What are Simple Events?
The Event module in Poppulo allows you to Create Advanced Events which sends a branded templated email which has reporting and RSVP tracking options, or send a Simple Event, which sends a simple calendar invite email without the use of a Poppulo Harmony Templates. Unlike some traditional platforms used to send meeting invites, Poppulo does not limit the number of people you can invite.
The simple event can be easily updated in people's calendars if you edit or cancel the event.
Use the instructions below to create a Simple Event Calendar Invitation.
Note: Once you create an Event it cannot be deleted. If you need an event deleted, please contact Poppulo Support.
You can start by watching this quick overview video of Simple Events.
-
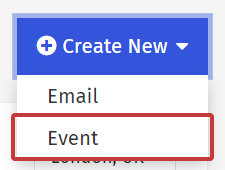
From the Overview page, select the Create New button and choose Event.
-
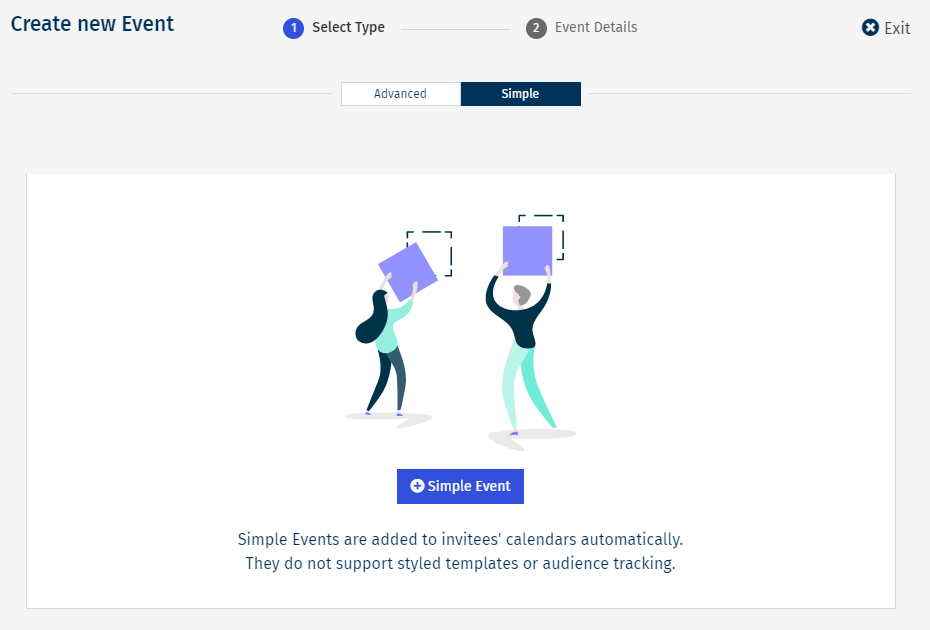
Choose Simple from the Advanced/Simple tabs and Select Simple Event.


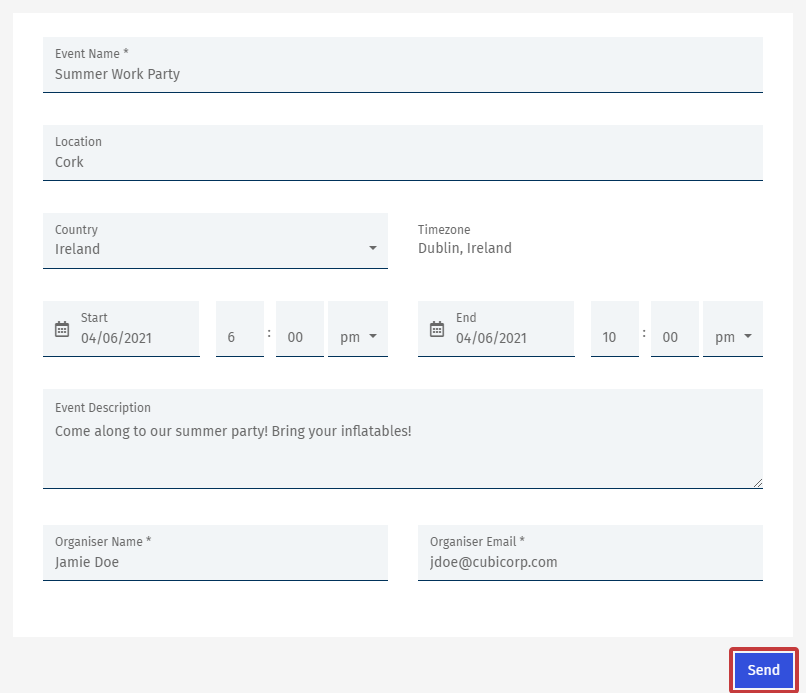
- In the Event Details, enter the following:
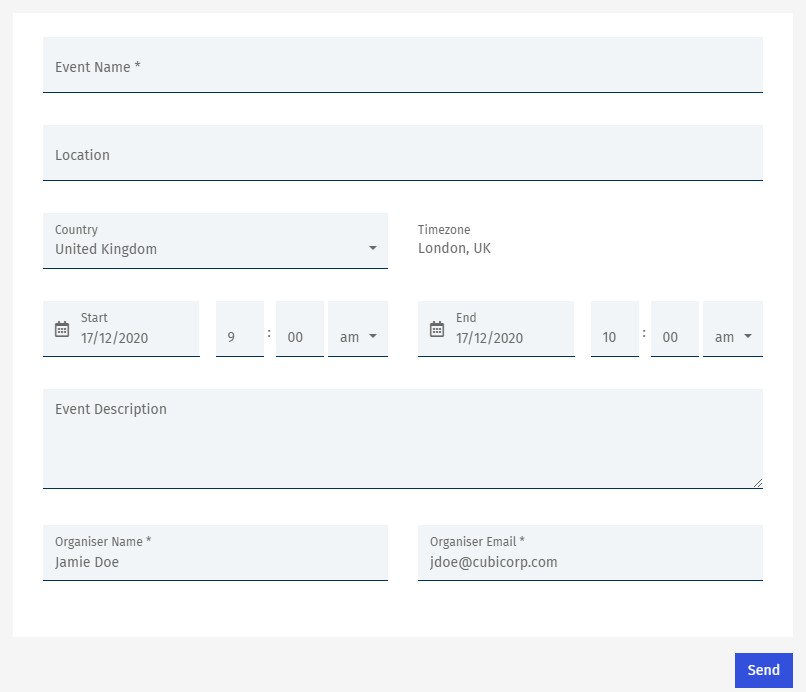
- Event Name: The title of your event, eg: Summer Work Party
- Location: The Location of the event
- Country: The country and timezone the event is held in
- Time & Date: The start and end time of your event
- Event Description (If your event is online, insert the URL of the event here)
- Organiser Name (this automatically defaults to your user license name, but can be edited manually)
- Organiser Email (this automatically defaults to your user license email address, but can be edited manually)
- When you have added all the necessary details, choose Send.
<back to top>
-
Choose the People you would like to send the event invitation to, then click Next.
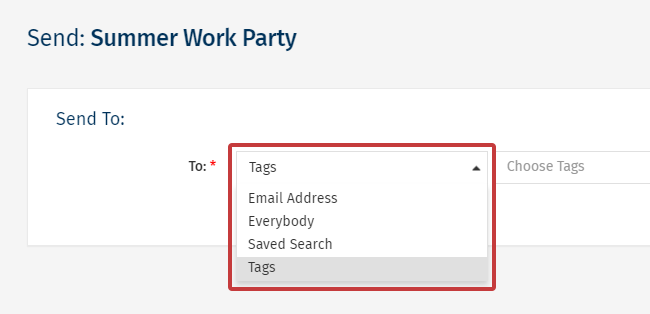
You can choose between sending to Tags, send to a specific Email Address, send to Everybody, and send to a Saved Search. Note: If "Everybody" does not appear as an option, it may be turned off in your Sub Account by your Enterprise Admin.
- Review your Sender Details and click Next to continue.
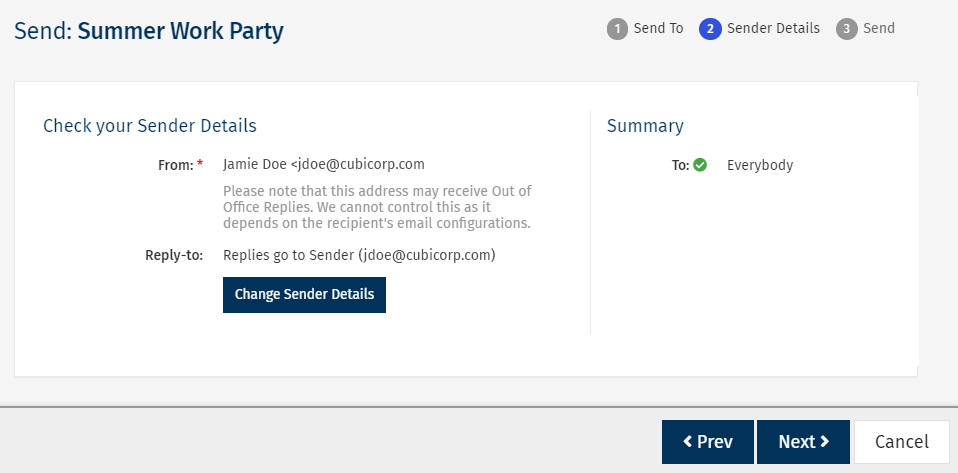
Note: You can Change your Default Sender Details if necessary. Also, ensure that the From and Reply-to email addresses are from the trusted domains.
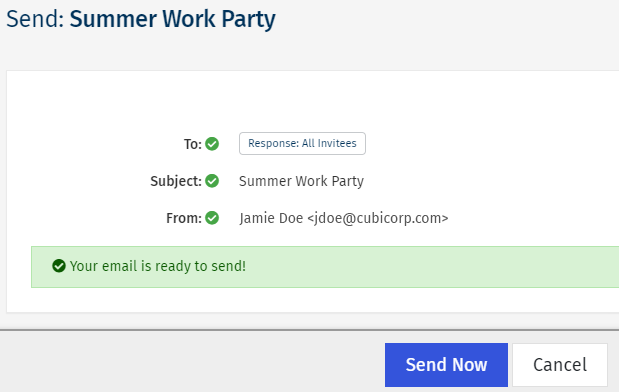
- Review your send details and select Send Now to complete the send.
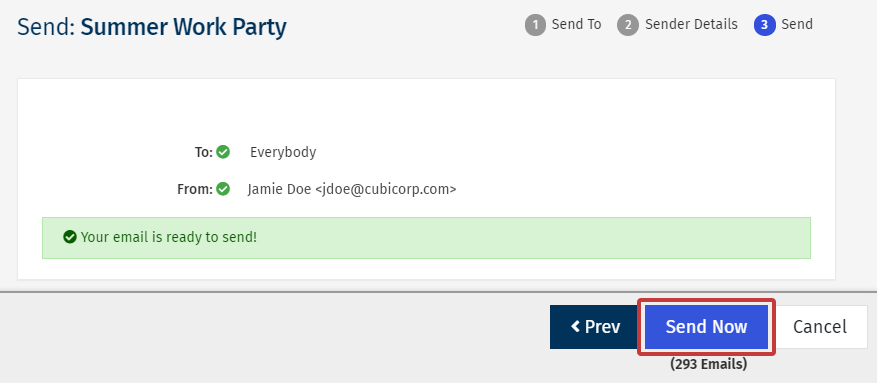
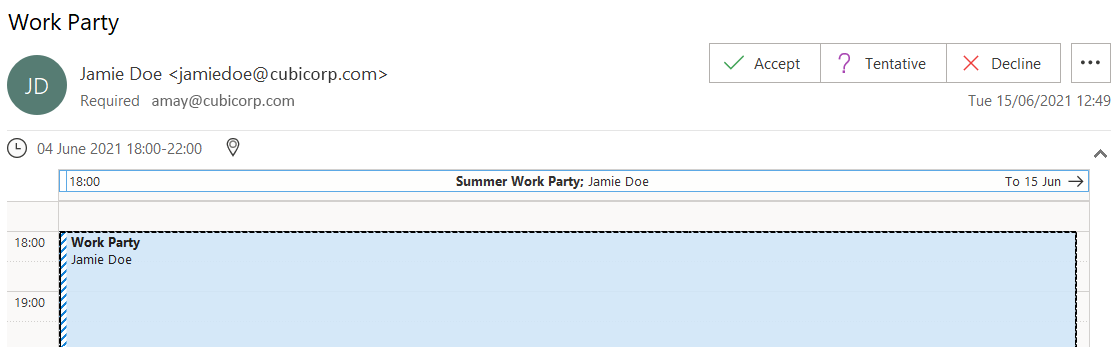
Note: The calendar invite will automatically appear in the recipients calendar. The recipient will also receive an email with the Subject line (Event Name) and the location details.
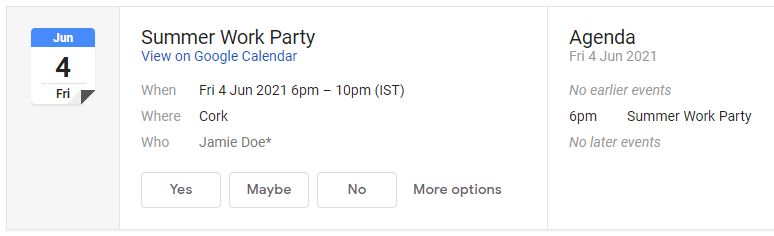

Example of the invite in Google Calendar/Gmail.
Example of the invite in Outlook.
<back to top>
To Edit a Simple Event Calendar Invitation:
-
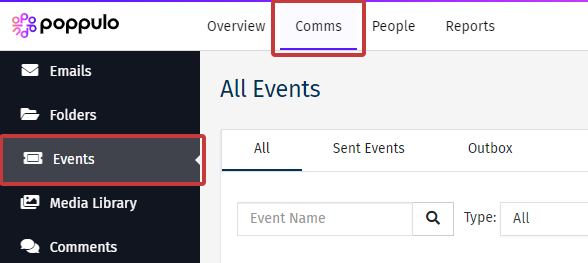
In the Comms section of your account, choose Events from the menu on the left.
-
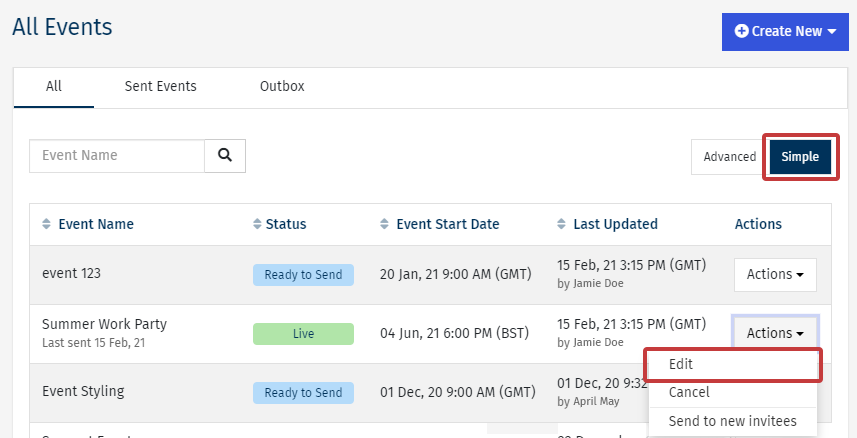
Click on the Simple tab, find the Event you want to edit and select the Actions button; Choose Edit from the drop-down menu.
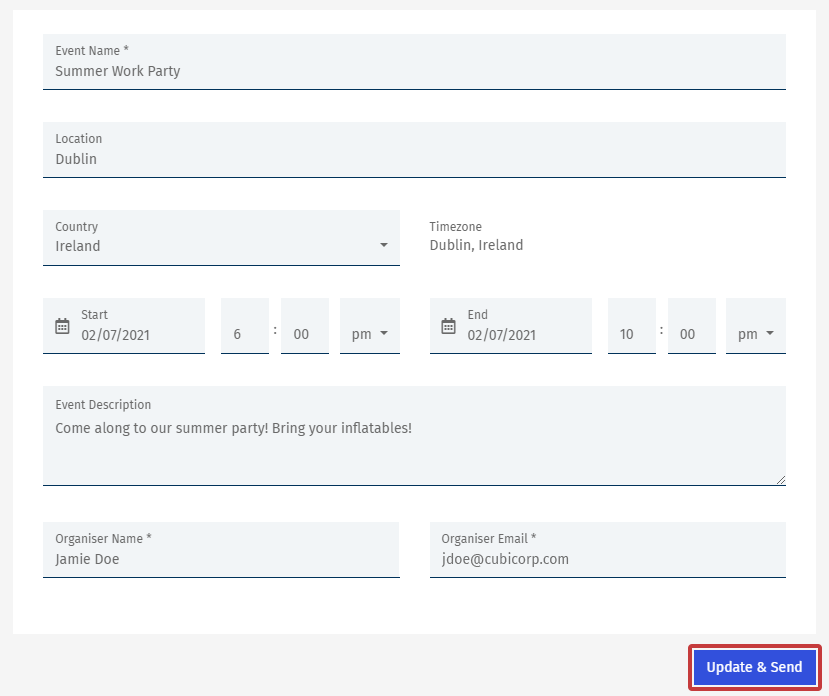
- Make the necessary changes to your event invitation, then click Update & Send.
- Review your send details and select Send Now to complete the send
Note: The recipient will receive an email with the updated information and their calendar invite will update automatically. 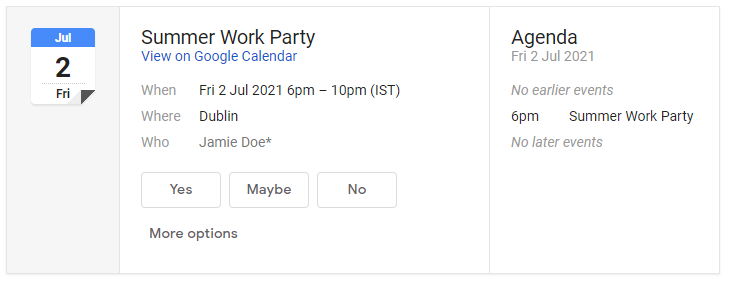
Example of the invite in Google Calendar/Gmail.

Example of the invite in Outlook.
<back to top>
-
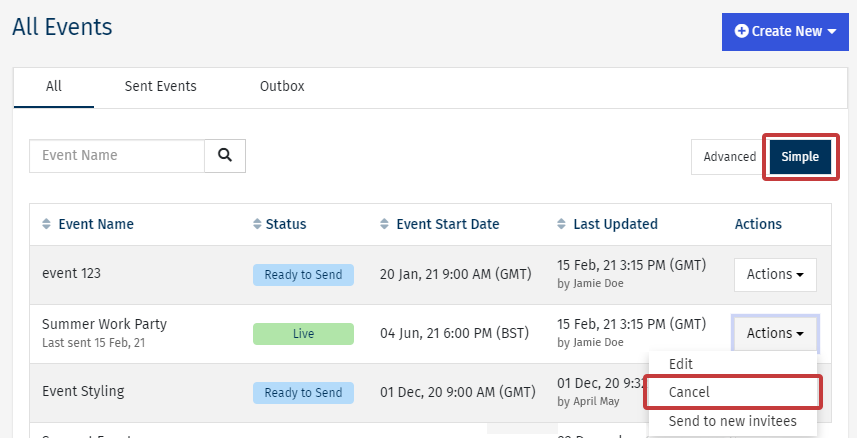
In the Comms section of your account, choose Events from the menu on the left.

-
Click on the Simple tab, find the Event you want to cancel and select the Actions button; Choose Cancel from the drop-down menu.
- A pop-up screen will appear with some default information. Edit as necessary, then choose Yes, cancel Event to cancel the event.
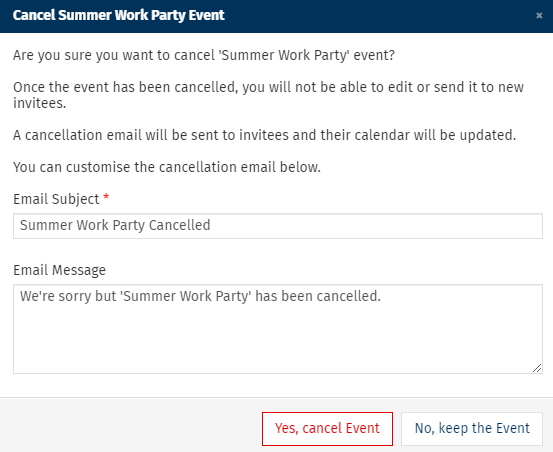
Note: The calendar invite will be either removed from the recipients calendar or display as "cancelled" depending on the email client they are using.
<back to top>
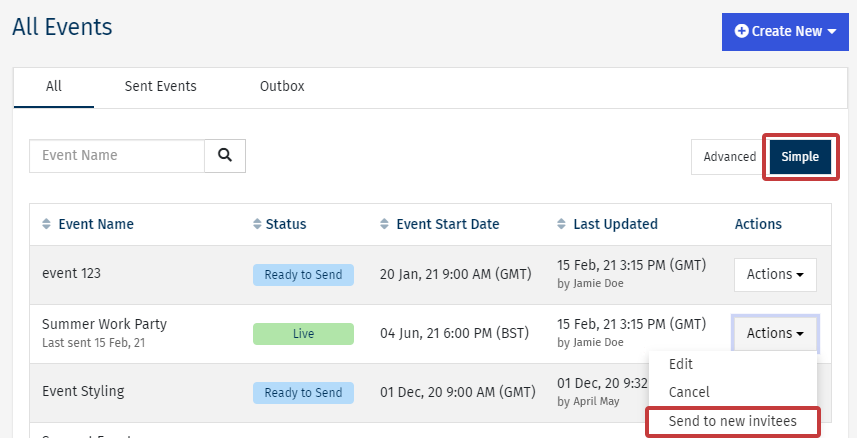
To Add Additional Invitees:
-
In the Comms section of your account, choose Events from the menu on the left.

-
Click on the Simple tab, find the Event you want to edit and select the Actions button; Choose Send to new invitees from the drop-down menu.
-
Choose the new People you would like to send the event invitation to, then click Next.
You can choose between sending to Tags, send to a specific Email Address, send to Everybody, and send to a Saved Search. Note: If "Everybody" does not appear as an option, it may be turned off in your Sub Account by your Enterprise Admin.
- Review your Sender Details and click Next to continue.
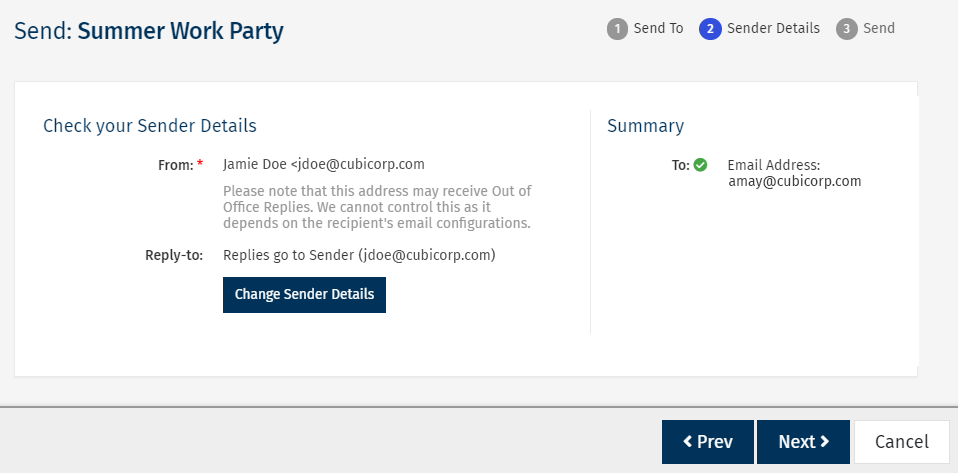
Note: You can Change your Default Sender Details if necessary. Also, ensure that the From and Reply-to email addresses are from the trusted domain.
- Review your send details and select Send Now to complete the send.
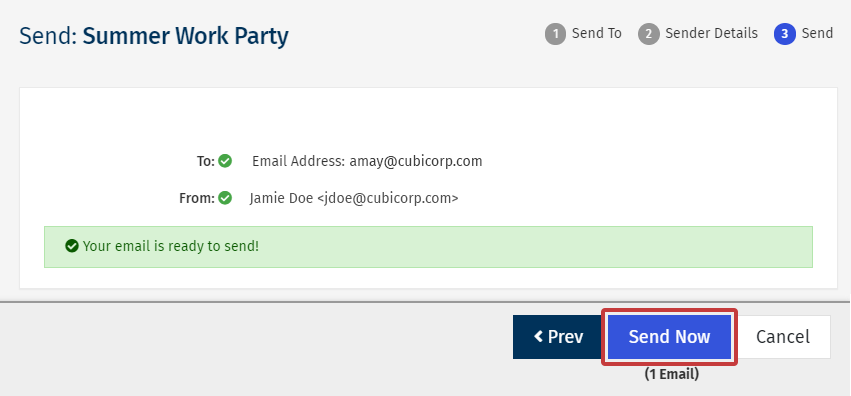
Note: The calendar invite will automatically appear in the recipients calendar. The recipient will also receive an email with the Subject line (Event Name) and the location details.
Example of the invite in Google Calendar/Gmail.
Example of the invite in Outlook
<back to top>
Create a simple event and send it to yourself (and/or a colleague). If you are happy with it, you can then add additional recipients after, or edit the invite as necessary and then add additional recipients. You cannot delete a Simple Event.
