Sign-up forms are widely used for gathering information from employees - for example, if you are using Topics or Audiences and allow employees to choose the email content they want to receive by subscribing or opting in and out of your comms.
You can also use sign-up forms to confirm personal information of your employees and fill any missing data you might be using in your Saved Searches.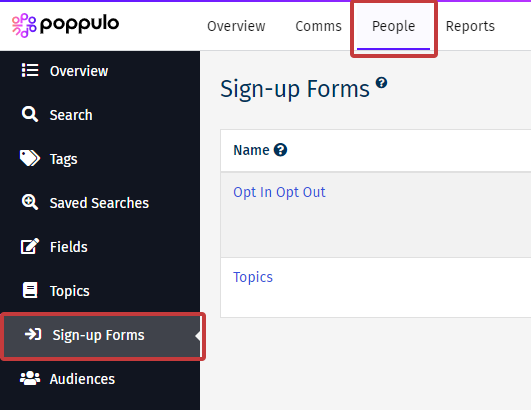 Note: Accounts using Enterprise People Management cannot use sign-up forms. The option for Audiences may not appear in your menu or as a requirement when creating a sign-up form.
Use the instructions below to start using sign-up forms.
To Create a Sign-up Form:
- In the People area, select Sign-up Forms from the menu on the left.
-
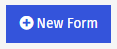
On the Sign-up Forms page select the New Form button.

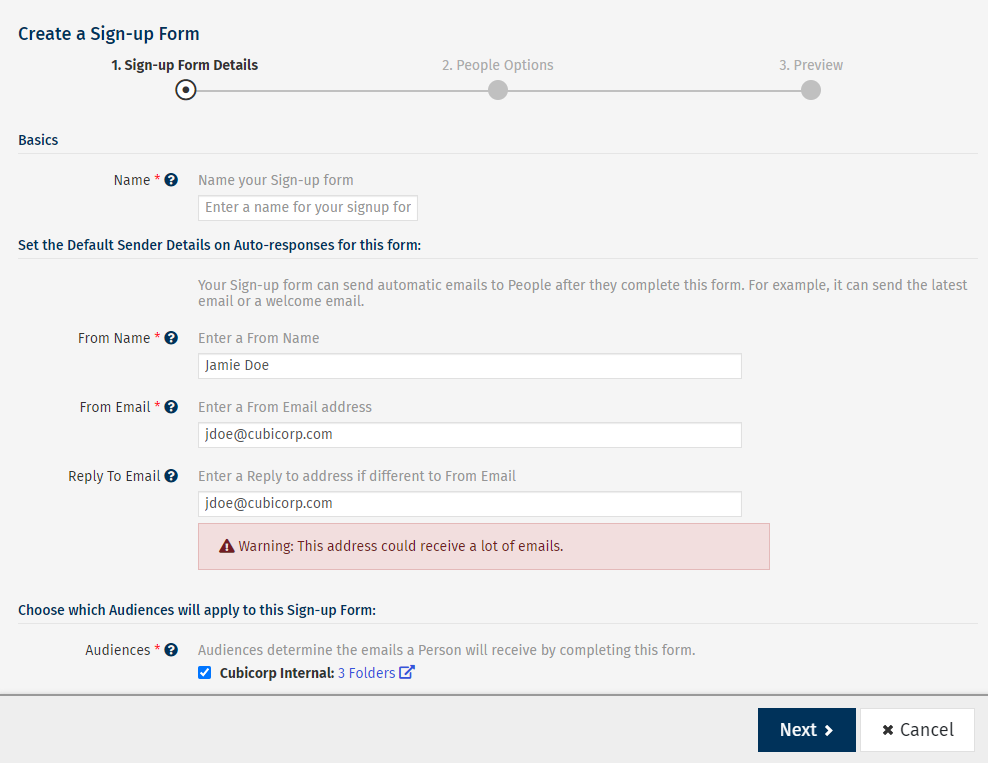
- On the Sign-up Form Details page, enter the Name of your Sign-up Form, set the Default Sender Details and choose your Audience. Then, choose Next.
-
Default Sender Details determine the name and email that employees will see in their auto-response, on completion of the form.
-
Select the Audiences that an employee will be added to when they complete the form (If shown, you must select at least one Audience).
- On the People Options screen there are a number of options relating to the email notifications sent to your People when they complete the form. Choose your options and select Next.
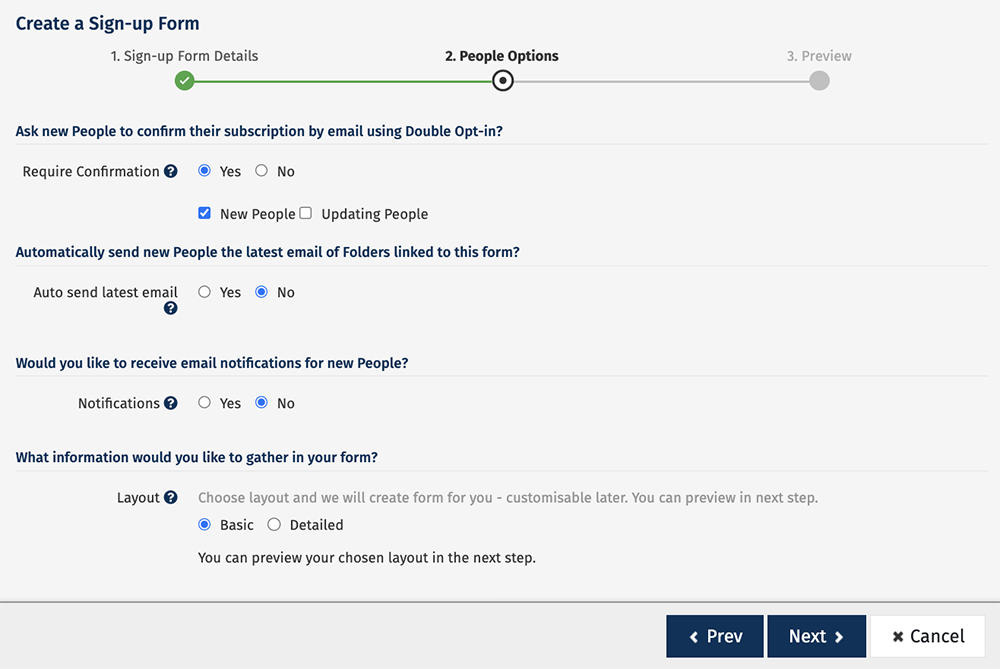
Double Opt In sends an email asking people to confirm they wish to receive emails.
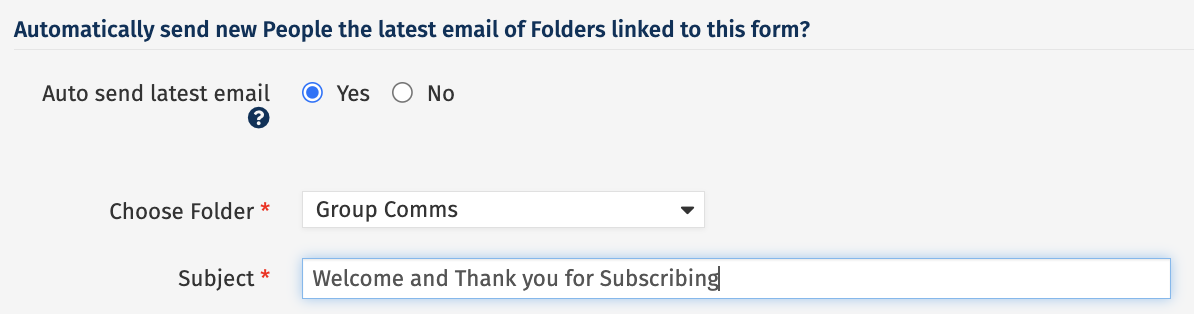
Choosing Yes to Auto Send Last Email allows you to choose which Folder to send from and enter Subject Line for the welcome email.
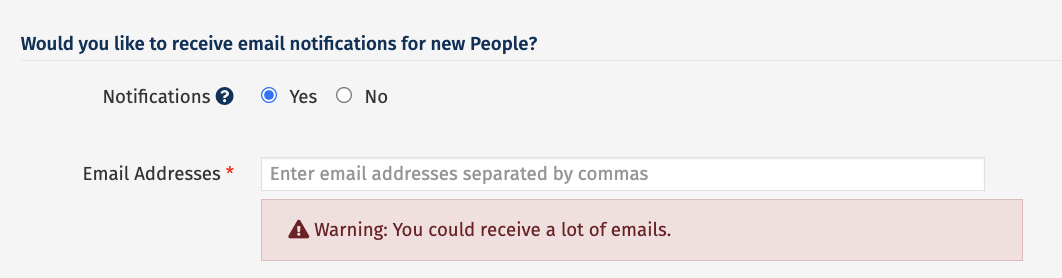
Choosing Yes to Receive Notifications allows you to enter an email address which will receive the notifications.

- Basic Form adds the following fields: first name, last name and email address. (You can choose which fields are mandatory)
- Detailed Form adds the fields: first name, last name, email address, phone number, address and email format preference. (You can edit the selection.)
- The Preview screen shows a preview of your Sign-up form. Long Version preview is selected by default.
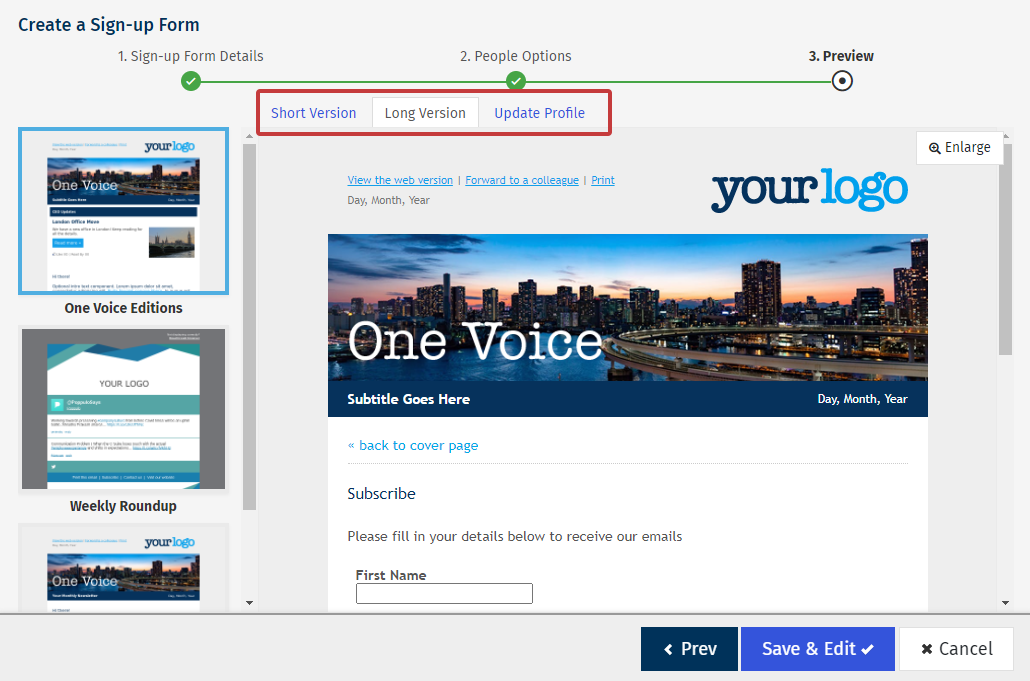
- Short Version displays the mandatory fields only.
- Long Version displays all fields.
- Update Profile, this version of the Sign-up form allows People to update their information. This includes changing the email address that they have subscribed with. Employees are directed to this page after completing the Long or Short Version with the option of completing the remaining fields.
Note: You can preview how your sign-up form looks in different emails by choosing the template from the left.
- Selecting Save & Edit will bring you to the Edit page of your new Sign-up form. Here you can add fields to gather more information or change your sign-up form options. You can also refer to Editing a Sign-up Form for the steps involved in editing your new Sign-up form.
- Your new Sign-up Form now appears on the Sign-up Form page. You can now Add a Sign-up Form to your Newsletter.
<back to top>
To Edit a Sign-up Form
-
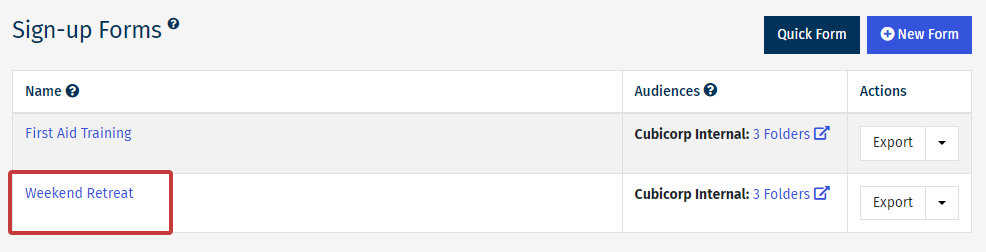
In the People area of your account, select Sign-up Forms from the menu on the left.

-
Select the Sign-up Form you wish to edit.

Click an option below to view the options available for editing your Sign-up form.
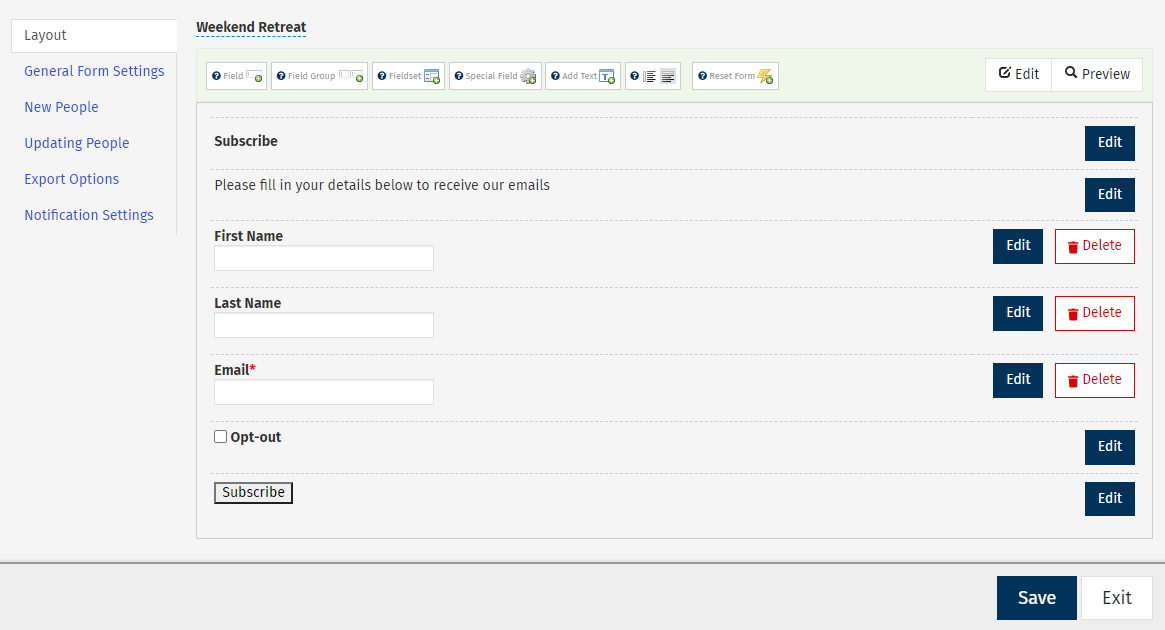
Edit the Layout area of your Sign-Up Form:
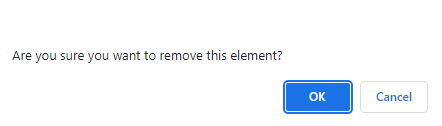
You will see an option to the right of each field in your form to Edit or Delete it.

By clicking Delete, the field can be removed from the form. A confirmation message appears to confirm your selection.
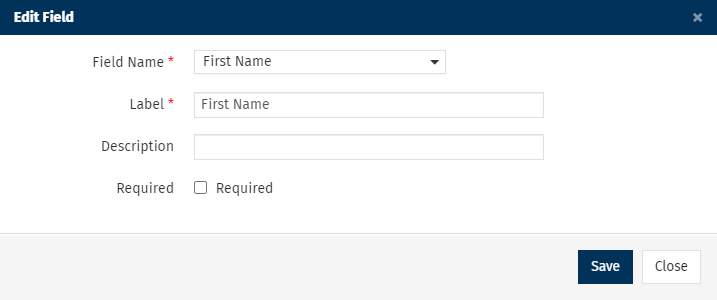
If you choose to Edit a field, a window will appear with options to change the field; the Field Name, Label and Description.
To change the order of the fields on the form, hoover over the field you want to move. Then, click and drag into a new position.
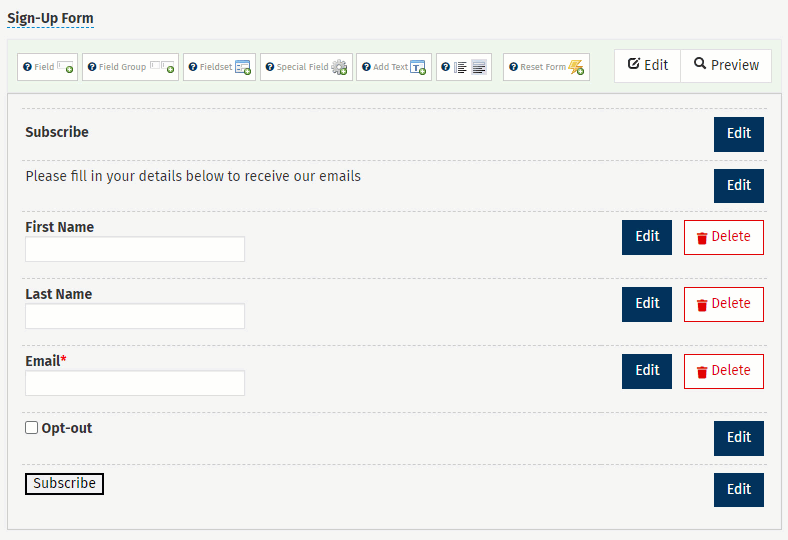
Along the top of the sign-up form there are a number of different options available for adding to or editing the sign-up form. See table below for options
 | Field - In the label field, insert the title as it should display on the form. |
 | There are currently two field groups available to select, Full Name (First Name & Last Name) and Full Address (Address 1,2 & 3).
In the label field type what you want this field group to be called on the form. |
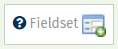 | This option allows you to name an area to contain specific fields.
Once a new fieldset is added different fields can be dropped into this fieldset area. |
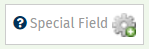 | This area allows you to create fields for Audiences and Tags. Using these options, employees will determine the audiences or the tags that they are added to.
Select the Field Type you wish to add and then update the label with how these options should be presented to employees. |
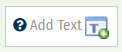 | This option allows you to add a block of text to the sign-up form.
Like any other field in the form it can be moved and dropped to change where it appears. |
 | This option allows you to determine whether the field labels appear above the fields or to the right of the fields . |
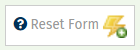 | This option allows you to reset the form to revert any changes made. There are two options available when resetting the form.
Basic Form – this version of the form has fields for Email Address, First Name and Last Name.
Detailed Form – this reverts back to the detailed long version of the form. |
<back to top>
General Form Settings of a Sign-up form:
Here you can edit or assign a Folder(s) to the sign-up form - Folders are grouped by the Audiences they are assigned to. You are required to set which Folder(s) are associated with the sign-up form during the initial set up. The option to set Default Sender Information is located under the Audience options. This dictates where any emails related to the sign-up form will be sent from.
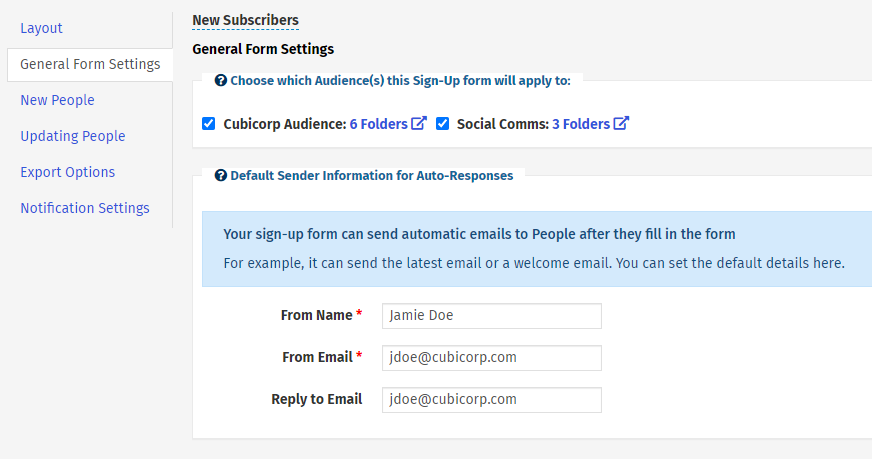
Note: This will automatically take the default sender information for the Folder associated with the sign-up form (as set in the admin area).
<back to top>
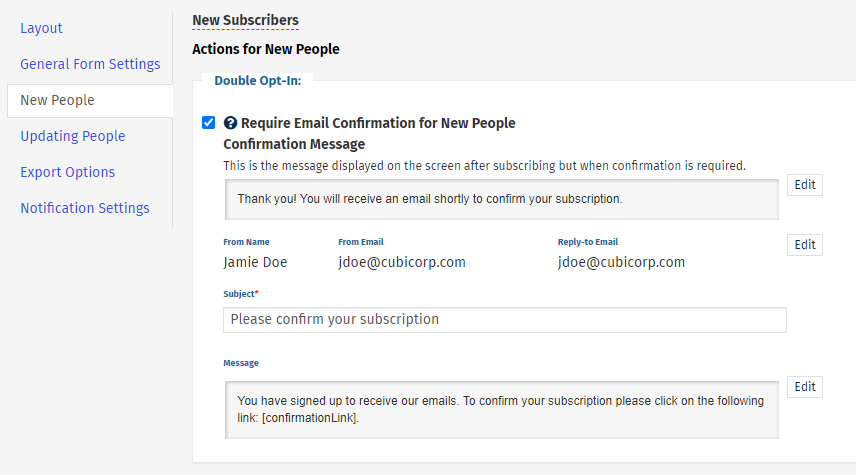
New People for a Sign-up form:
These are the settings that will effect any new People. The option to set Double Opt-In for new People is available here. This means that once the new employee completes the sign-up form they will receive an email requiring them to click on a link to confirm their subscription.
The next group of options is what happens After a new Person completes the Sign-up Form. You can select your preference from the below four options: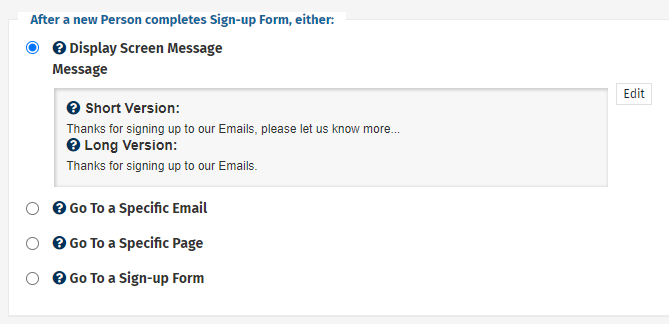
Display Screen Message.
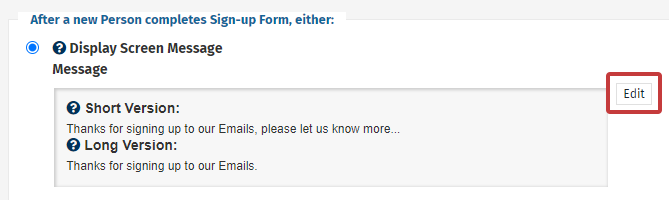
There are two default messages set here. You can change the message that appears by selecting the Edit button.
- Short Version: This is the message that the subscriber sees after filling out the 'Short Version' of the sign-up form. As they are presented with the Update Profile form at this point, the message should imply that they are signed up but if they would like to provide more information this is their opportunity.
- Long Version: This is the message that is displayed after the subscriber fills out the 'Long Version' of the subscribe box. At this point the person is subscribed to the newsletter. The message is displayed on a blank page of the Folder that is associated with the sign-up form.
Go to a specific email

Choosing this option allows you to send a specific email once the person has filled in the sign-up form. First select the Folder and then select either the latest published email or a specific email.
Go to specific page
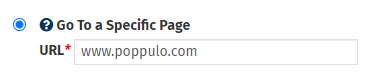
This option allows you to send a specific web page once they have completed the sign-up form.
Go to sign-up form
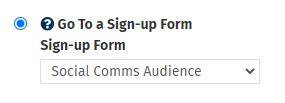
This option allows you to send another sign-up form. This can be used if you require further information or would like to encourage the new Person to sign up to another Folder.
The
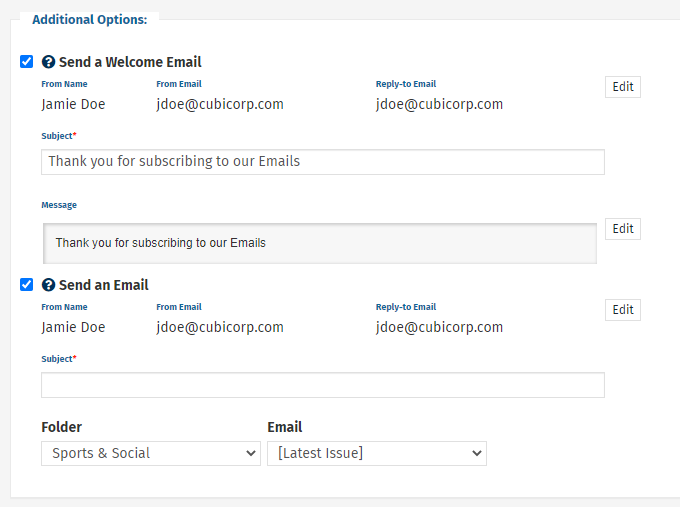
Additional Options allow you to decide if the subscriber receives a welcome email and if you want to automatically send new People an email from the selected Folder. If you select either of these options you can then set the details of the welcome message or the details of the email to send.
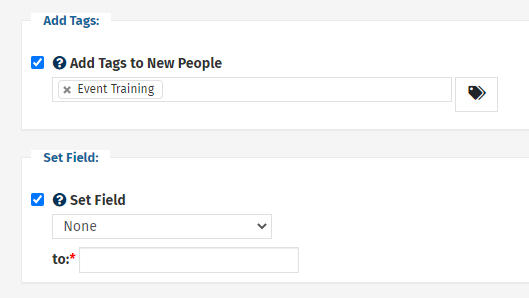
Add Tags and Set Field: Here you can set what Tags new people are added to when they complete the sign-up form. By default a tag called - SIGN UP FORM NAME followed by self subscriber, will be applied to any new People. The tag can be changed here. You can also choose to set a particular field for all new People that fill out the sign-up form.
<back to top>
Updating People for a Sign-up form:
These are the settings that will apply to any People updating their profile.
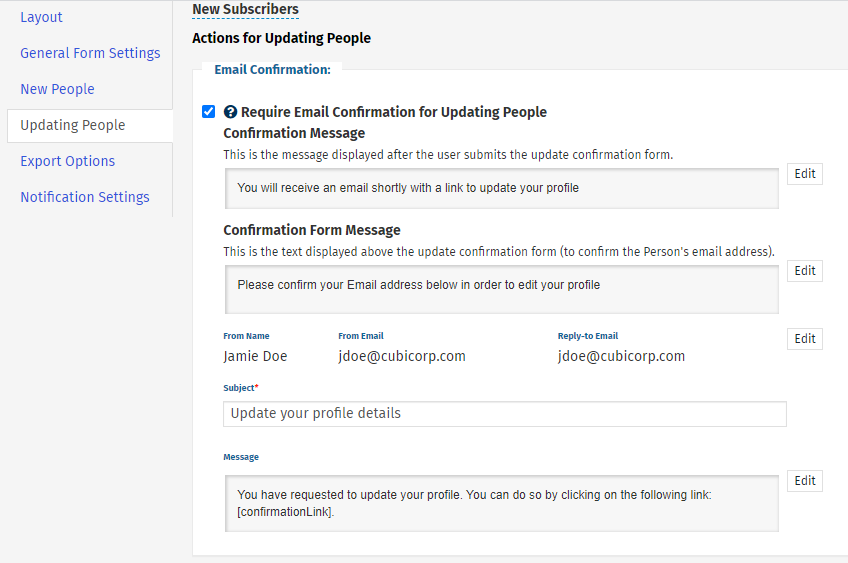
Email confirmation: This is the option to send an email to any People that is updating their details to confirm their actions.
This is to ensure that the updated information is associated with the correct person. Existing People won't be able to access the update profile form unless they click on the link in their email to confirm their email address.
If this option is selected then the Confirmation Message will appear on the update profile page. When the person submits their email address the Confirmation Message appears on screen. Then the Confirmation Email is sent and, once the person clicks on the confirmation link, that form opens for the person to complete.
The option to edit what a subscriber sees when they complete the sign-up process appears below this. The options are the same options available for a new person.
Additional options here allow you to set whether the subscribers receives an email message and if you want to automatically send updated People an issue of the newsletter. If you select either of these options you'll need to set the details of the message to send. You can also set the tags applied to People that update their records or set a particular field for all updating their information.
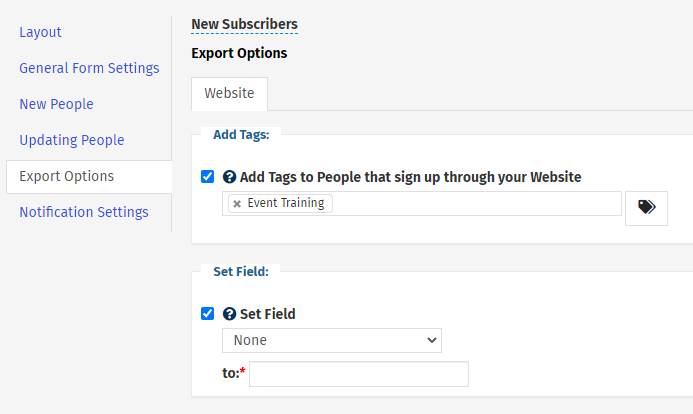
Export Options
In the export options section you can set the Tag applied to People that complete forms exported to your website. You can also set a selected field to a particular value, when an employee completes the form, and export it to your website.
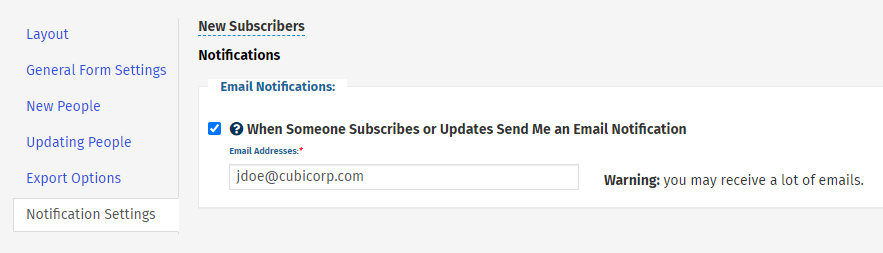
Notification Settings of a Sign-Up Form:
This option allows you to set an email address to receive notifications when someone completes the sign-up form, updates their profile or opts-out using the sign-up form.
Once you are finished editing your sign-up form, save all changes by selecting
Save.
<back to top>
