Make your communications more effective by scheduling emails to arrive at the same local time, no matter where your recipients are in the world. With this feature, you can choose a specific time of day (e.g. 8:00 AM), and the email is delivered at 8:00 AM in each recipient’s time zone.
How It Works
You need to send an email to recipients in numerous time zones scheduled for 8:00 AM. Someone locally in London receives the email at 8:00 AM UK time (GMT+1) while a different person in New York receives the same email at 8:00 AM Eastern time (GMT-4) — which is five hours later than the person in London. This allows you to ensure the email arrives at a time that feels natural and timely for each person, even though the actual send times are staggered based on location.
The ability to send an email at the recipient’s local time helps improve:
- Visibility: Emails arrive during working hours, not in the middle of the night.
- Engagement: People are more likely to read your message when it lands at a convenient time.
- Consistency: Great for global announcements that you want to be seen at the same time of day, no matter where someone is.
To use this feature, you need to ensure your people data includes a
Time Zone field using the
IANA time zone format, such as:
- Europe/Dublin
- America/New_York
- Asia/Tokyo
- Australia/Sydney
Add Time Zone to your People Data
Depending on how you manage your people data, here’s how to add or update the Time Zone field:
Manual Upload
- Add a new column to your upload file called Time Zone
- Populate it with IANA-compliant values for each recipient
- You may need to find a suitable source for your data e.g. your HRIS system
Direct Integration (People API)
- Update your integration end point to include a time zone or timezone field
- Ensure values match the accepted IANA formats
Managed Integration or SFTP
- Contact your CSM and request time zone be added to your data sync
- An internal ticket will be raised for the Technical Services team to assist
To Schedule a Send in Local Time Zones
-
Edit the Email you'd liked to schedule.
-
In the Edit Email View, select the Send button and choose Approve and Schedule Send from the drop-down.

Note: You can edit your email at any point before the send and the changes will appear for your readers.
-
Select who you want the email to be sent to in the To: field (Choose from Tags, Saved Search, Everybody or Email Address). Select Next.
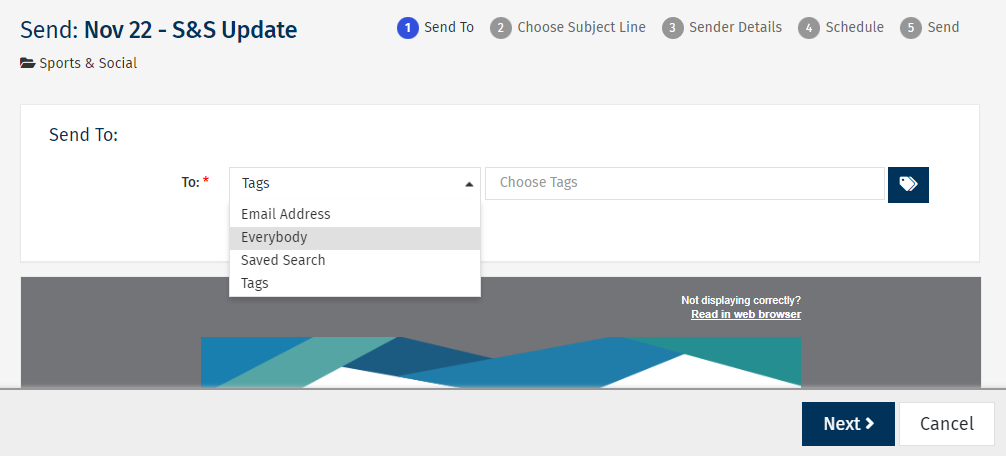
Note: If "Everybody" does not appear as an option, it may be turned off in your Sub Account by your Enterprise Admin.
-
Enter your Subject Line and click Next.
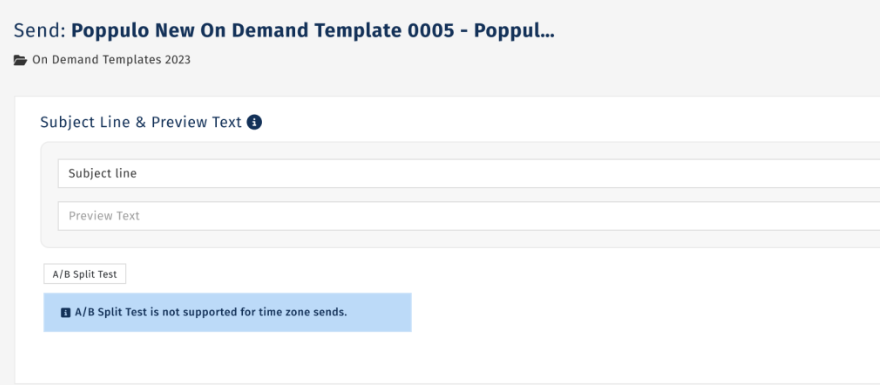
Note: Note: A/B Split Test is not supported for time zone sends.
-
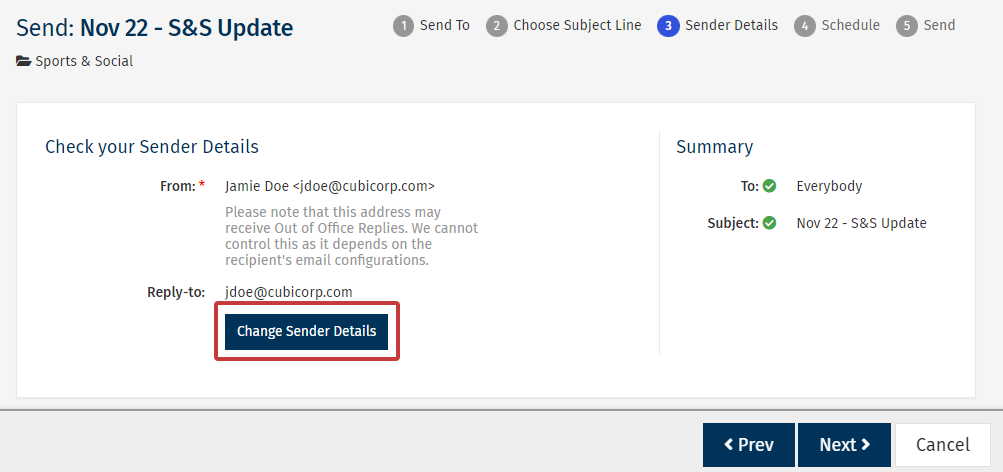
Check your Sender Details. You can edit your Default Sender Details on this screen. Click Next to continue.
Note: Ensure that the From and Reply-to email addresses are from the trusted domain.
-
Set the Date and Time for when you'd like your email to be sent. Then select Recipients’ local time zone for the Time Zone. Choose a fallback time zone (used for any recipients without time zone data).
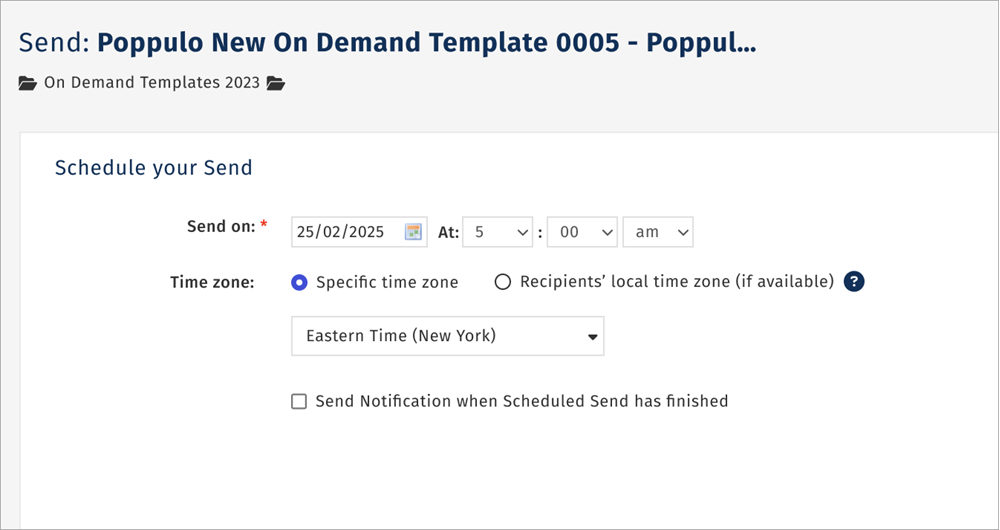
Note: For recipients to receive this email in their local time zone, we recommend scheduling your send 24 hours in advance.
-
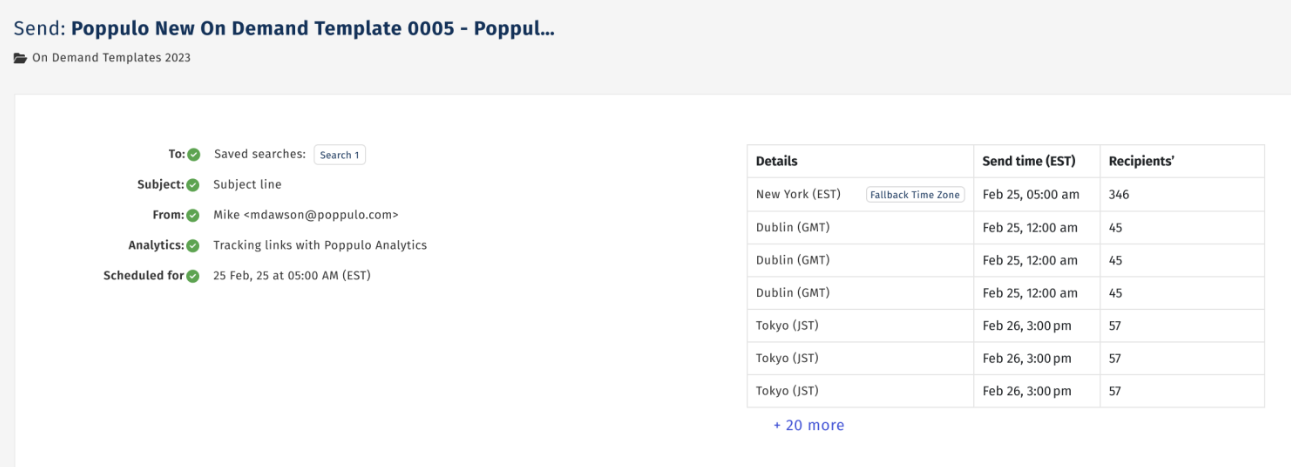
Review your send details, including all the send times and how many recipients will receive the email at that time. When ready, click Schedule Send.
-
Your Email is now scheduled and will be sent out on the date you chose. Select Edit Schedule to alter the send date or Cancel Scheduled Send to cancel the send.
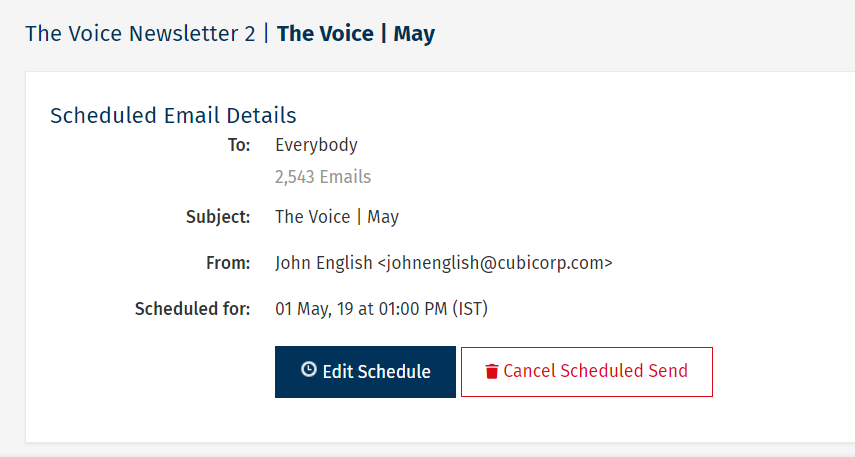
Note: You can Edit the Scheduled Send or Cancel the Send at any time before it's sent.
What Happens If Some Recipients Don’t Have a Time Zone?
If a recipient’s time zone is not set, they’ll receive the email at the fallback time zone you selected when scheduling.
