One of the biggest benefits of using Advanced Events is the ability to view exactly many people have accepted, declined or not yet responded. This allows you to send follow-up communications to invitees based on their response.
For example, you can:
-
Resend an Event Invite to all invitees who have not yet responded (ensuring that you don't clutter the inbox of those that have already responded).
-
Send follow-ups or important updates on the event to all those who have accepted.
-
Send recordings or pictures from the event to those who declined and were not able to attend in person using a follow-up email.
An event follow up email is a reminder email or update that you can use to target a specific group i.e. to All Invitees, or those that Did not reply, Accepted, are Awaiting registration or Declined your original invitation. Use the instructions below to send an Event Follow-up. You can create more than one Follow-up email.
Note: The instructions below are for Advanced Events and the feature is not available for Simple Events.
To Send an Event Follow-up Email:
-
From the Overview area, locate your Event. Hover over your event options, click on the 3-dot icon and choose Follow Up from the drop-down.
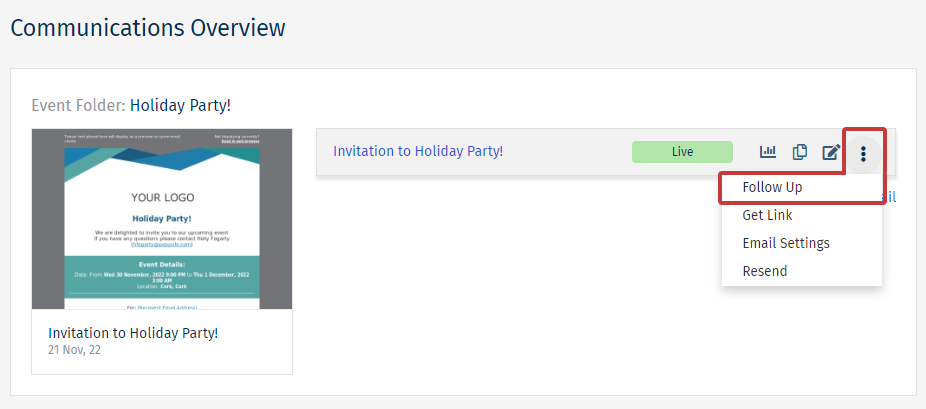
Note: Alternatively, from the Event Dashboard or Event Edit Screen, click 'Follow Up'.
-
Enter a Follow-up Title, set your details and then choose Save & Edit.
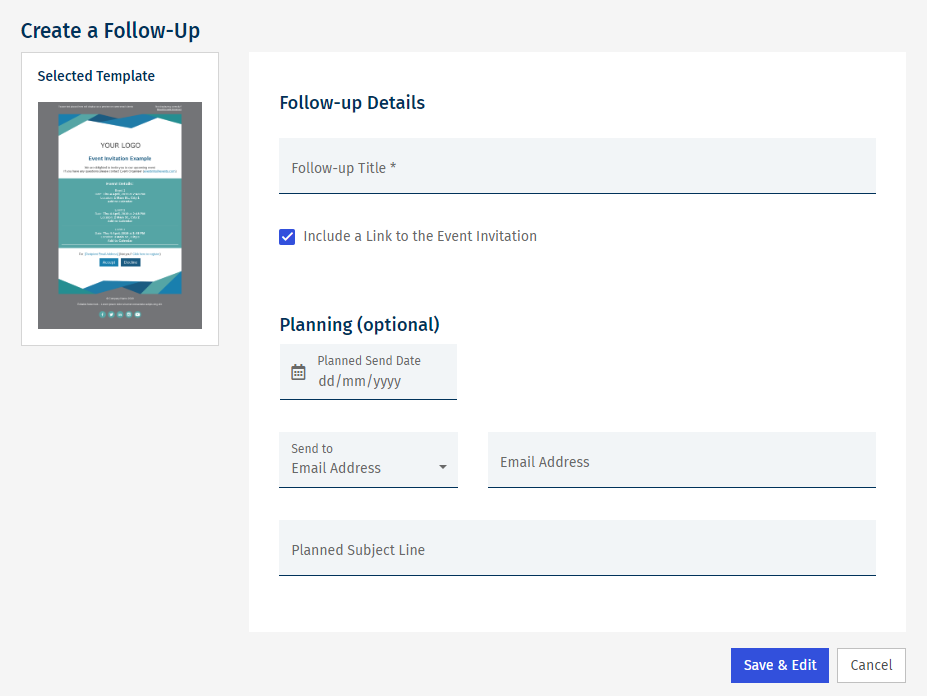
Note: You can add optional planned send details. This will give other users in your account insight into when you're planning to send.
-
You can edit the body of your email. When you're ready to send, choose Approve and Send from the Send drop-down.
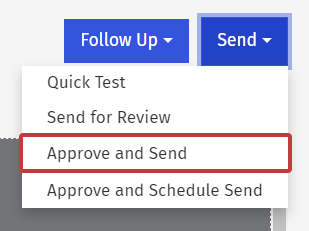
Note: We recommend sending a Quick Test before you complete a live send.
-
In Step 1 of the Send Wizard, choose the Invitees you'd like to send to based on their Event Response. You can also send to an Email Address

Note: You can choose to send your follow up to Invitees who Accepted, Declined, Did not Reply, Awaiting Registration or All Invitees.
- Complete the Send Wizard as normal to finish sending your Event Follow Up.
