As well as being able to Personalise Greetings and content for your readers, you can also manipulate the Sender Details of your Emails. This allows you to personalise the From Name, From Email Address and Reply-To Address so they are targeted at the particular People receiving your communications.
For the example, if you would like the Company Sales Report to look look like it has been sent from the manager associated with each of the employees, you would personalise the From Email Address and the From Name, to match the employee's manager.
To Personalise the Sender Details:
-
Open the email that you would like to send, and start the Send Wizard. (See Approve and Send your Email for more details.
-
Choose who you'd like to send your communication to, then click Next.
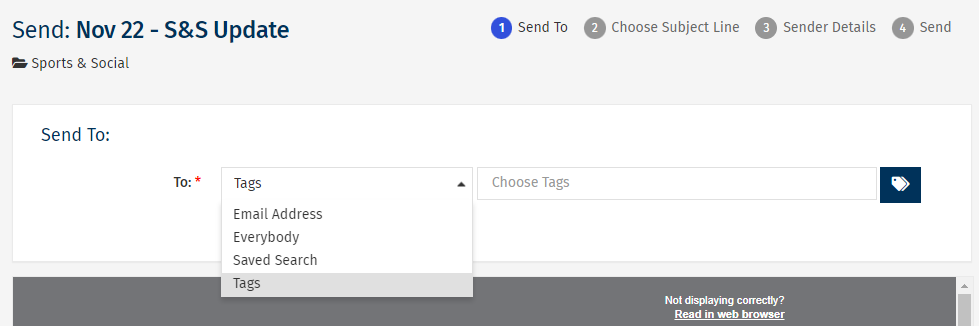
Note: If you would like to test the functionality, send to yourself or a colleague with the appropriate fields filled in.
-
Choose your Subject Line, then click Next.
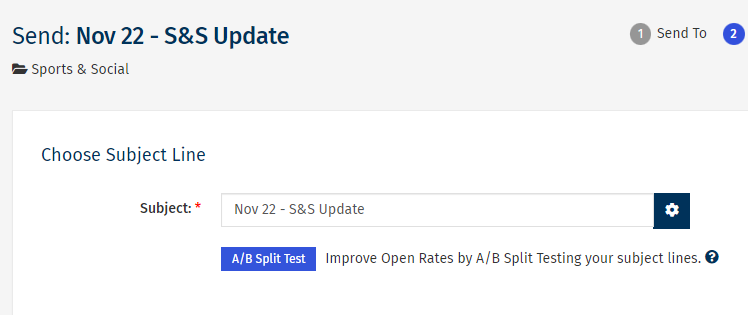
Note: You can also Personalising your Email's Subject Line.
-
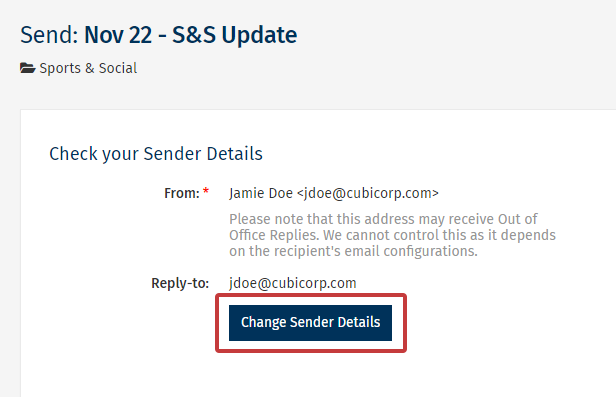
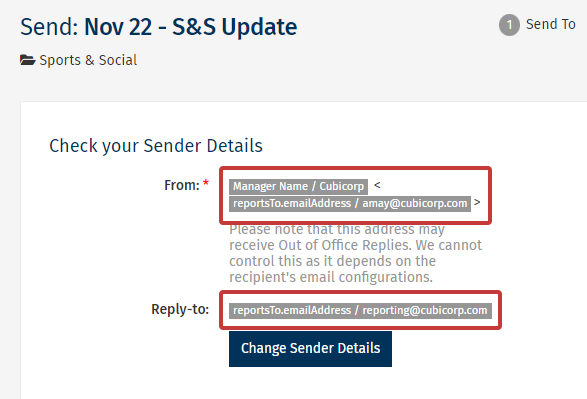
On the Check your Sender Details screen, select the Change Sender Details button.
-
To the right of the three fields (From Name, From Email and Reply to Email) you'll see the Insert Field/cog icon. Click the icon to the right of the From Email field.

-
In the Field drop-down, select the data field that represents the email address you want as the From Address. Select Insert.
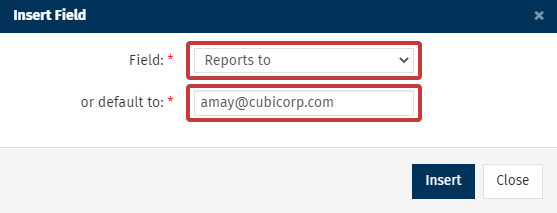
In the example above, Reports to is selected as it contains the email address for the employees manager.
Note: When personalising the From Email, the field chosen must store email addresses. Any field with the incorrect syntax for an email address (or is empty) will result in the employee receiving from the 'or default to' email address, not the personalised sender.
-
Your personalised HTML code will now appear within the From Address Field.
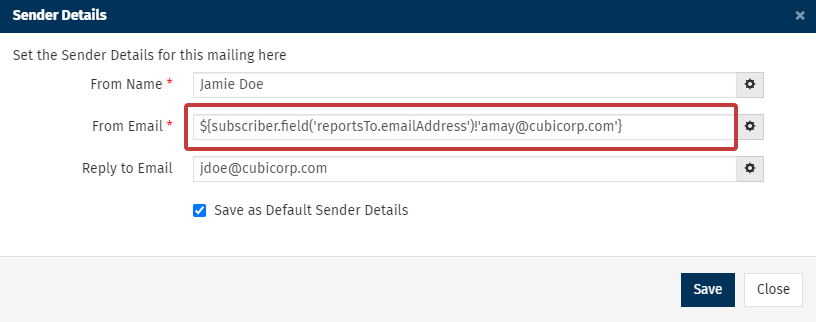
In the example above, you'll see the HTML Code ${subscriber.field('reportsTo.emailAddress')!amay@cubicorp.com'}. To People receiving this communication, it will appear as though the email came from their direct report's email.
-
Steps 5-7 can be repeated for From Name and Reply to Email. Choose Save when done.
-
For the From Name, the field chosen should contain a name.
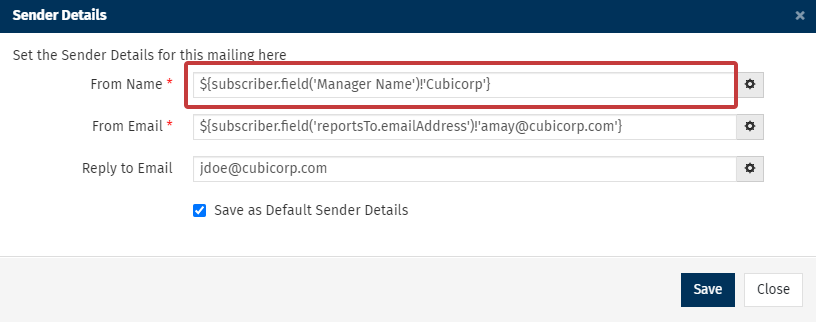
In the example above, you'll see the HTML Code ${subscriber.field('Manager Name')!'Cubicorp'}. For this example, the Custom Field, Manager Name was used for the From Name. To People receiving this communication, the name of the manager will appear.
Note: When personalising the From Name, the field chosen must store a name (text). Any field with the incorrect syntax for a name (or is empty) will result in the employees receiving from the 'or default to' name, not the personalised name.
-
For the Reply to Email, choose a field which contains an email address.
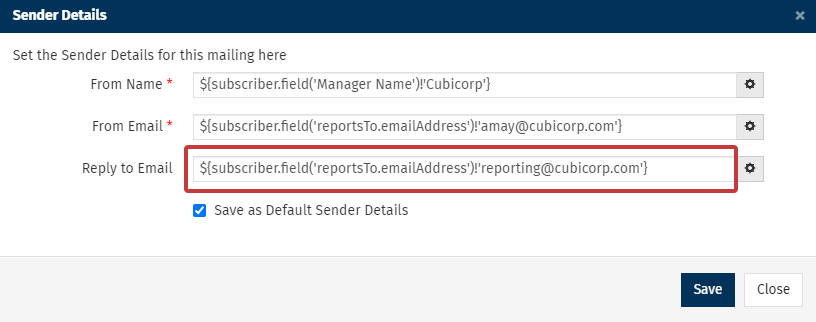
In the example above, you'll see the HTML Code ${subscriber.field('reportsTo.emailAddress')!'reporting@cubicorp.com'}. To People replying to this communication, replies will be sent to the email address in the Reports to field.
Note: When personalising the Reply to Email, the field chosen must store email addresses. Any field with the incorrect syntax for an email address(or is empty) will result in the employees receiving from the 'or default to' email address, not the personalised sender.
-
Select the Change Sender Details button to make any further changes to the Sender Details.
- Click Next, and continue through the rest of the Send Wizard.
