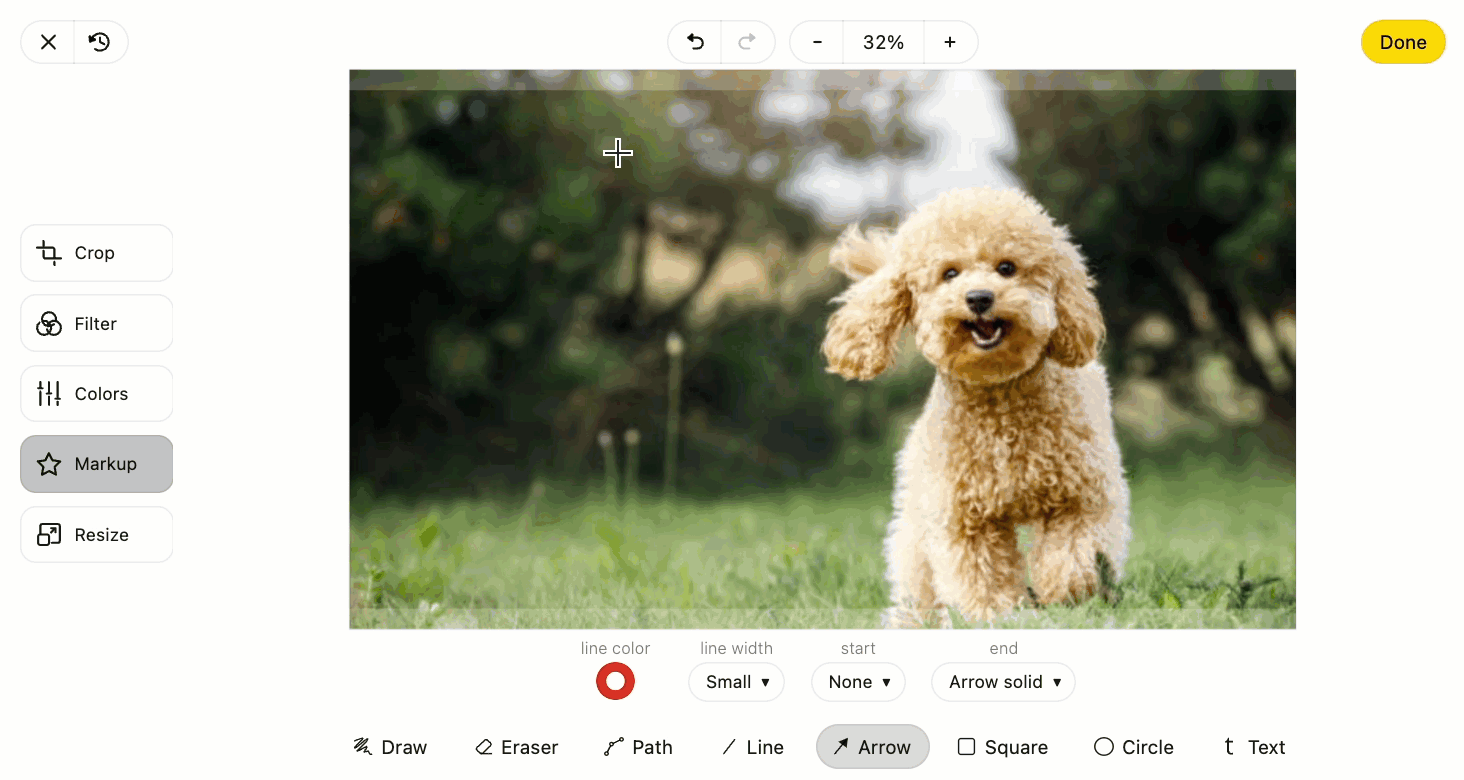
The Markup tool in Poppulo Harmony's Image Editor allows you to add many elements to your images. The Markup tool helps with calling attention to important aspects of your images; you can add Arrows, Text, Square and Circle shapes, Paths, and even Draw on your images! Text in particular helps to make distinctive headers and banners for your newsletters.
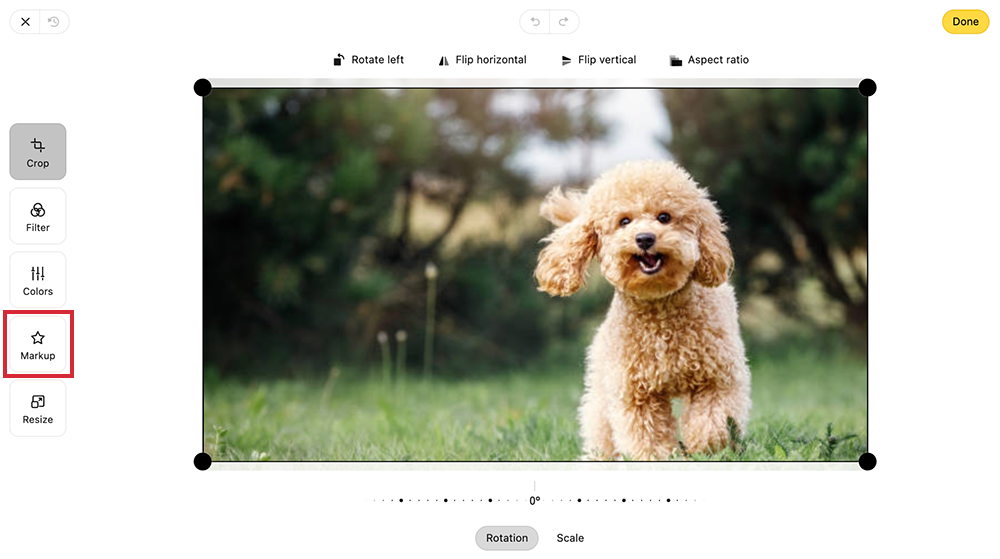
To start, Add an Image within your content or Add an Image using Placeholders. Use the pencil edit icon to open the Image Editor. Then, use the instructions below to add Markup elements to your images.
-
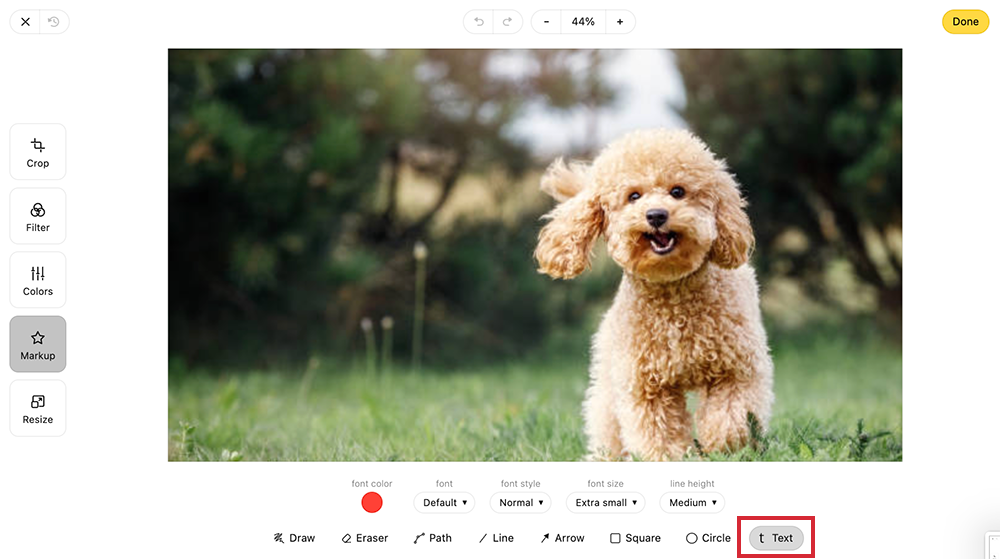
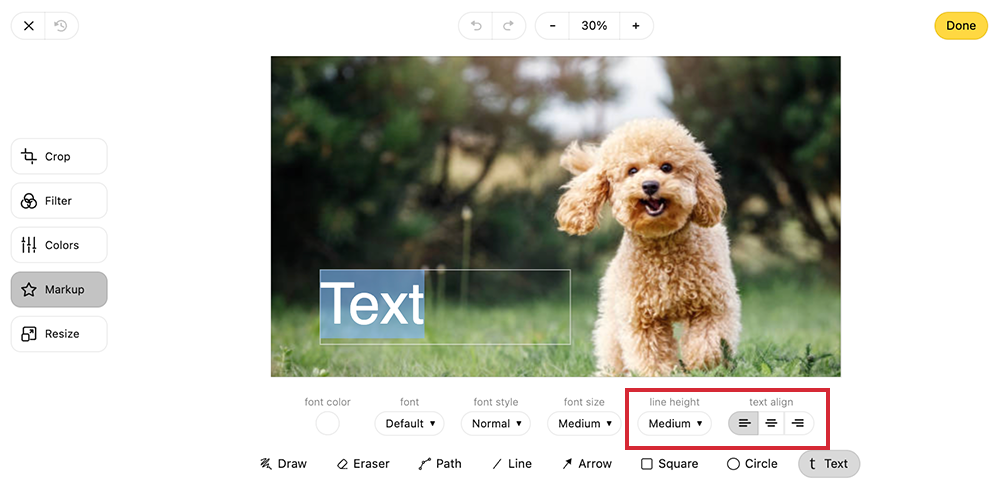
In the Markup tab of the Image Editor, choose Text.
-
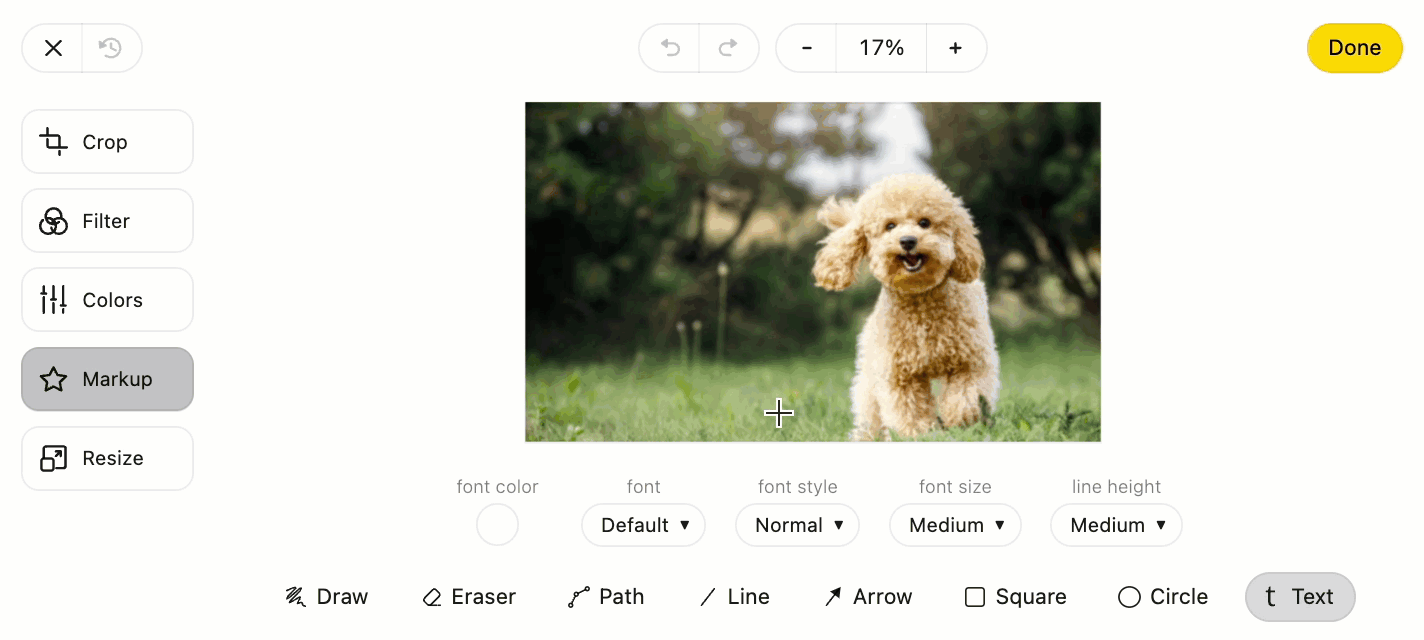
Outline the Text Box for your text.
-
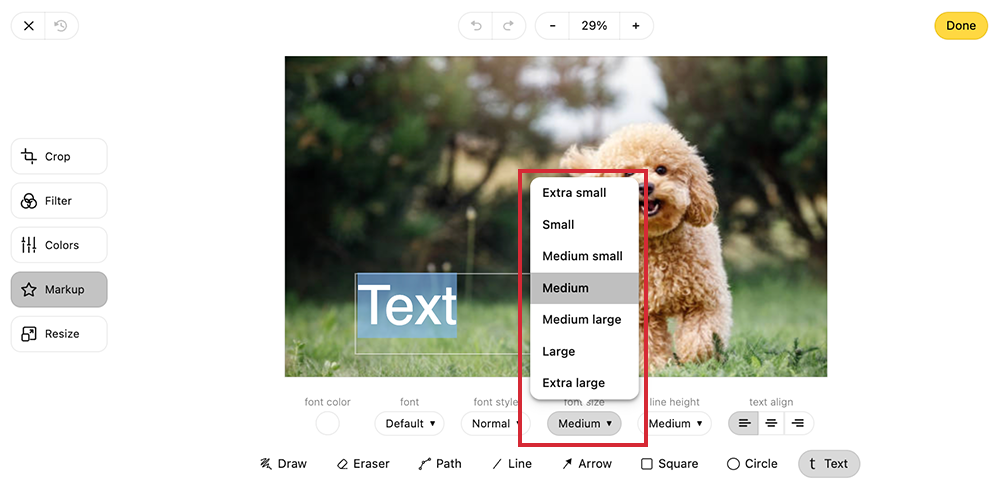
Choose the Size of your text.
-
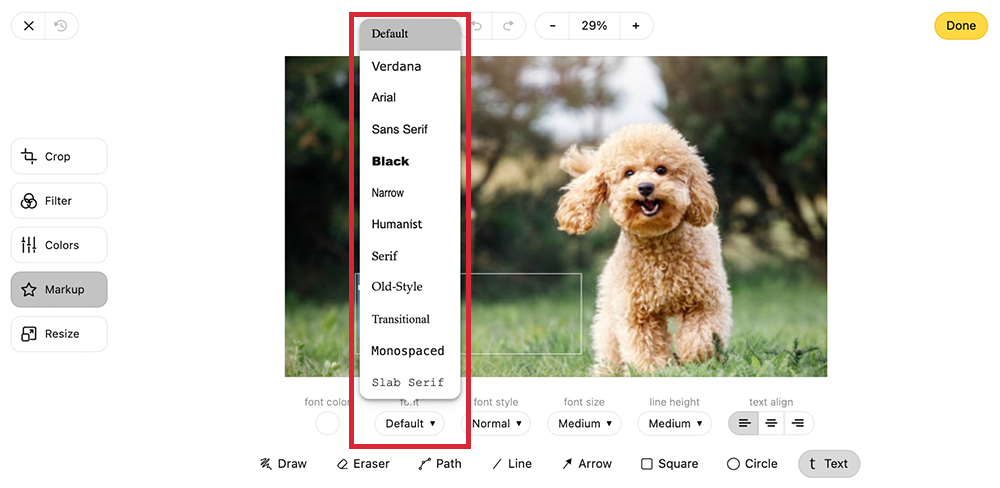
Choose the Font type.
-
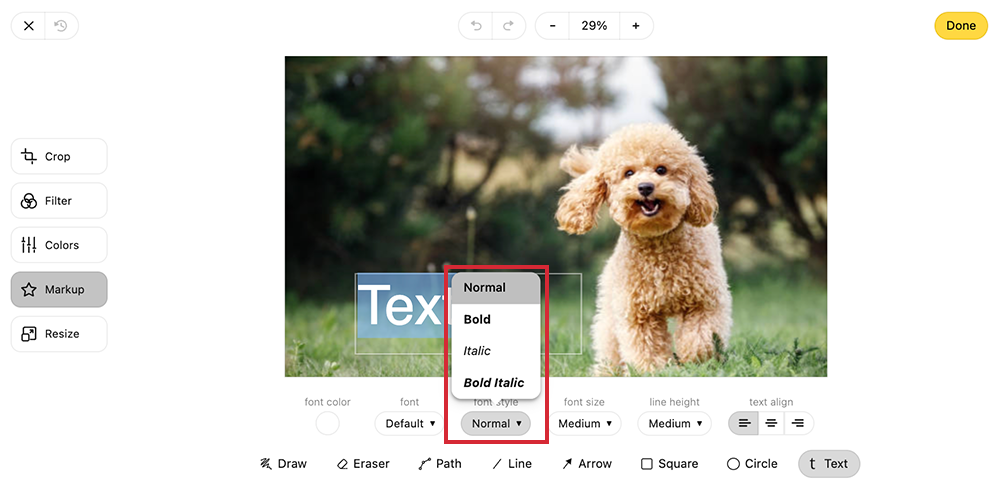
Choose the font Style.
-
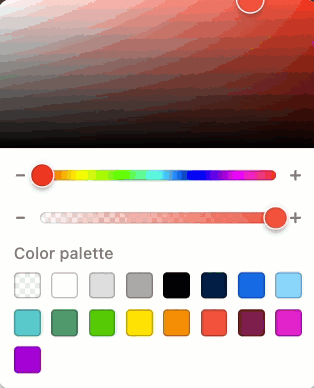
Choose the Color of your text by using the colour option below your image. You can slide to select from a range of colors, set the opacity of your text, or choose from one of the pre-loaded colours in the Color palette.
-
You can also set the Line Height and Align your Text.
-
Select Done to save your text.
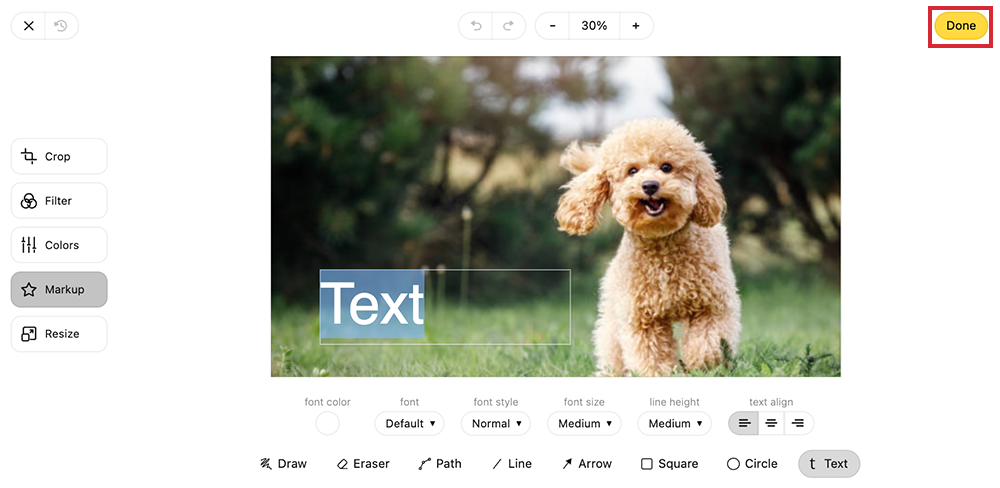
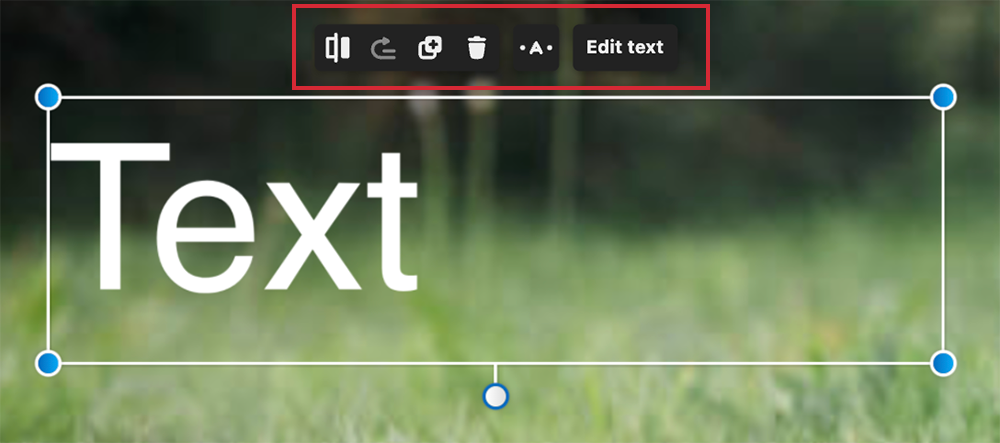
Note: You can also select Revert to reset to your original image. To edit the Text before or after saving, open the image editor and select your Text. The option to edit, flip and remove will appear.
-
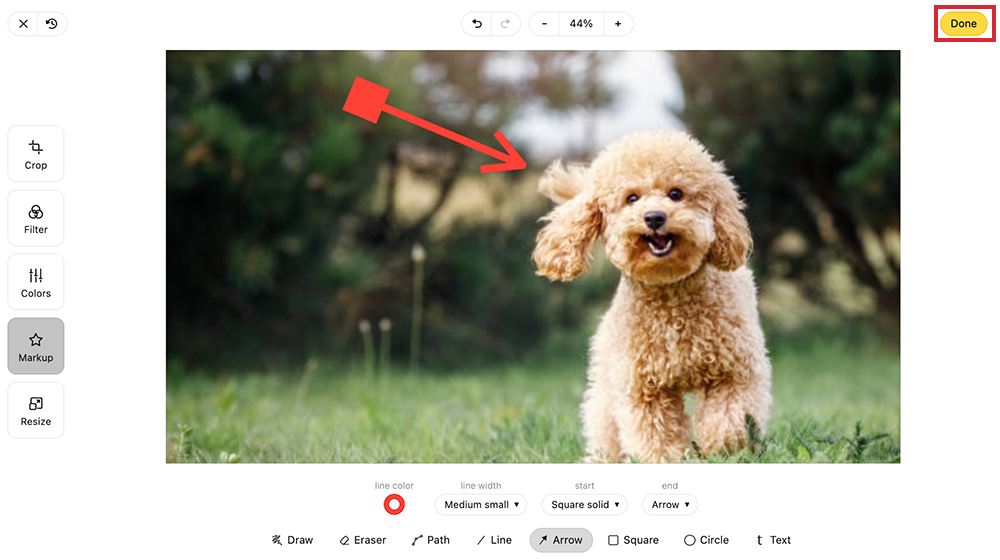
In the Markup tab of the Image Editor, choose Arrow.
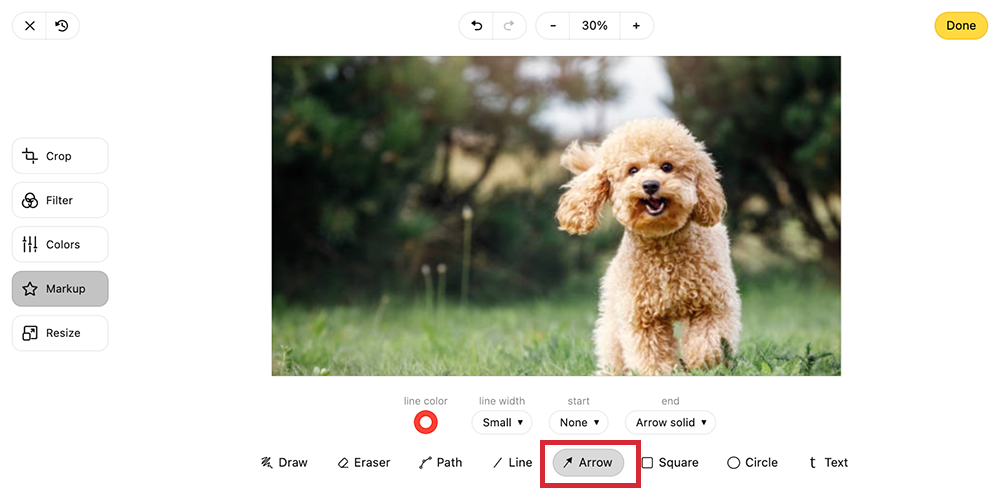
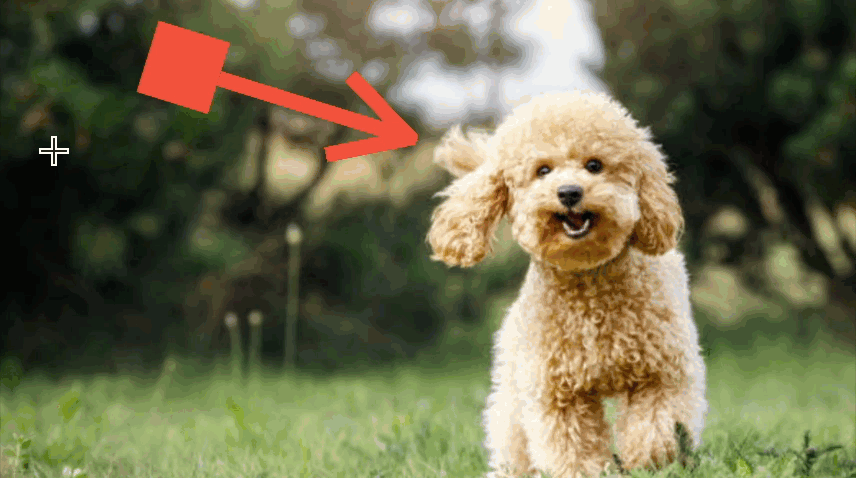
Note: You can remove the Arrow by selecting it and then choosing to delete.
-
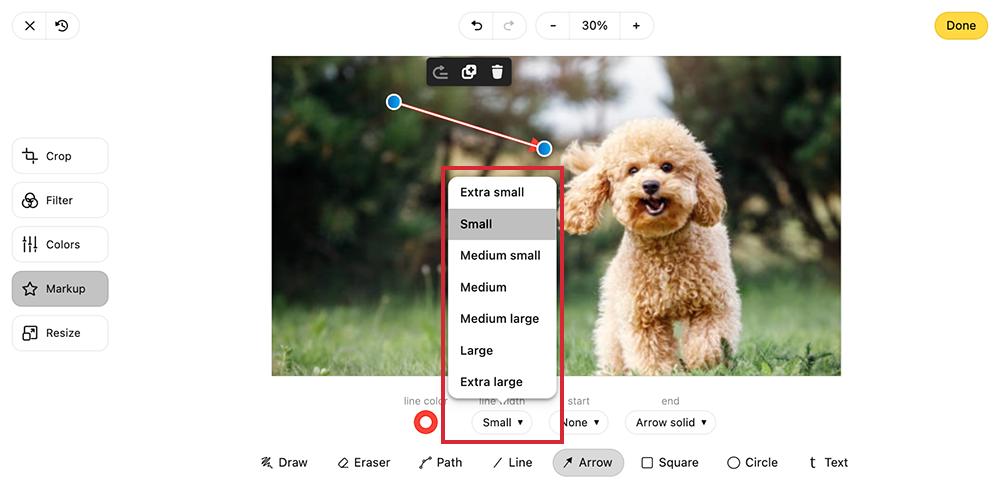
Draw the arrow onto your image by clicking and dragging your mouse in the direction you want the arrow to point.
-
Choose the Line Width of your arrow.
-
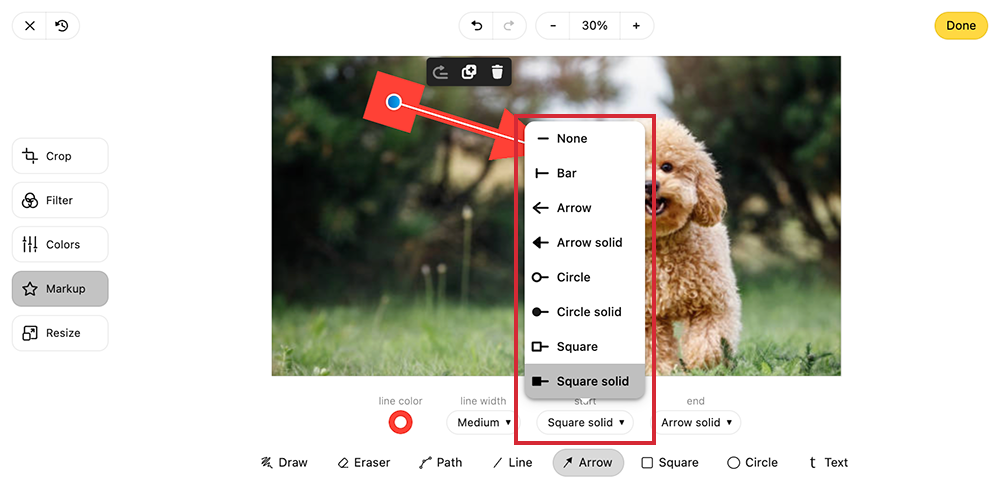
Choose the Start shape type of your arrow.
-
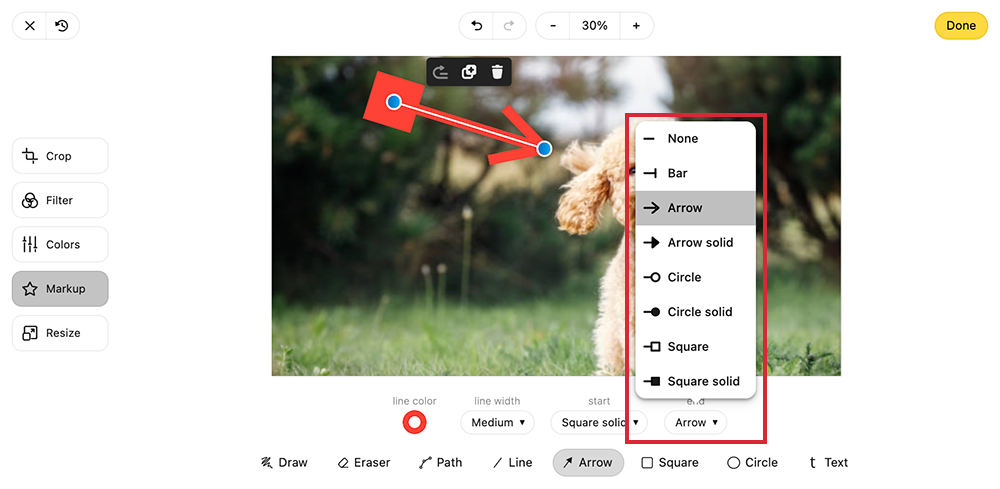
Choose the End shape type of your arrow.
-
Choose the Color of your arrow by using the colour option below your image. You can slide to select from a range of colors, set the opacity of your arrow, or choose from one of the pre-loaded colours in the Color palette.

-
Select Done to save your Arrow.
Note: You can also select Revert to reset to your original image. To remove the Arrow after saving, open the image editor and select your Arrow. The option to duplicate or remove will appear.
-
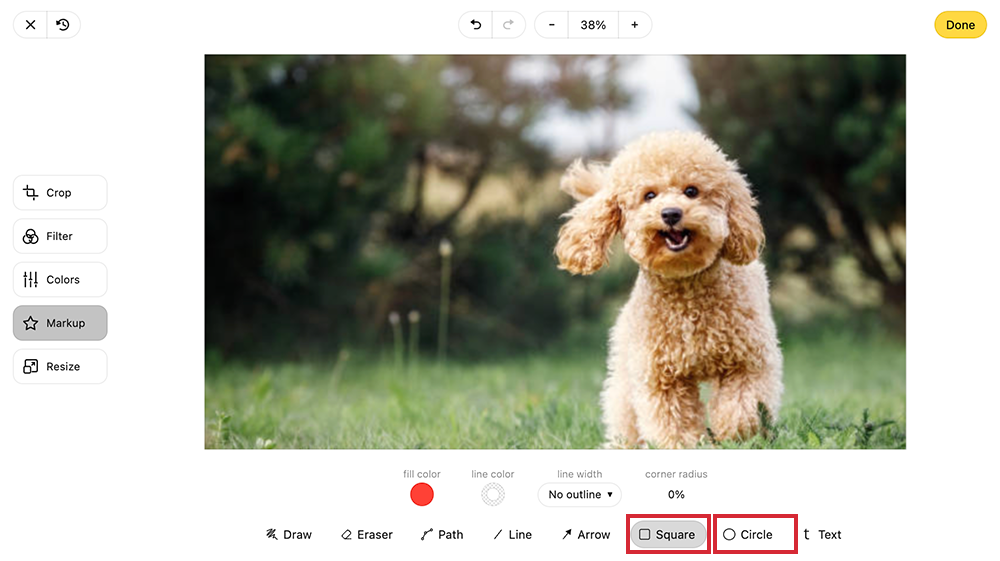
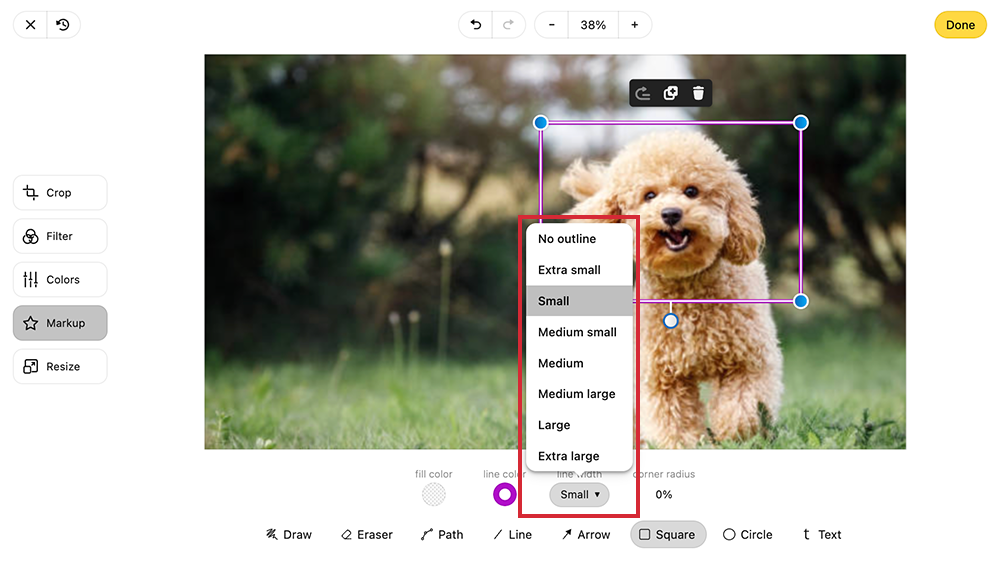
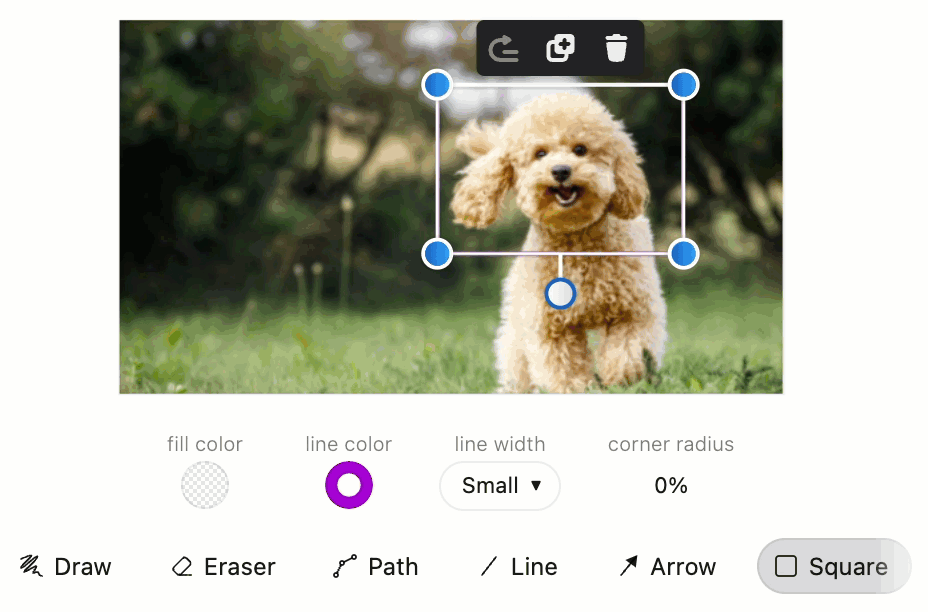
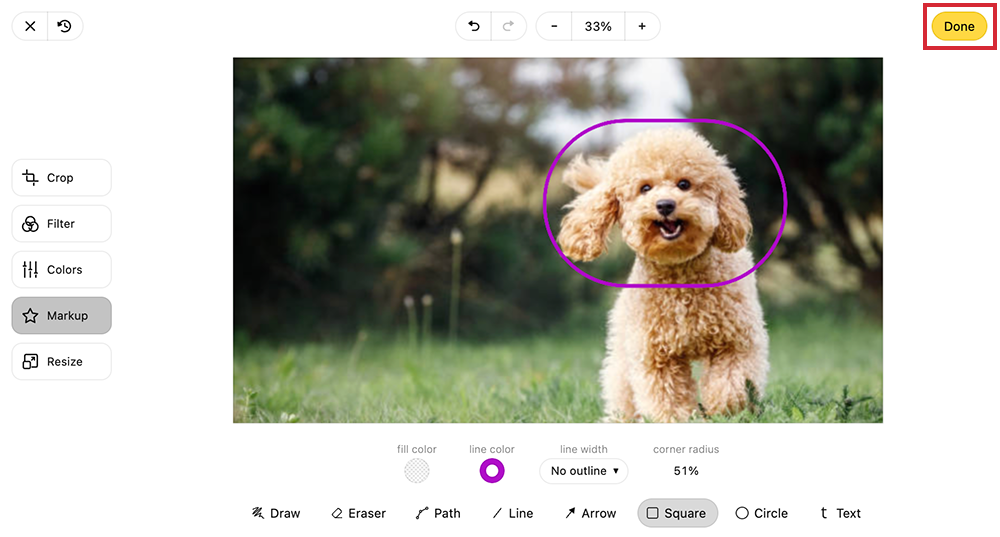
In the Markup tab of the Image Editor, choose Square or Circle.
-
Draw your shape onto your image by clicking and dragging your mouse. You can change the size of the shape by dragging the handles at each corner/side. You can also change the Square into a rectangle and the Circle into an oval this way.
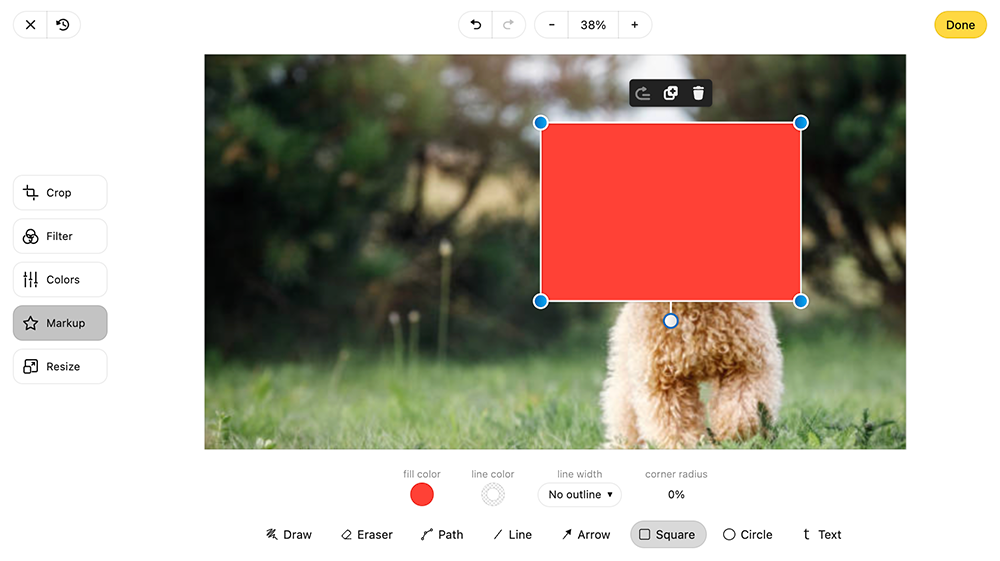
Note: You can remove the Shape by selecting it and then choosing to duplicate or delete.
-
Choose the Fill and Outline of your shape.

-
Choose the Color of your shape by using the colour option below your image. You can slide to select from a range of colors, set the opacity of your shape, or choose from one of the pre-loaded colours in the Color palette.
-
Select the Line Width of your Shape.
-
Change the Radius of your Shape using the radius slider.
-
Select Done to save your Shape.
-
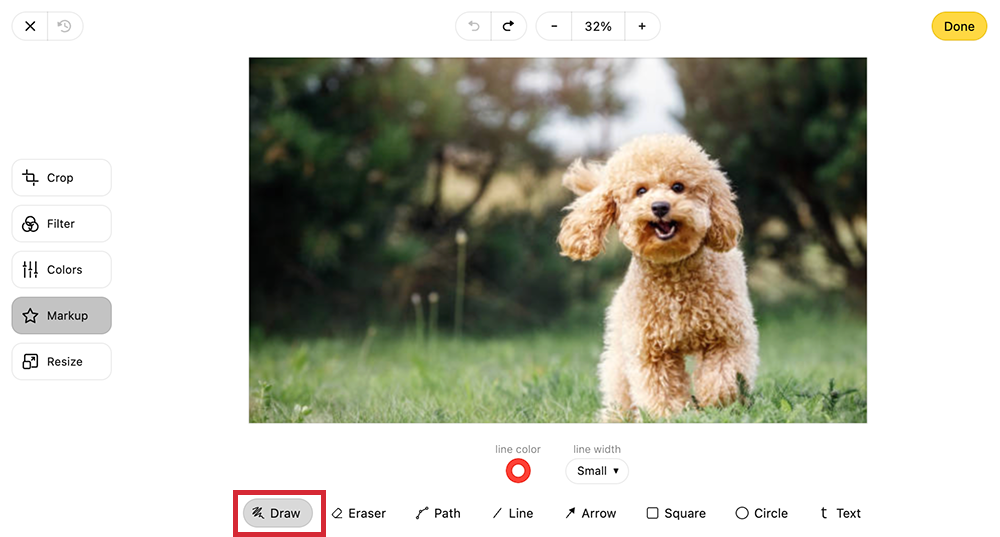
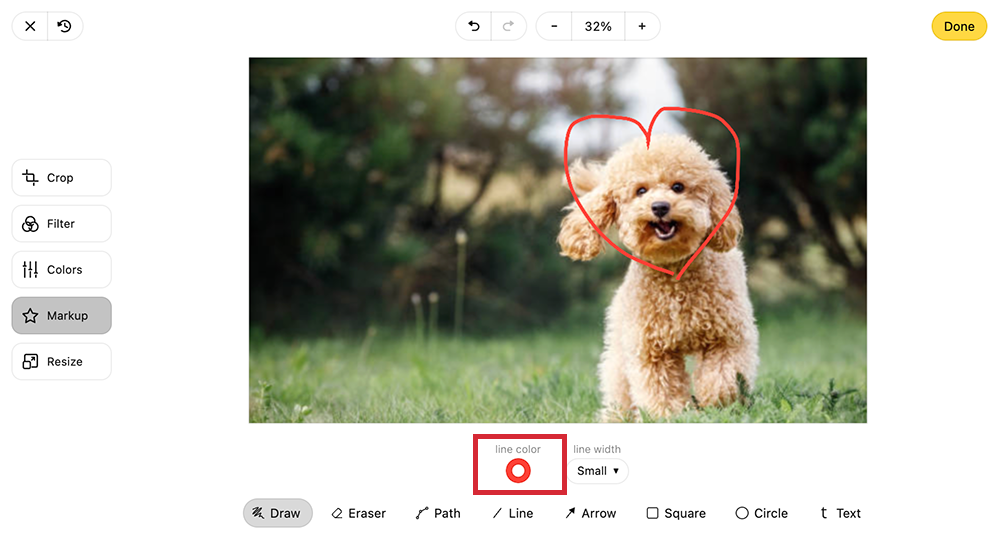
In the Markup tab of the Image Editor, choose Draw.
-
Choose the a Color for your lines. Draw freely on your image.
-
Change the Line Width of your drawing.
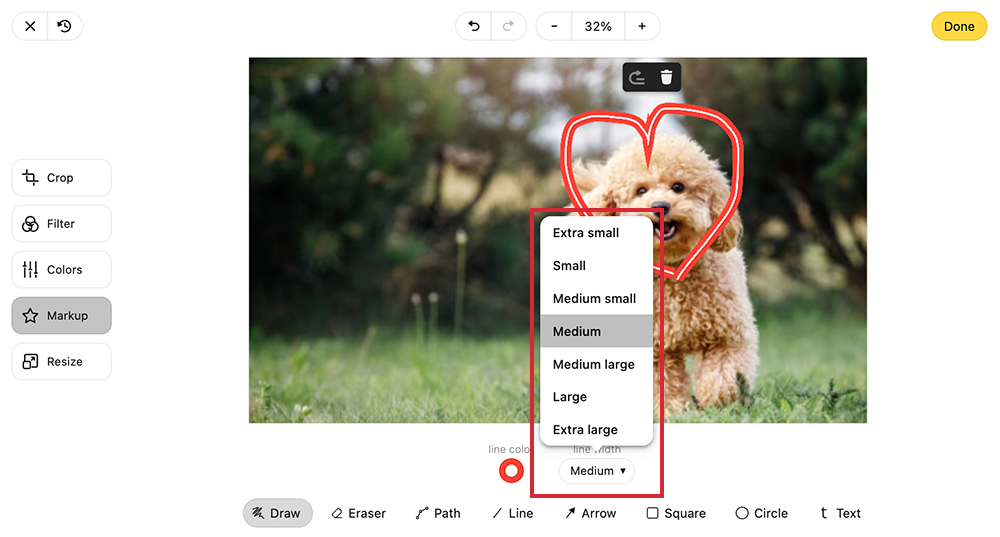 Note: You can remove your drawing by selecting your drawn lines, as the option to Delete will appear. You can also select Revert to reset to your original image.
-
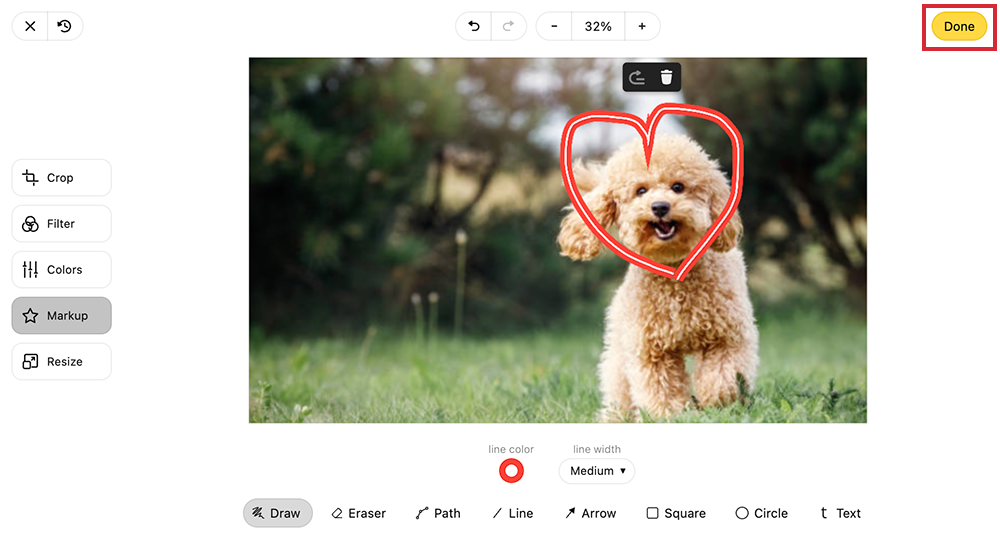
Select Done to save your drawing.
- In the Markup tab of the Image Editor, choose Path
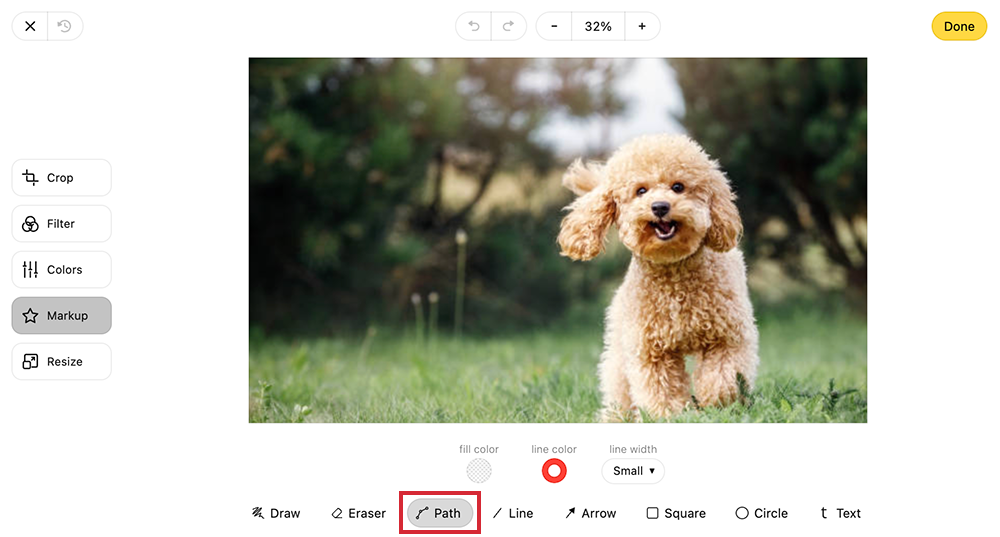
- Use your mouse to draw your Path onto your Image.
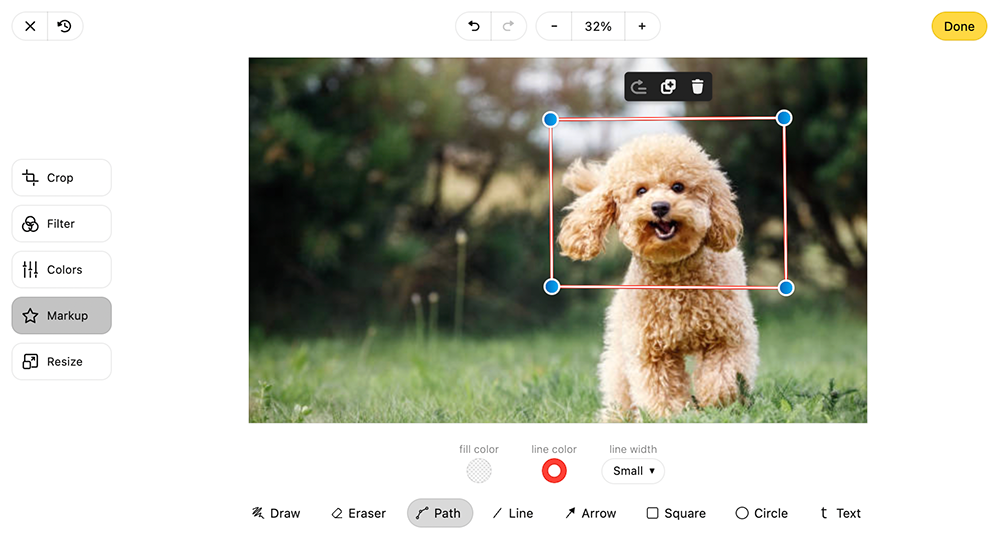 Note: When the Path is selected, the option to Duplicate or Delete will appear.
 - Select the Fill Color and Line Color for your Path.
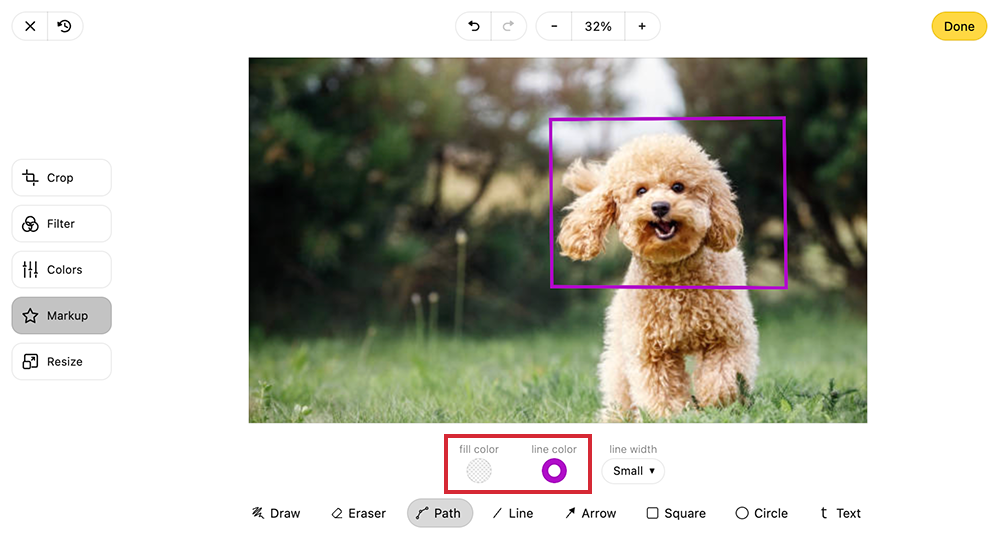
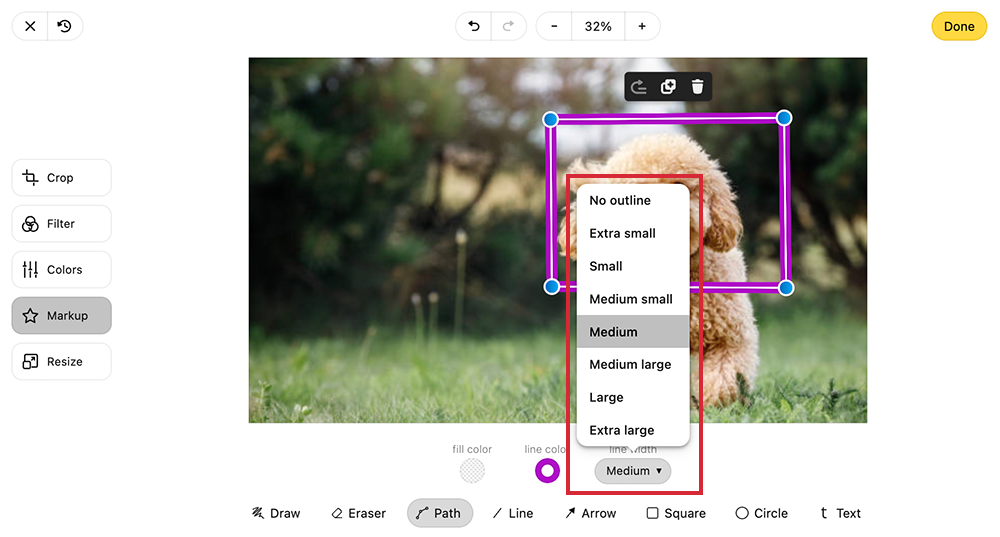
- Select the Line Width for your Path.
- Click Done to Save your changes.
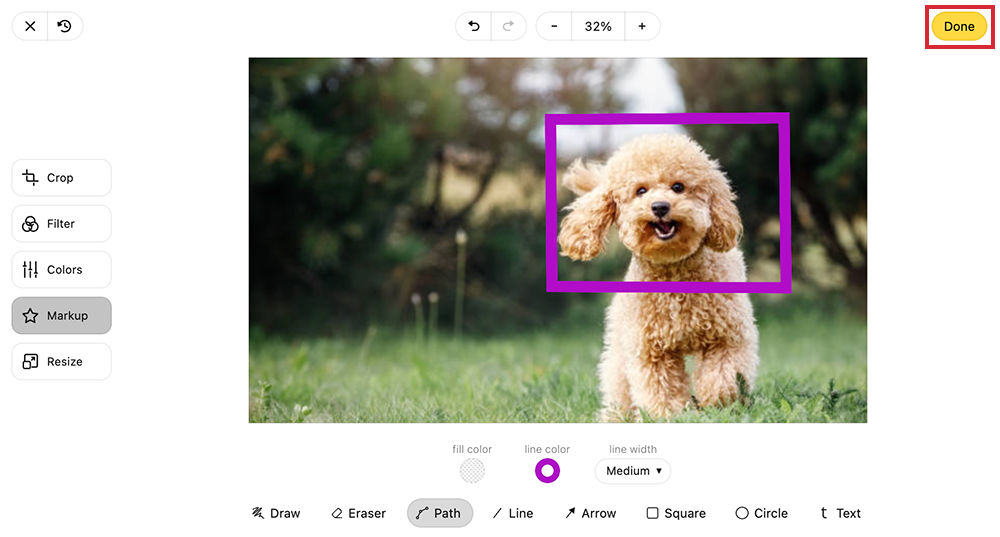 Note: You can Revert your image to reset to your original image.
