Workflows allows you to create fully automated, multi-touch communication journeys throughout the employee lifecycle. With Workflows, you can schedule emails and apply activity-based triggers to deliver relevant content at the appropriate time.
Before You Start
Workflows works best if you have the following ready before you create a new Workflow:
- Workflow Details: The Workflow Name, Description, and the Sender Details for the emails within your Workflow.
- Audience: Decide who you want to the Workflow to reach using Saved Searches, Tags, or individual email addresses.
- Folder and Emails: Prepare an Email Folder and create the Emails you want to use within your Workflow.
To avoid hopping back and forth between different parts of Poppulo, it’s a good idea to have these items ready before you start building your Workflow.
Creating a new Workflow
You can create a new workflow or you can
clone an existing workflow.
To create a new Workflow,
- From the Home page, go to Comms > Workflow.
- From the Workflow screen, click Create. A pop-up window appears.
- On the pop-up window, provide the details as mentioned,
- Workflow name: enter a name for the workflow. Used for your own identification only.
- Workflow description: provide more details for the workflow. This field is optional.
- From name: this will be used by all Emails sent as part of this Workflow.
- From email: this will be used by all Emails sent as part of this Workflow.
- Reply to email: this will be used by all Emails sent as part of this Workflow (optional)
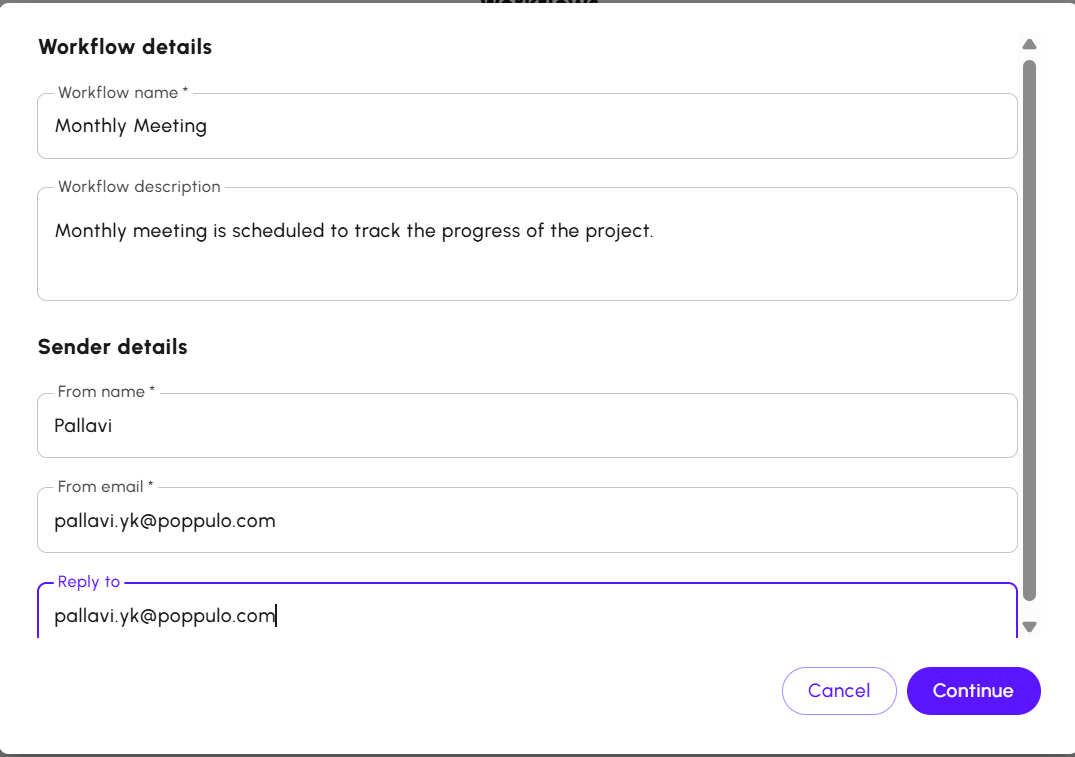
- Click Continue. The Workflow is created, and the Workflow builder screen appears.
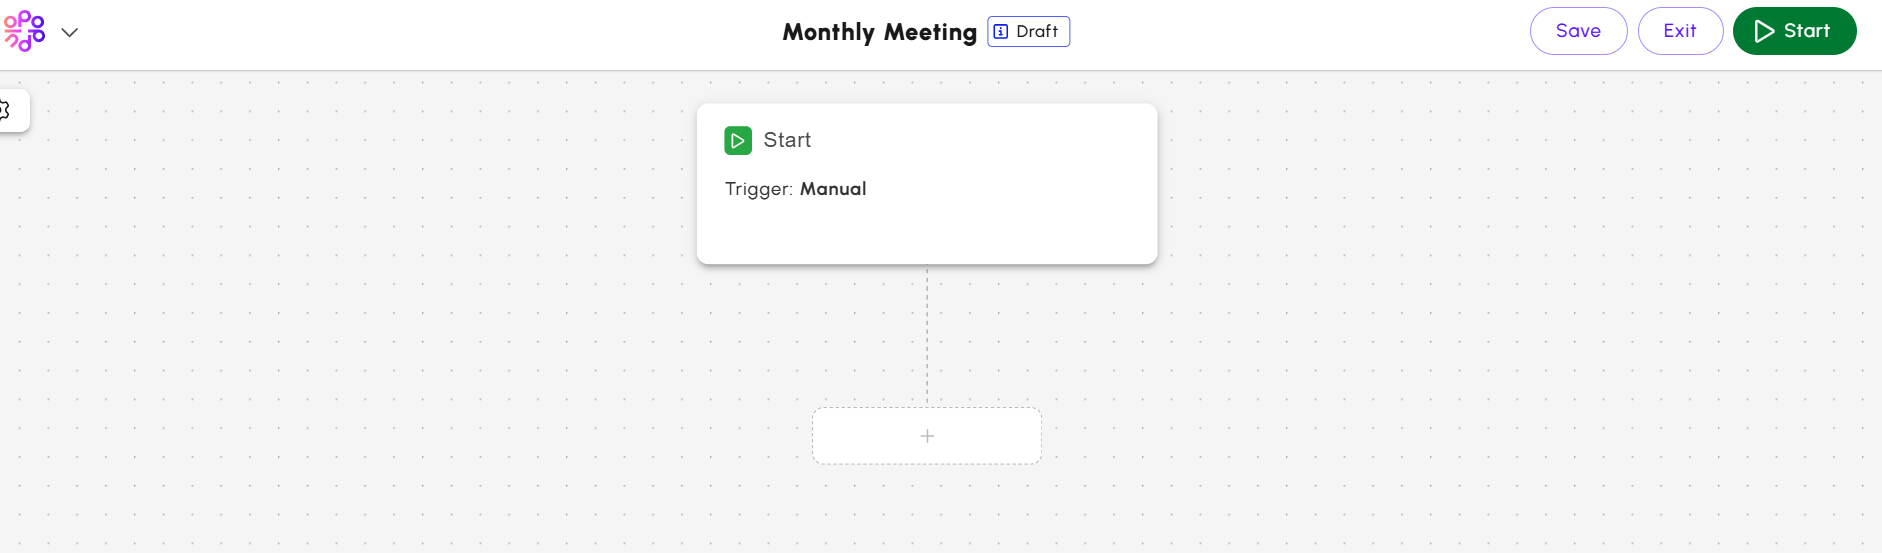
Building a Workflow
On the
Workflow Builder screen, you can define the workflows as per your requirements. There are multiple steps that allow you to define the workflows. The available step types are:
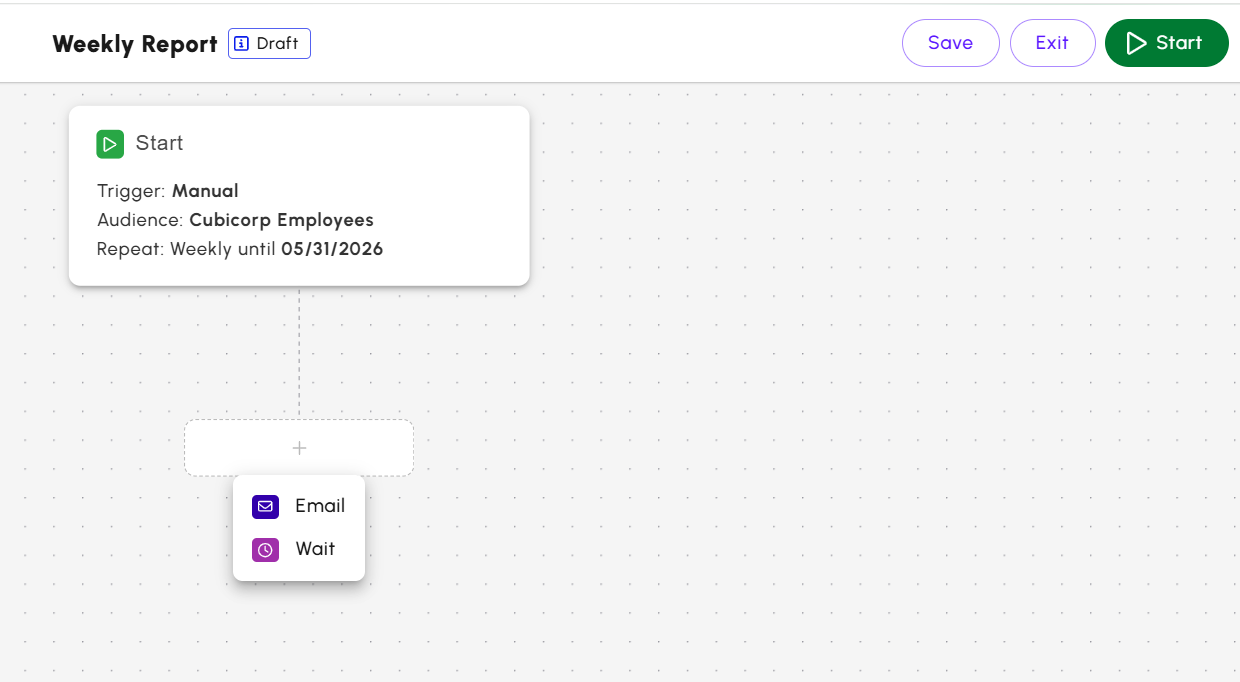
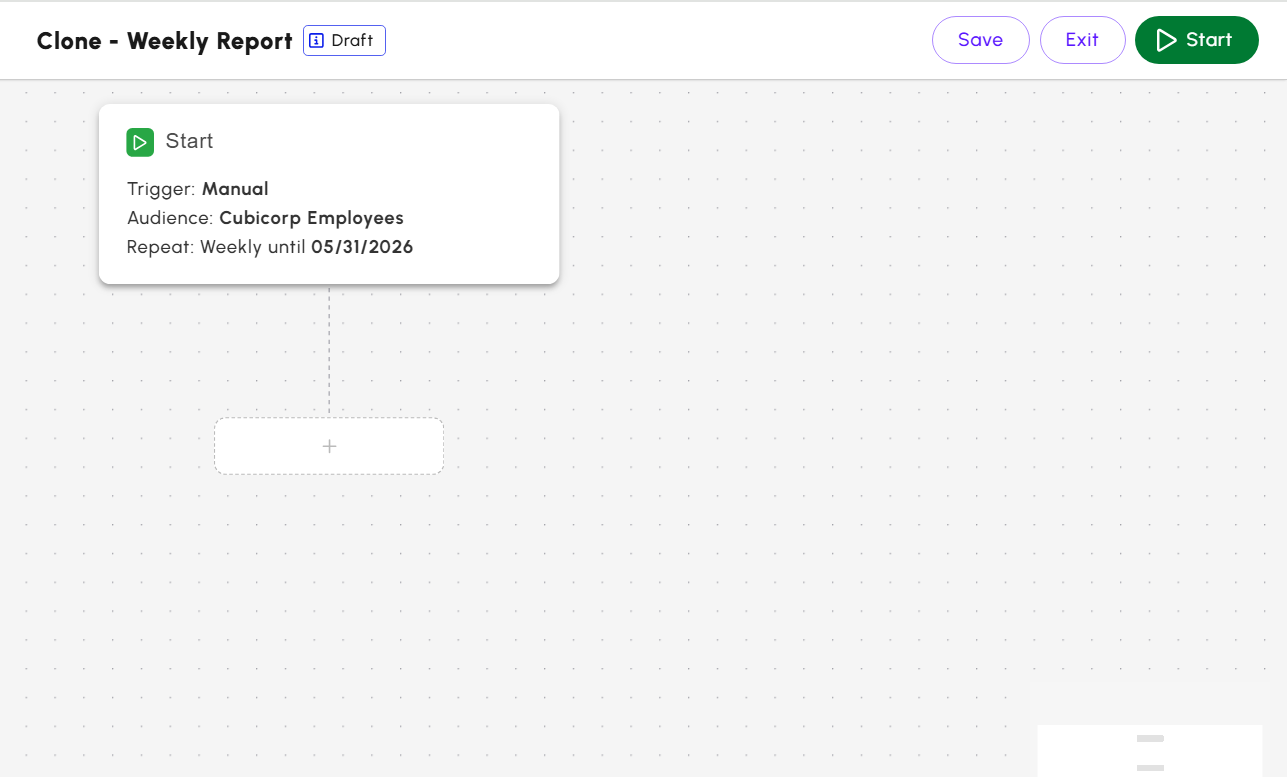
Start Step
The
Start step defines how and when the workflow begins, and who will receive the communication.
To set up the Start step,
- Click the Start icon to initiate the workflow. The Start pop-up window appears.
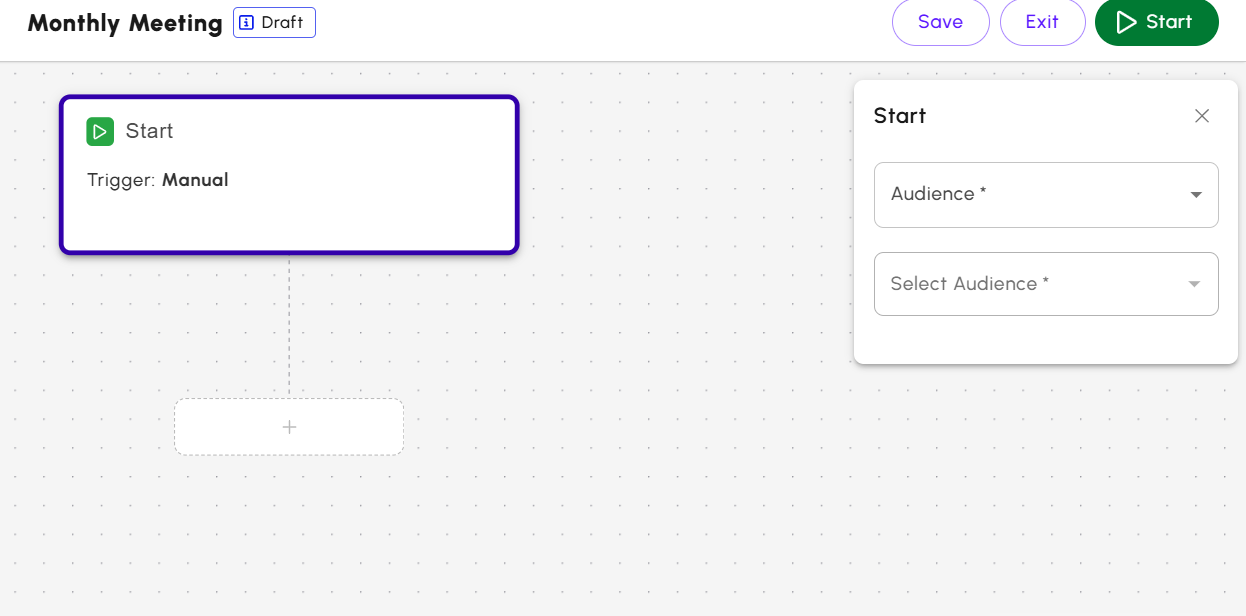
- From the Audience drop-down menu, select one of the following,
- Tag
- Saved Search
- Individuals: the Workflow is sent to specific individual email addresses.
- From Select Audience drop-down menu, enter the details according to the selection you made in the Audience field. For example, if you select Saved search, choose a saved search from the list.
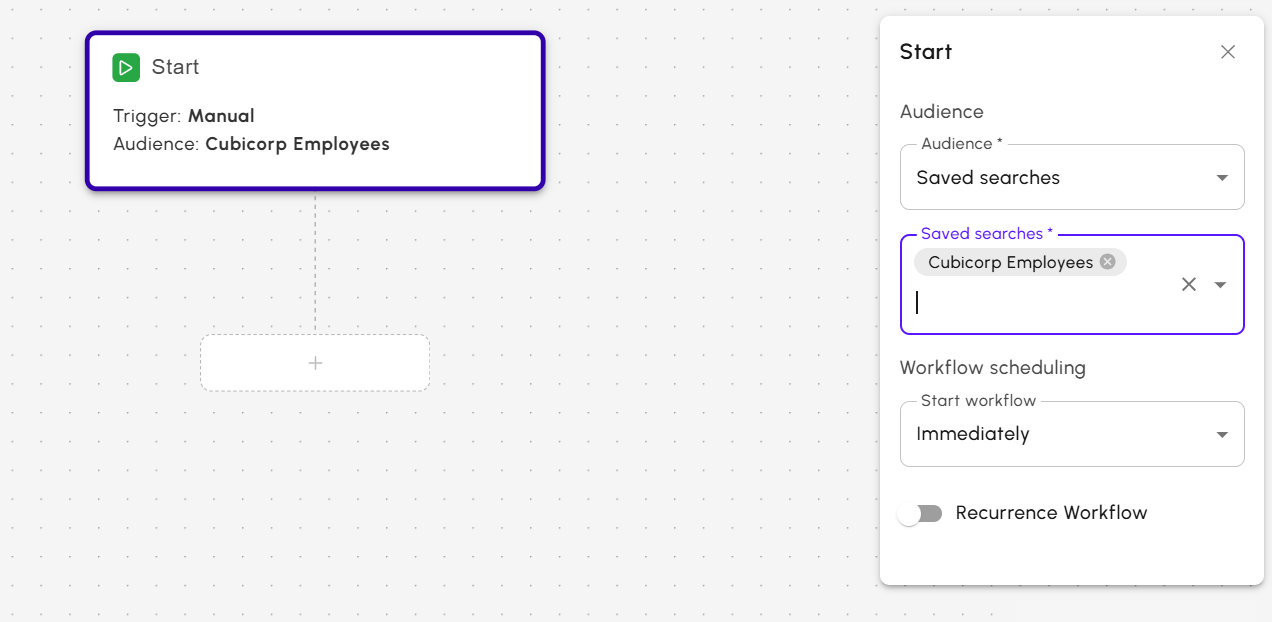
- From the Start workflow drop down, select one of the following,
- Immediately - Starts the workflow immediately.
- Scheduled Date - Starts the workflow at a specified date.

- Turn on the Recurrence Workflow button to repeat the workflow.
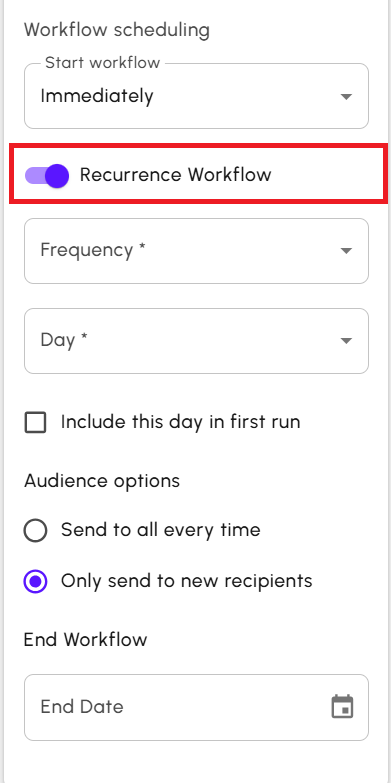
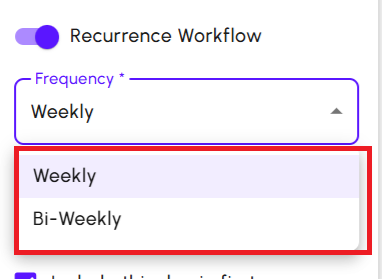
- From the Frequency drop down, select one of the following,
- From the Day drop down, select the day the workflow runs.
- Include this day in first run starts the Workflow immediately on the selected day instead of waiting for the next scheduled recurrence date.
- Under Audience Options section, define the audience preference.
- Send to all every time.
- Only send to new recipients
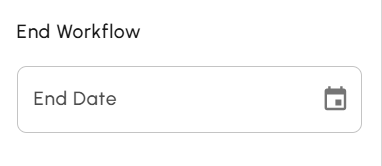
- Click the calendar from the End Date field and select a date to stop the recurrence.
Note: Workflows can run for a maximum of 6 months from the start date.
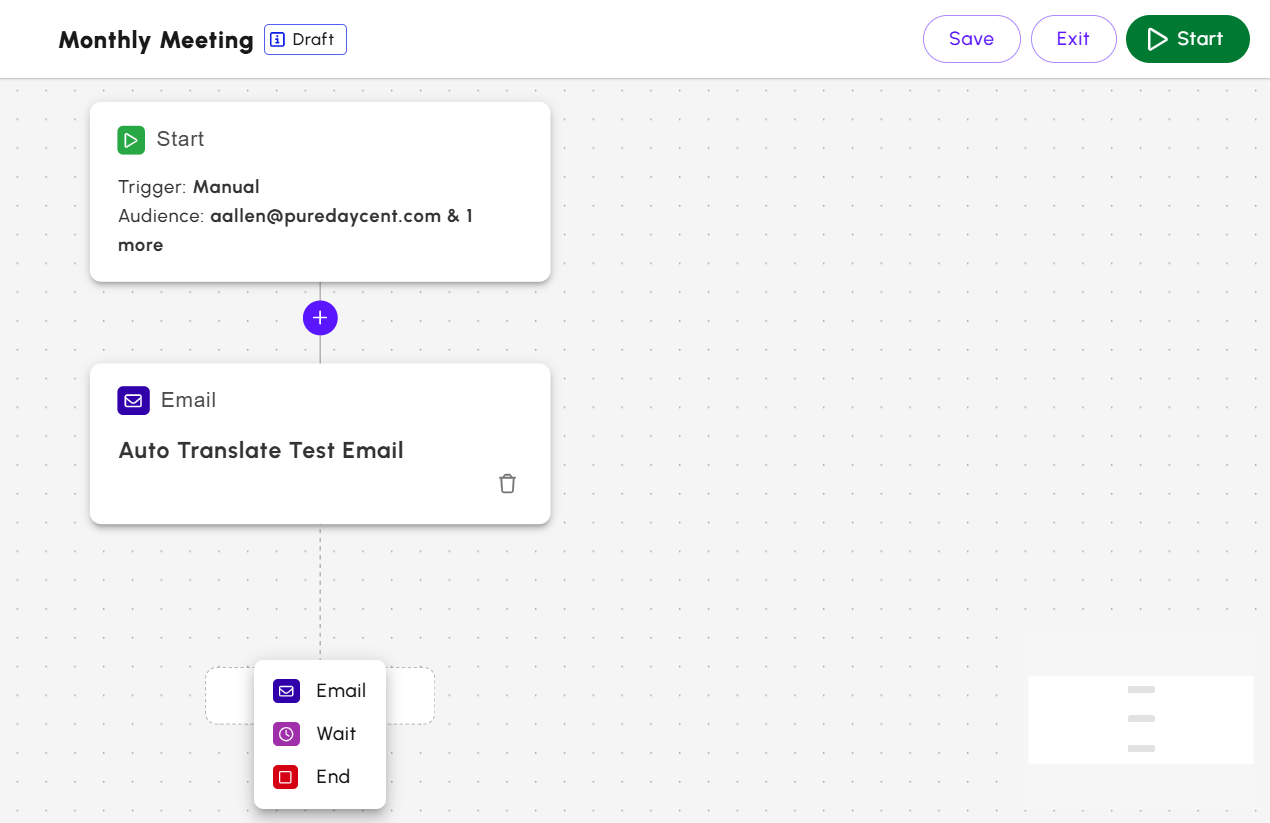
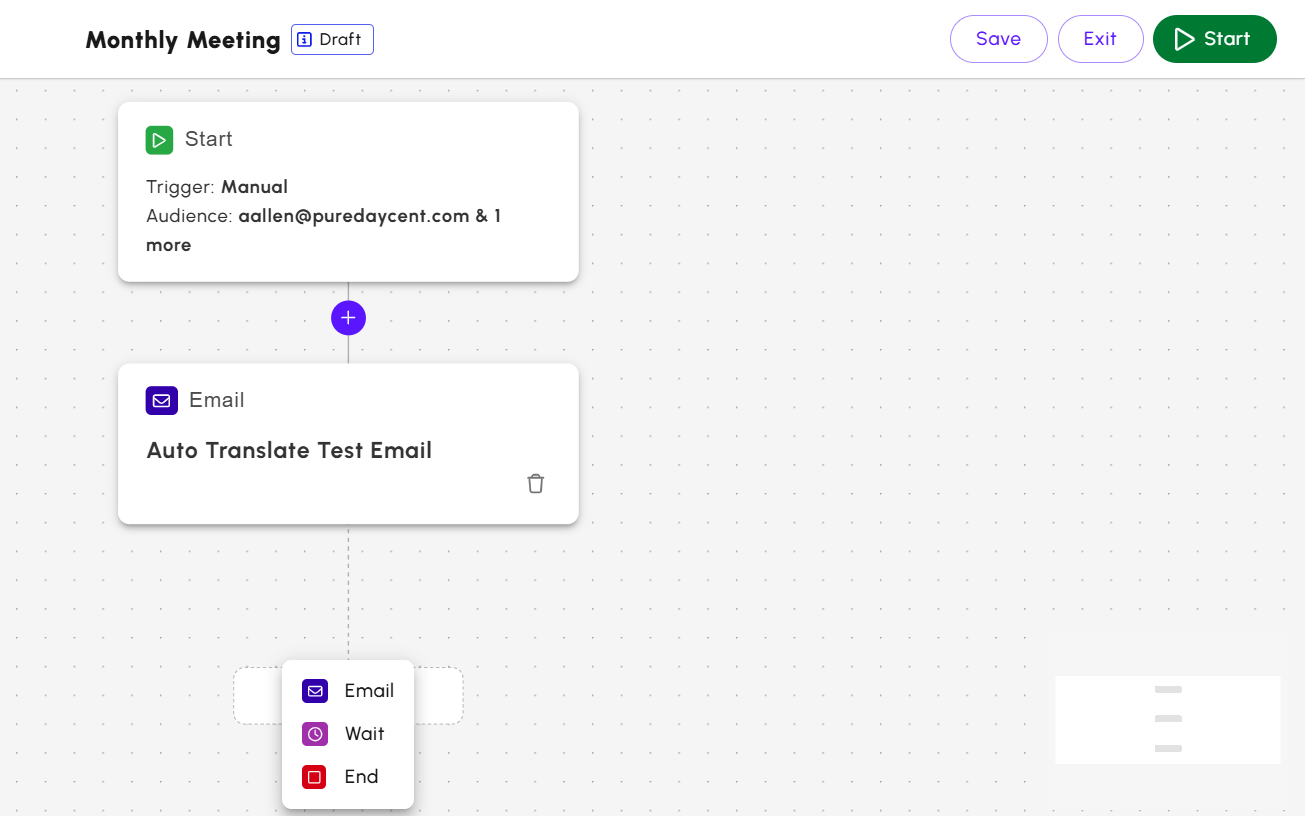
- Click the plus symbol and insert the next step. It can be either an Email or Wait step.
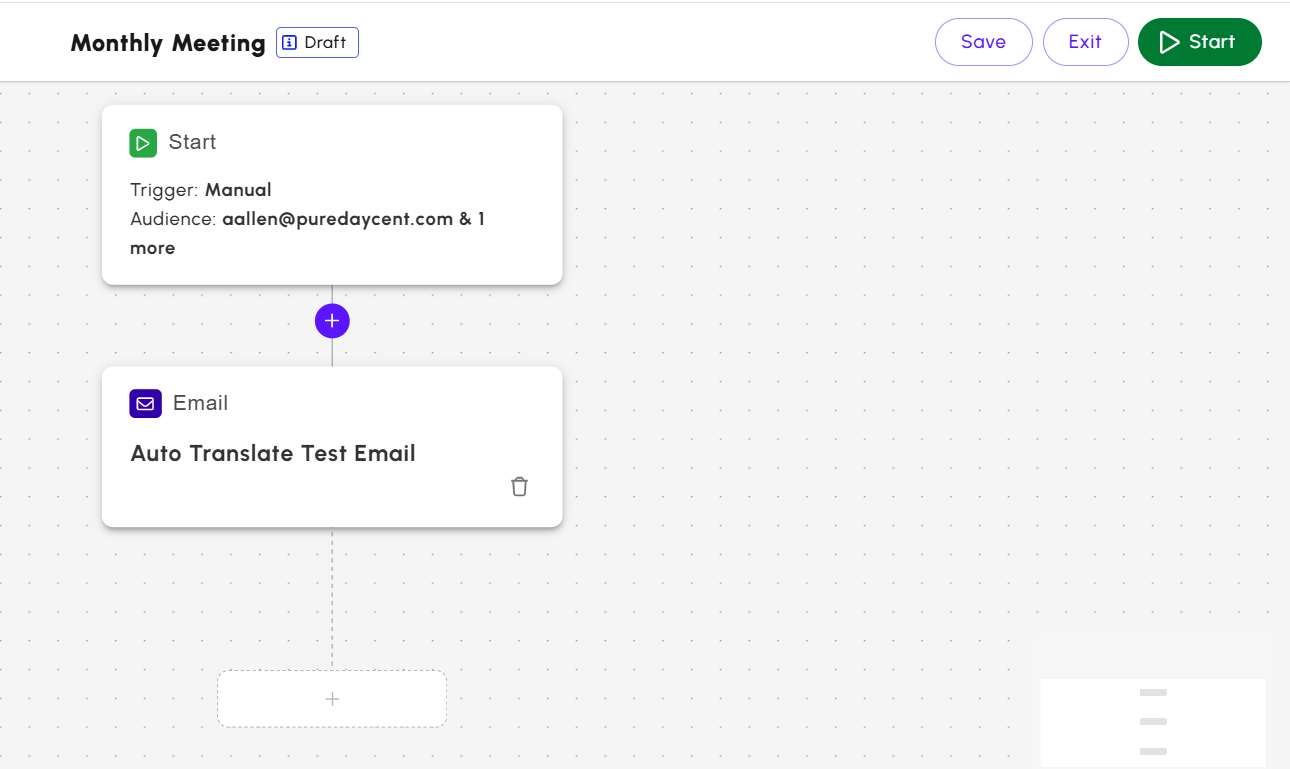
Email Step
The
Email step allows you to send an Email within the Workflow.
To set up the
Email step,
- Click the plus symbol and select Email. The Email pop-up window appears.
- On the Email pop-up window, provide details as mentioned.
- Email Folder: select an existing Email Folder. Note: Folders using Advanced Audience Management are not available for selection.
- Email: select an Email from within the chosen Folder.
- Subject line: add a custom subject line for the Email.
- Preview text: add preview test for the Email. (optional)
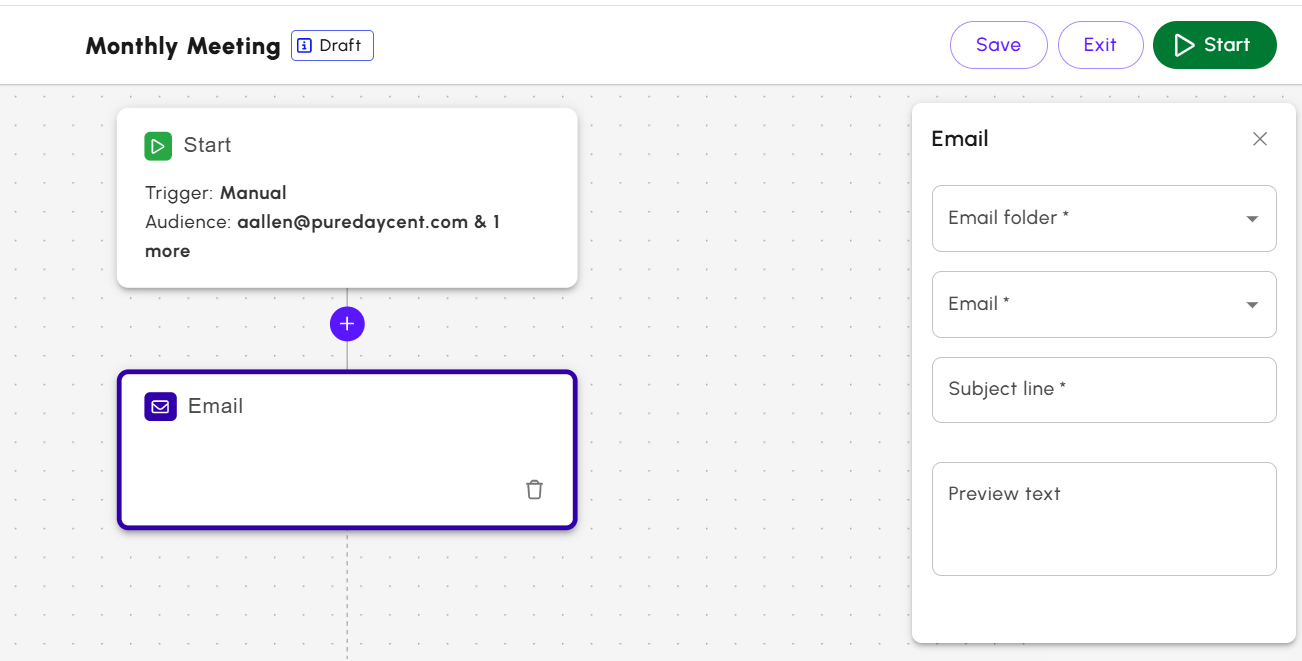
- The Email step is created.
 Note: Emails in Draft or For Approval status are automatically set to Approved when sent as part of a Workflow.
Wait Step
The
Wait step defines the delay before the next action.
To set up a
Wait step,
- Click the plus symbol and select Wait.
- The Wait step is added to the workflow. On the Wait pop-up window, you can choose the number of days to delay the email. The time delay options are:
- Minimum: 1 day
- Maximum: 7 days
Note: Hour-based delays are not currently supported.

Branch Step (Conditional)
The
Branch step allows different paths based on user behavior. You must adhere to the following rules to create the branch step.
- It can only be added after a Wait step.
- It supports a single condition:
- Opened / Not Opened (email open behavior)
- Only one conditional branch is allowed per Workflow.
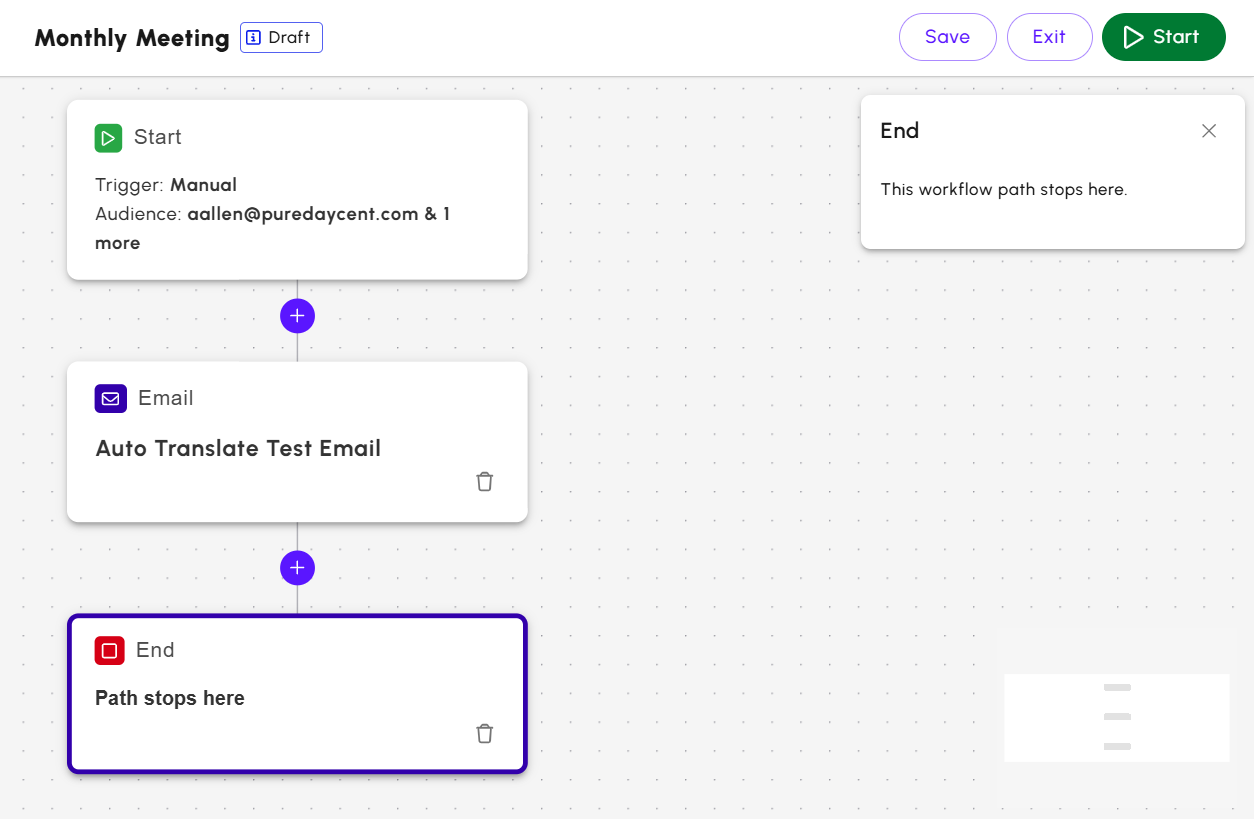
End Step
The
End step marks the end of a Workflow path. It must be placed at the end of each Workflow branch. All branches require an
End step before the Workflow can start.
To add an
End step,
- Click the plus symbol and select End.
- The End step is added, and message appears indicating the Workflow path is ended.
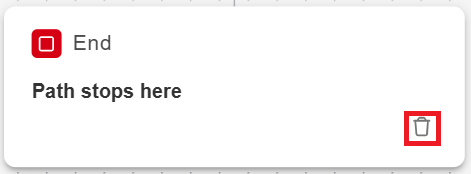
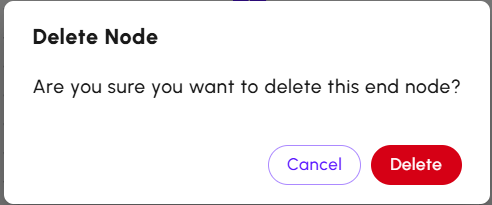
Deleting Steps
While creating steps, you can delete a step at any time.
To delete a step,
- Click the bin icon on the step.
If the step has child steps, you will receive a warning.
- On the Delete Node confirmation screen, click Delete.
Starting a Workflow
You can start the Workflow after setting up the steps.
Note: You cannot edit a Workflow once it has been started.
To start a Workflow,
- Click Start in the upper corner of the Workflow Builder.
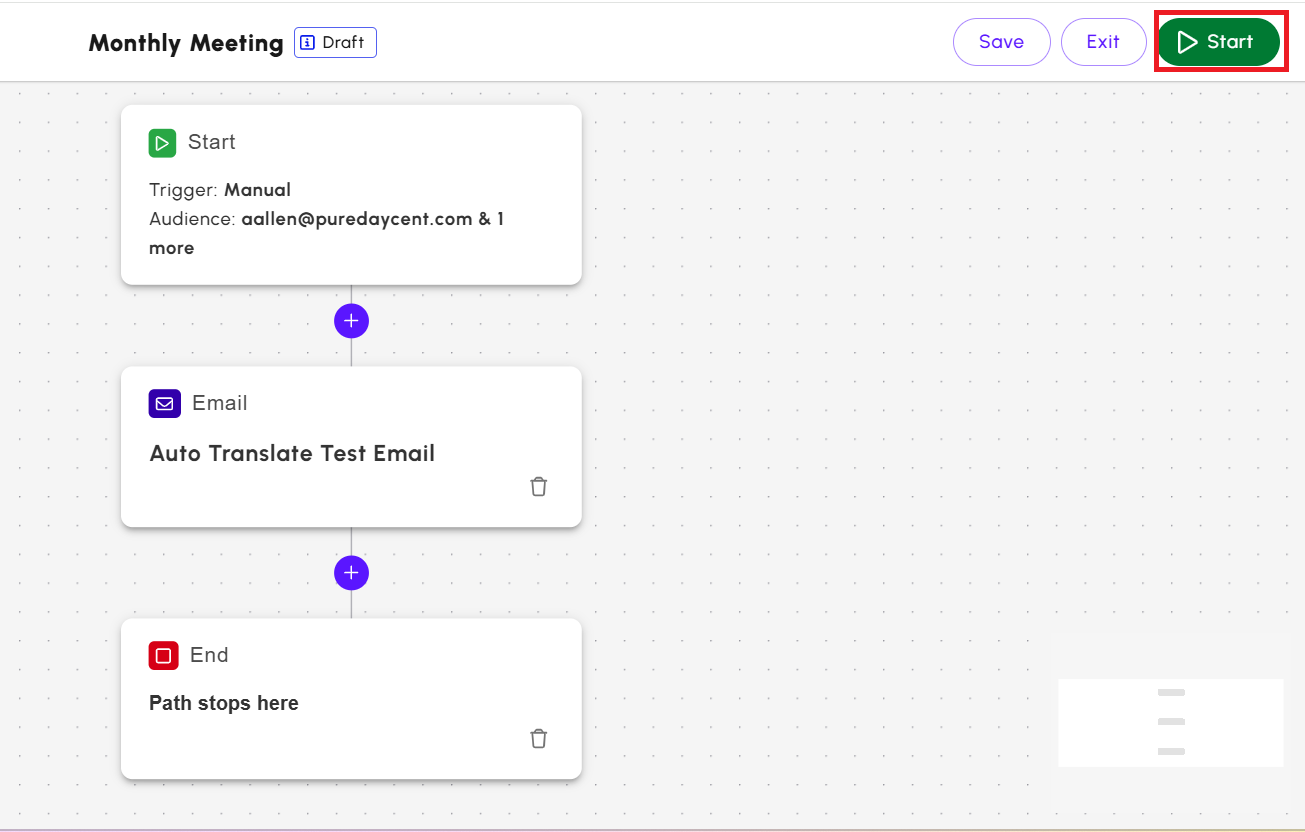
The workflow begins and is added to the Workflow screen.
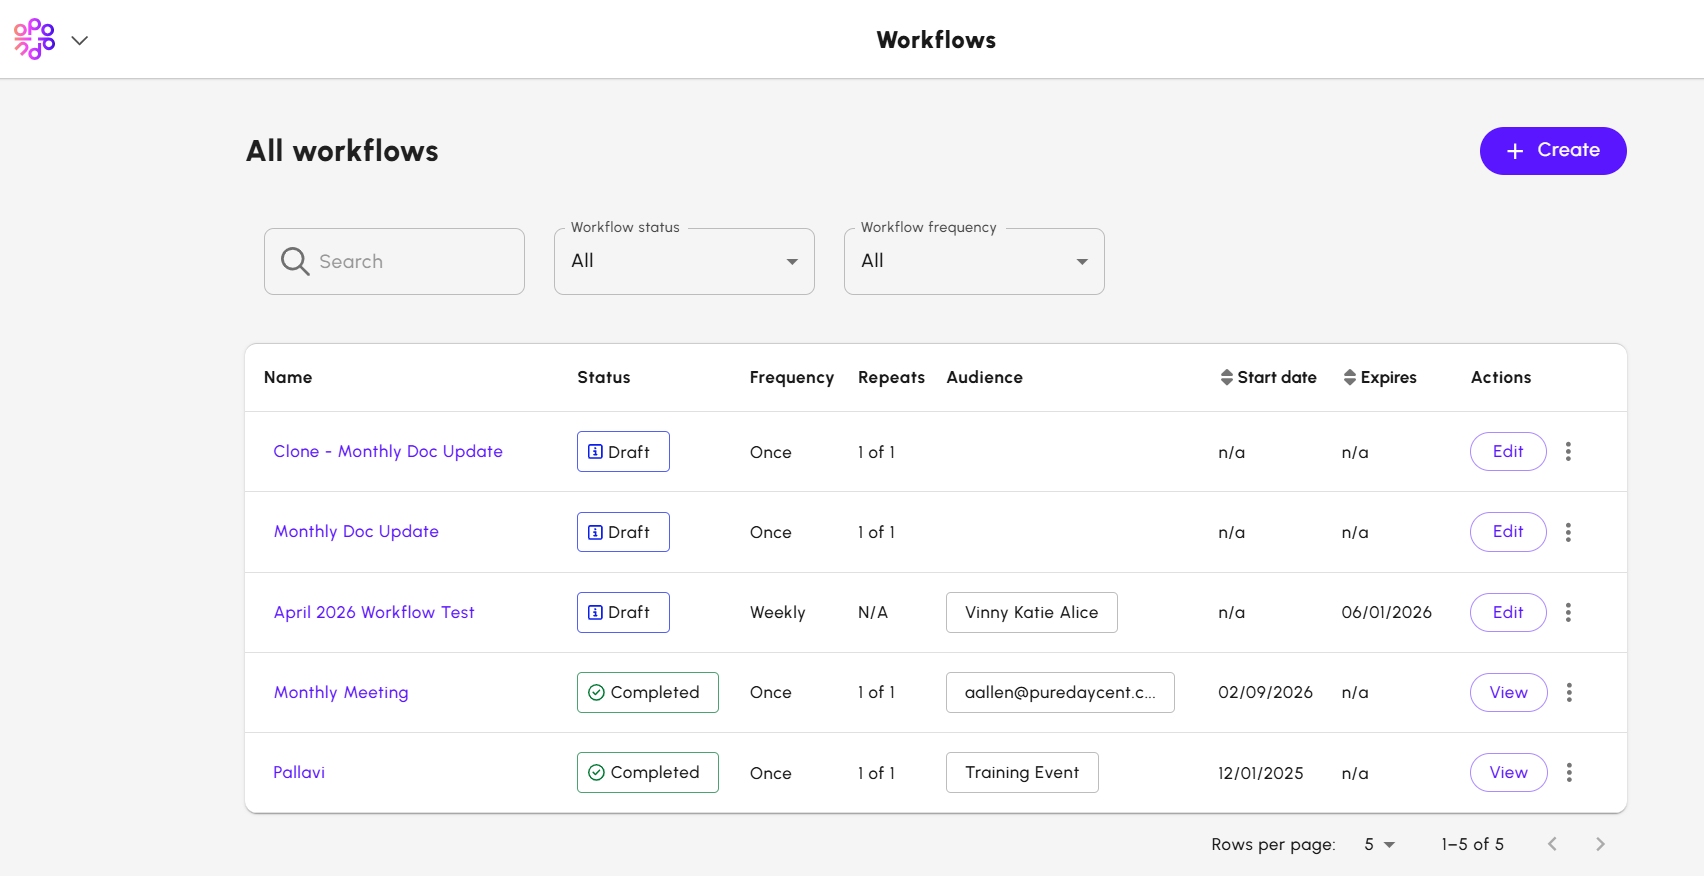
Viewing a Workflow
On the
Workflows screen, you can view all the workflows which are created.
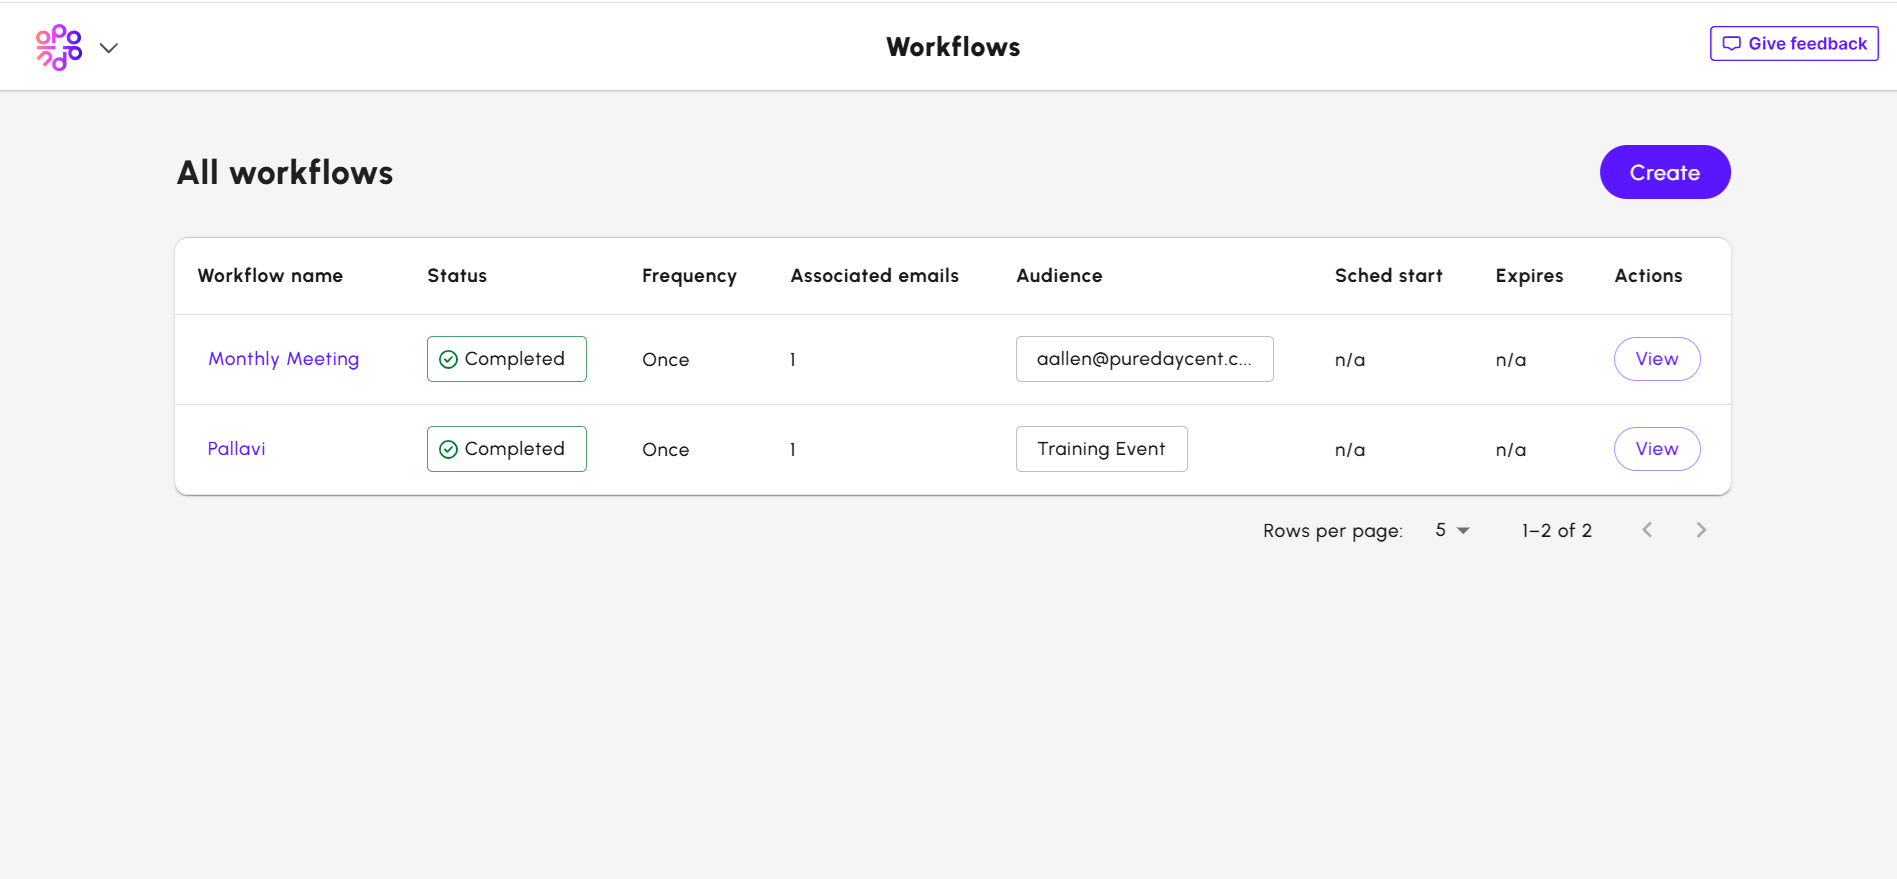
Click the
View button or select the Workflow name. The Workflow opens in read-only mode.
If the Workflow is in draft mode, then click
Edit or select the workflow name to open the Workflow Builder in edit mode.
Stopping a Workflow
If you wish to stop a Workflow,
- Locate the active Workflow on the All Workflows screen.
- Click the three dots and select Stop.

A warning message appears to confirm your action. Once, the Workflow is stopped, it cannot be undone. When a workflow is stopped,
- Any active email sends are immediately halted.
- All future Workflow steps are cancelled.
- The Workflow status changes to Stopped.
- You may view the Workflow but cannot restart or edit it.
If you wish to clone a Workflow,
- Locate the Workflow on the All Workflows screen.
- Click the three dots and select Clone. The Workflow details screen appears.
- On the Workflow details screen, provide the details as required.
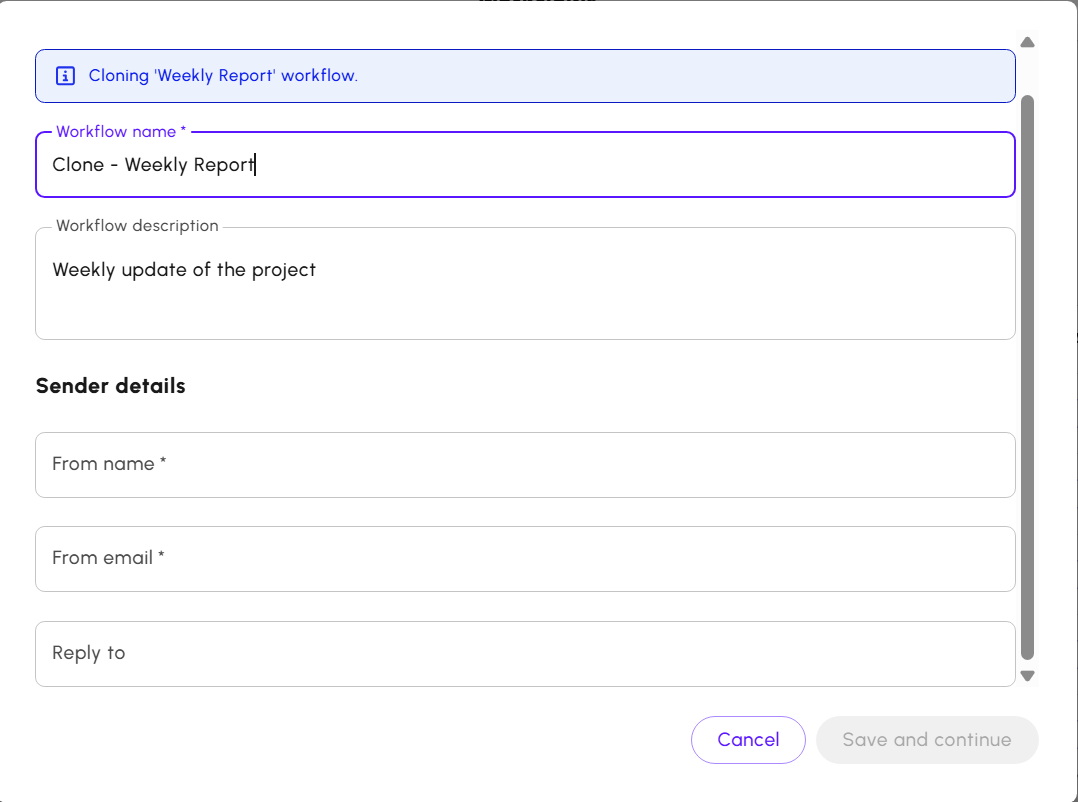
- Click Save and continue to navigate to the Workflow builder screen. The workflow includes the details from the cloned workflow. You can modify the workflow as needed.
Practical Workflows Example
The following example shows how to create a recurring onboarding workflow for new employees.
Scenario
Automatically send onboarding emails to new hires during their first week, with emails spaced 2 days apart.
Steps
- Create a new Workflow.
- For Audience select a Saved Search containing your new hires.
- Choose whether to start the workflow immediately (today) or schedule it to start on a future date.
- Select Recurrence Workflow.
- Configure the workflow to repeat weekly, for example every Monday.
- Under Audience options, select Only send to new recipients so existing recipients do not re-enter the workflow in future runs.
- Choose an end date for the workflow.
You can now begin building the workflow by adding emails and wait steps. for example:
- Send Welcome Email
- Wait 2 days
- Send Benefits Email
- Wait 2 days
- Send Culture and Resources Email
- End
This setup allows each new group of employees to automatically receive onboarding communications during their first week without duplicate sends to previous recipients. The Workflow continues to run each week, sending to new employees as they join.
