What are Events?
The Event Module allows you to create and send Event Invitations to employees across your business. Unlike some traditional platforms used to send meeting invites, Poppulo does not limit the number of people you can invite.
Advanced Events use templates and provide RSVP options and reporting, and allows you to send targeted Follow-ups to invitees based on their response (for instance, sending reminders to those who haven't opened the original invite).
Simple Events allows you to send an Event invite directly to the recipients inbox and calendar without the use of a Poppulo Templates.
To Create an Advanced Event Invitation:
-
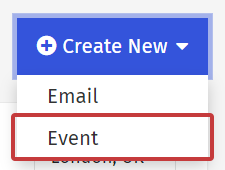
From the Overview page, click Create New and choose Event.
-
Select the Advanced Tab, then choose a Template to use.

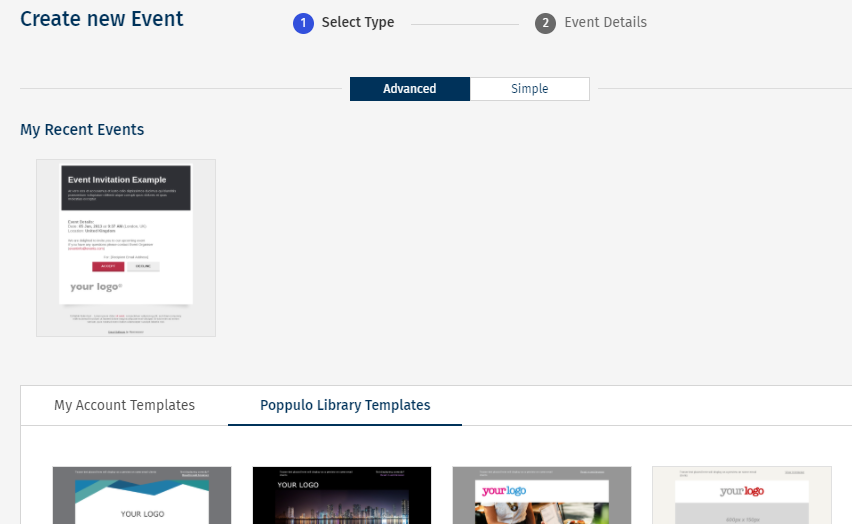
Note: You'll find My Account Templates and the Poppulo Harmony Template Library below, (depending on your account/template set-up, not all options may be available on all emails).
-
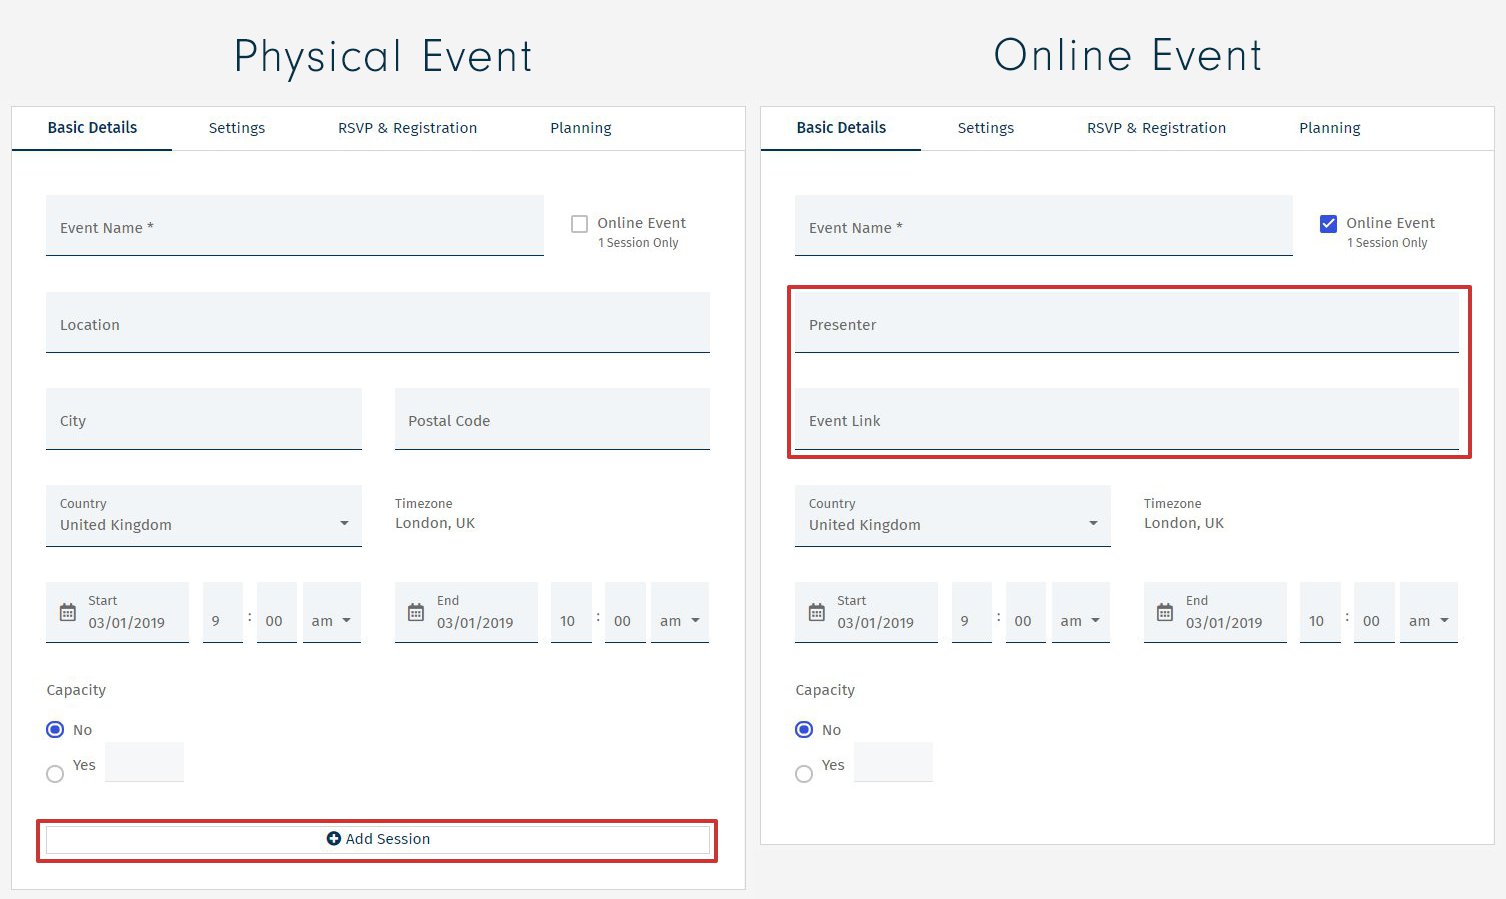
In the Basic Details, enter your Event Name, the physical Location details and the time & date of your event.
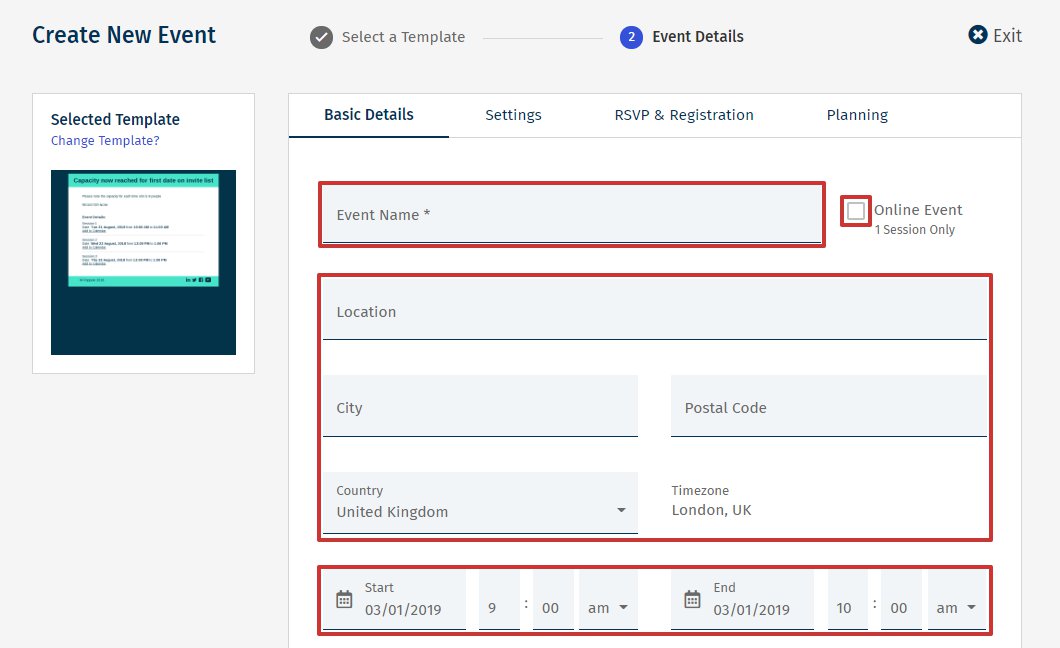
Note: The Online Event checkbox lets you add a Presenter name and a URL; an online event does not need physical location details and is restricted to a single session. If you have multiple online sessions, continue without using the Online Event option, and add your URL to the Location field.
Finally, in Basic Details, you can set a Capacity for your event and add additional sessions.
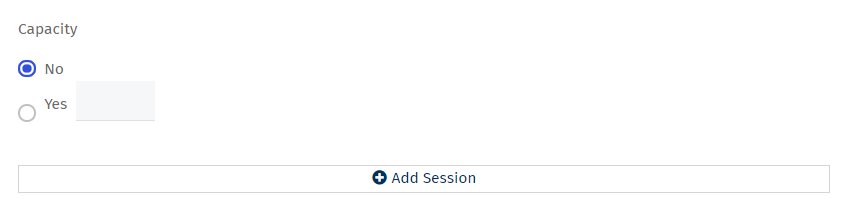
Note: Registration Form is automatically enabled when you add a session.
-
You can continue to set up some Additional Event Settings. Or you can edit the additional settings after you click Save & Edit.
Note: The Event Name is the only mandatory field when creating your event. There are additional Event creation instructions below.
Additional Event Creation Settings:
Once you've chosen your template, there are additional details and settings you can add while creating your Event, before you Save & Edit. These setting appear under the following tabs:
Event Name is the only mandatory field when creating an Event and all of the additional setting below can be updated or edited later.

If you have already Saved your event and are now in Edit View, you can access the settings under Event Settings.
Basic Details
In Basic Details you can enter your Event Name, the physical Location details for an event and the time & date of your event. If you have check Online Event you will see options to add online details opposed to physical details. Online events only allow for a single Session whereas you can add sessions for other Events. This provides your invitees with the option to choose the location or date that best suits them. Invitees will only be able to select one event to attend.
Note: When sending a Quick Test for a multi-session Event, the confirmation received by the tester will always be for the first event in the series. In a live send, the recipient will receive details of the selected session.
Settings
In Settings, enter your Calendar Event Description, this will appear in the recipients calendar invite. You can Edit the ICS Description for your Event later.
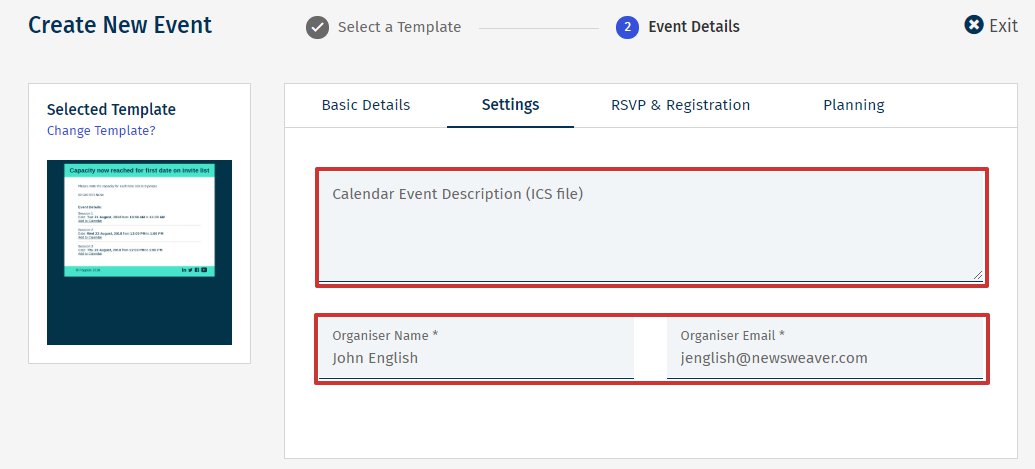
Note: Your Organiser Name and Email will appear by default but can be edited.
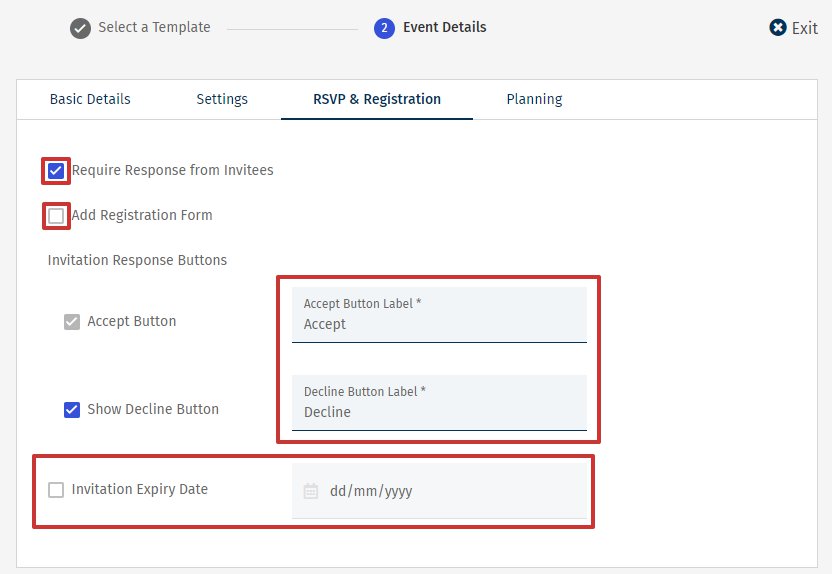
RSVP & RegistrationIn RSVP & registration you can choose if you
Require a Response from Invitees and if you want to
Add a Registration Form. You can also define what the
Accept and Decline buttons on the invite read and even choose to remove the Decline button to only collect accepted invitations from your invitees. Finally you can decide if you'd like your invitation to have an
Expiry Date, this ensures responses to the Event don't come back after a certain date.
When you choose to
Add a Registration Form, it will be included when you edit the event. You can also
Add or Edit an Event Registration Form once you finish creating the Event. Events with a Registration have 2
Privacy settings:
- Private Event - Only employees who receive the invitation can register.
- Public Event - Anyone can register for the Event and you can Add the Event to your Intranet or share the link.
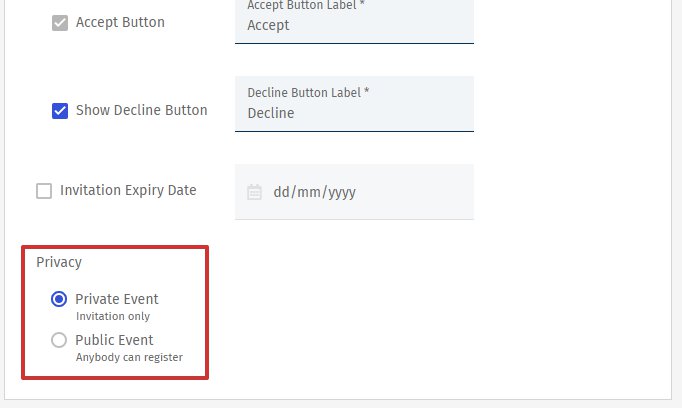 Note: The Privacy settings can be changed at any time before your live send. Planning
In Planning, you can set you planned send details for the Event. This will not send your Event but it will give the other users visibility of when and to who you plan to send, other users will see this in the calendar. Simply add a
Planned Send Date, the group of employees you wish to send to (Tag, Saved Search or Everybody) and finally your
Planned Subject Line.
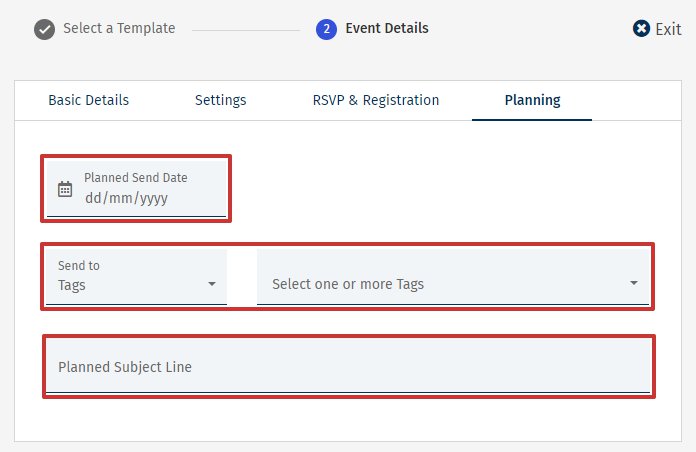 Note: All of these settings can be changed when you send your event. If "Everybody" does not appear as an option, it may be turned off in your Sub Account by your Enterprise Admin.