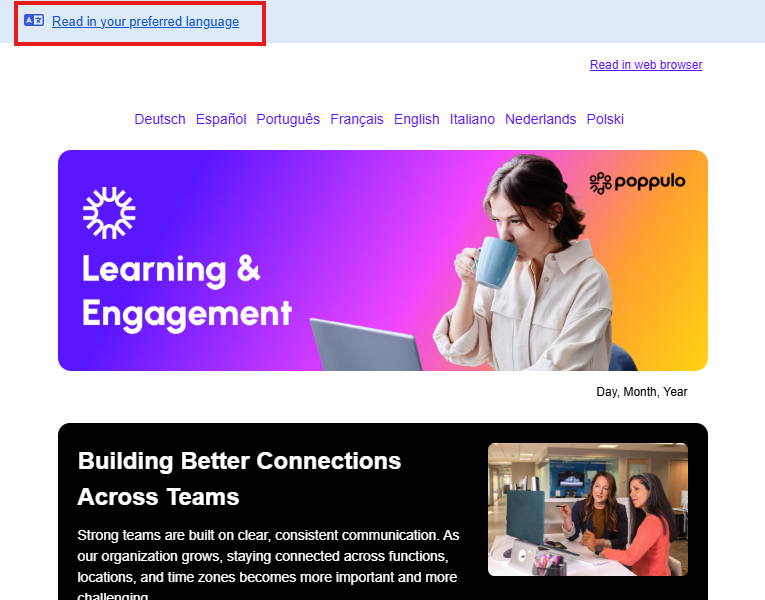
Create and translate emails in multiple languages in Poppulo using either Email Auto Translate or manual translation.
Before you start
To create a multilingual email, you must have:
- A multilingual template enabled in your account
- At least one additional language configured
If you don’t have these set up, contact your Customer Success Manager.
Step 1: Create a new email
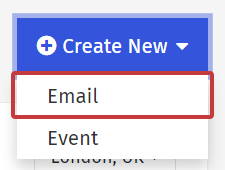
- Go to Overview
- Click Create New
- Select Email
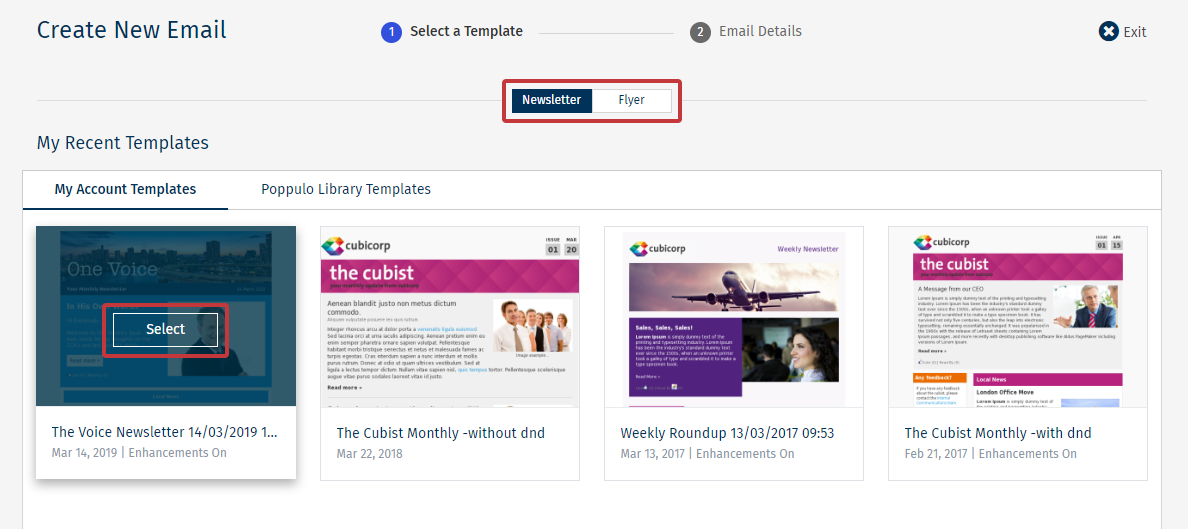
- Choose:
- Email type (Newsletter or Flyer)
- Your multilingual template
- Enter a title and select a folder
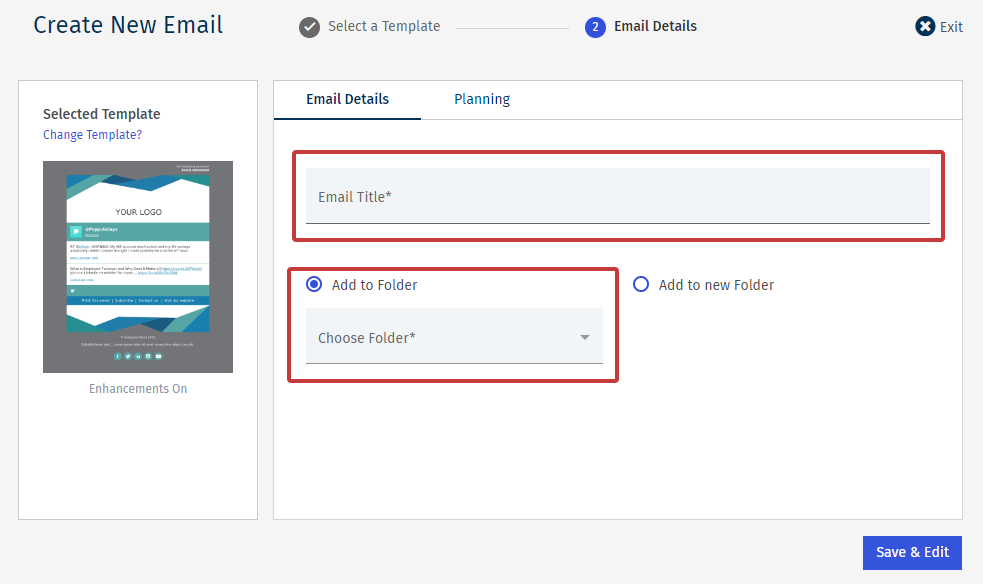
- Click Save and Edit
Step 2: Select languages
Multiple languages are available on each multilingual template. You must select which ones you want to use for your email:
- Click Settings (cog icon) and choose Email Settings
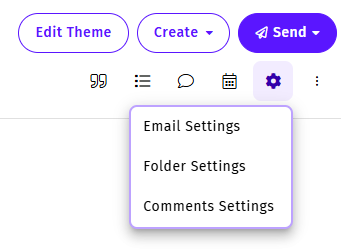
- Set the Default Language and the Additional Languages you need for this email
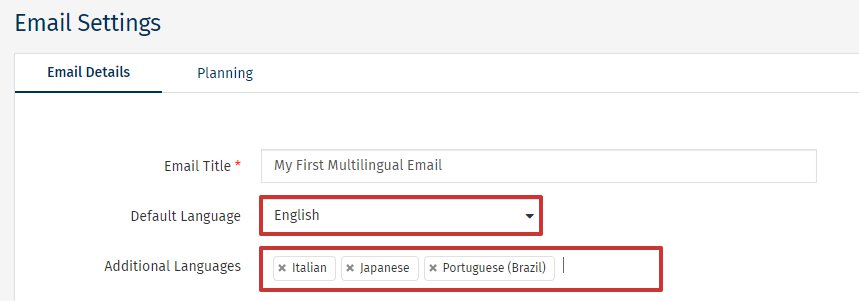
- Click Save
Step 3: Create your content
- Add content to your email as normal, starting with your default language (for example, English)
- Add articles, images, subject line, and preview text
Step 4: Translate your content
You can translate the text content your email using one of two methods.
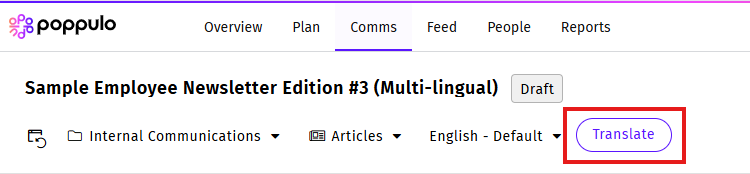
Option A: Use Email Auto Translate (available on certain plans only)
Use this option if you want to translate your email quickly across multiple languages.
- Click the Translate button
- Review or update your Do not translate list to exclude words or phrases that should remain in their original language.
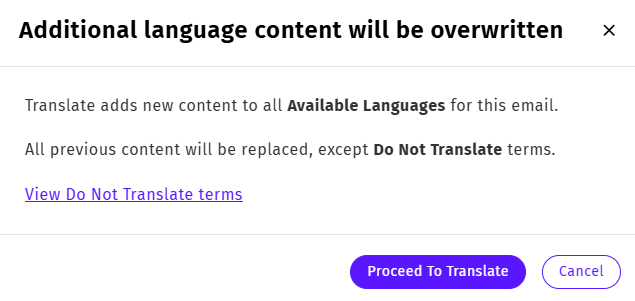
- Select Proceed to Translate
- Wait for translations to be generated
Your email will now include translated versions for all selected languages.
You can:
- Switch between languages using the language dropdown
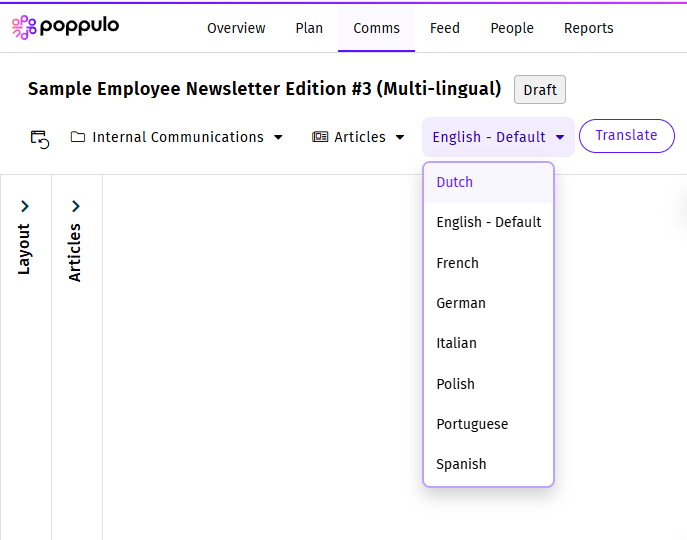
- Review each version before sending
- Edit any translated content, including text and images
Note: If you click Translate again, it will overwrite any edits you have made.
Learn more: Email Auto Translate
Option B: Add translations manually
Use this option if you need full control over wording or are using internal or external translators.
- Use the language dropdown to switch to a target language
- Replace the content with your translated version
- Repeat for each language as needed
You can:
- Paste translations from external tools or services
- Work with native speakers to review content
- Adjust tone and terminology for specific audiences
- Customize images and components for each language version
Step 5: Customize images by language (optional)
You can customize images and visual components for each language version of your email. This is useful if you want to localize visuals, such as using different mastheads, banners, or imagery for different regions.
To update images by language:
- Use the language dropdown to switch to a target language
- Select the image you want to update
- Replace the image with a language-specific version
- Repeat for each language as needed
This applies to:
- Article images
- Banners and mastheads
- Other visual components in your email
Each language version can have its own unique images, allowing you to tailor content more effectively for different audiences.
Step 6: Review your email
Before sending:
- Preview each language version
- Send test emails to yourself or reviewers
- Confirm layout, links, and formatting
- Check subject lines and preview text (if applicable)
Step 7: Send your email
- Click Send and select Approve and Send
- Complete the standard send workflow:
- Add subject line and preview text which can be unique per language
- Confirm sender details
- Select recipients
- Click Send Now
What happens when the email is sent?
- If Preferred Language is set in People Data, recipients receive the email in their inbox in their preferred language
- If not, recipients receive the email in the default language and can switch to their preferred version using a language selector or link
Learn more: Send Emails by Preferred Language
