Note: The instructions below are for Advanced Events. To learn about Simple Events, please view our article on Simple Events.
- - -
There are a couple of options to choose from when it's time to send your Event email. We always recommend testing your Event email by Sending a Quick Test for your Event or Sending for Review before your live send or Scheduled Send.
Use the Instruction below to Approve and Send your Event invitation.
Note: When sending a Quick Test for a multi-session Event, the confirmation received by the tester will always be for the first event in the series. In a live send, the recipient will receive details of the selected session.
To Approve and Send your Event Invitation:
-
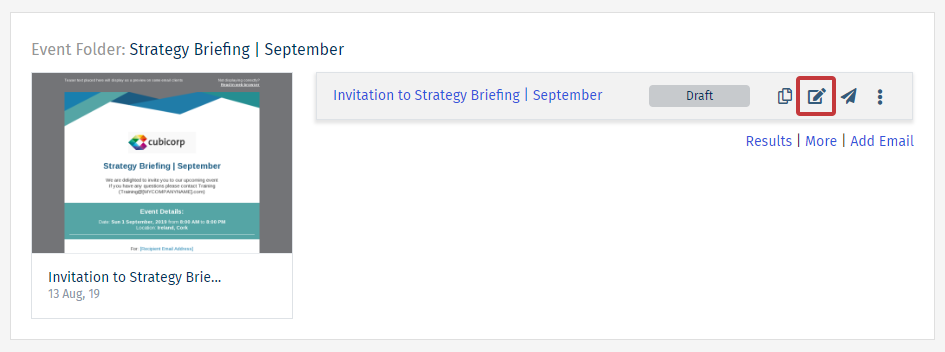
Edit the Event you'd like to send.
-
From the Event edit screen, go to the Send drop-down and click Approve and Send.

Note: This option will only appear for Events in draft status.
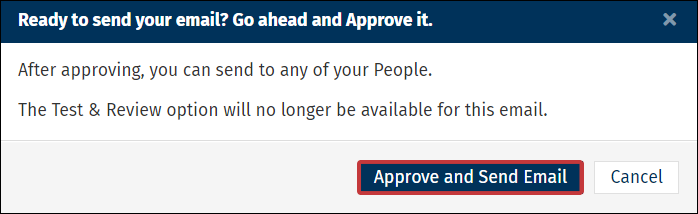
- Click Approve and Send Email to open the Send Wizard and begin sending your Event email.
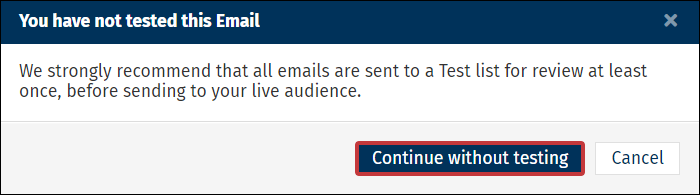
Note: We always recommend Sending a Quick Test for your Event or Sending for Review before a live send. If you have not completed a test send of your email, you will be asked to click Continue without testing; do so at your own peril.
-
Choose the People you'd like to send your Event email to and click Next.

Note: Choose between Everybody, Tags, Saved Searches or a single Email Address. If "Everybody" does not appear as an option, it may be turned off in your Sub Account by your Enterprise Admin.
-
Choose your desired Subject and click Next.
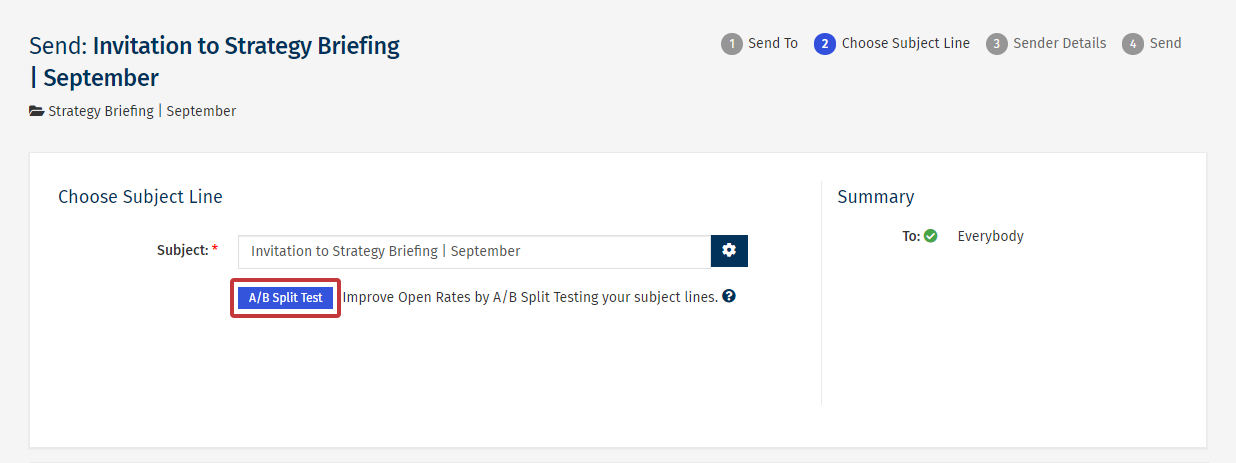
Note: Click the small gear icon to Personalise your Subject Line. You can also A-B Split Test your Subject Line.
-
Review your Default Sender Details and click Next.
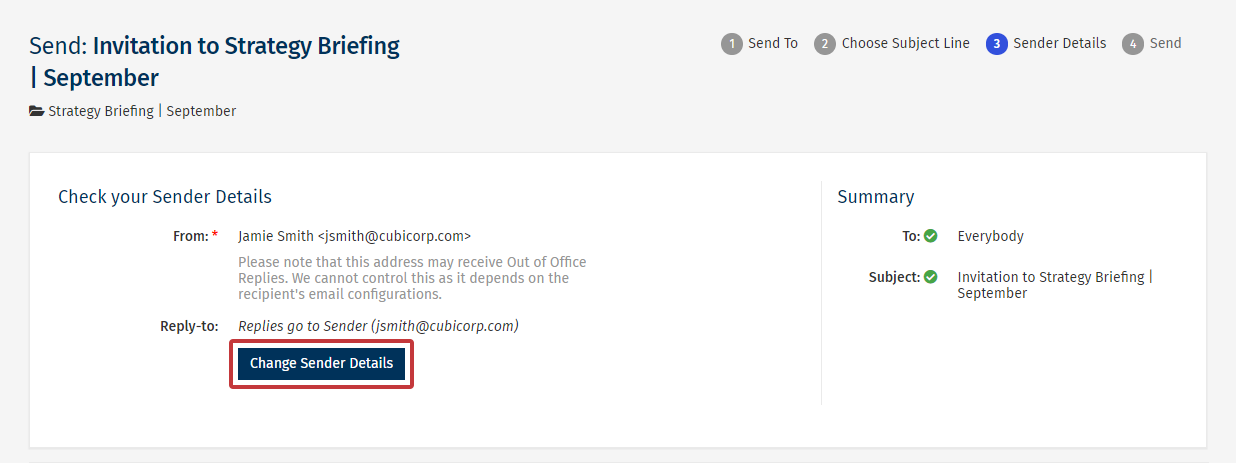
Note: You can Change your Default Sender Details if necessary.
-
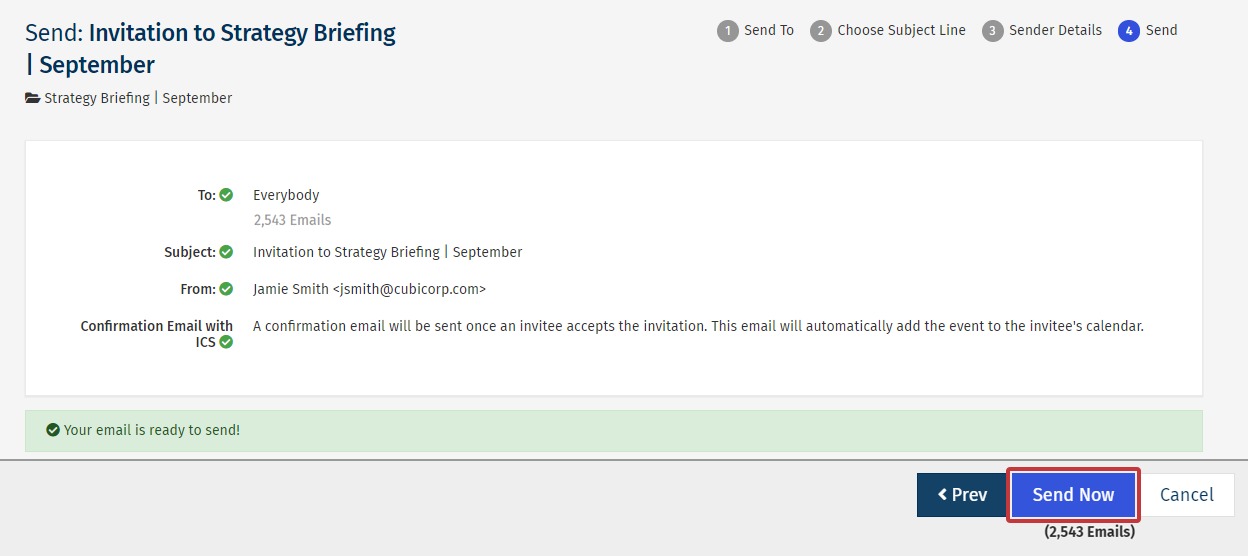
Review your send details and click Send Now to complete the send.
-
Your Event Invitation email will be sent. This can be confirmed on the progress bar(as below).
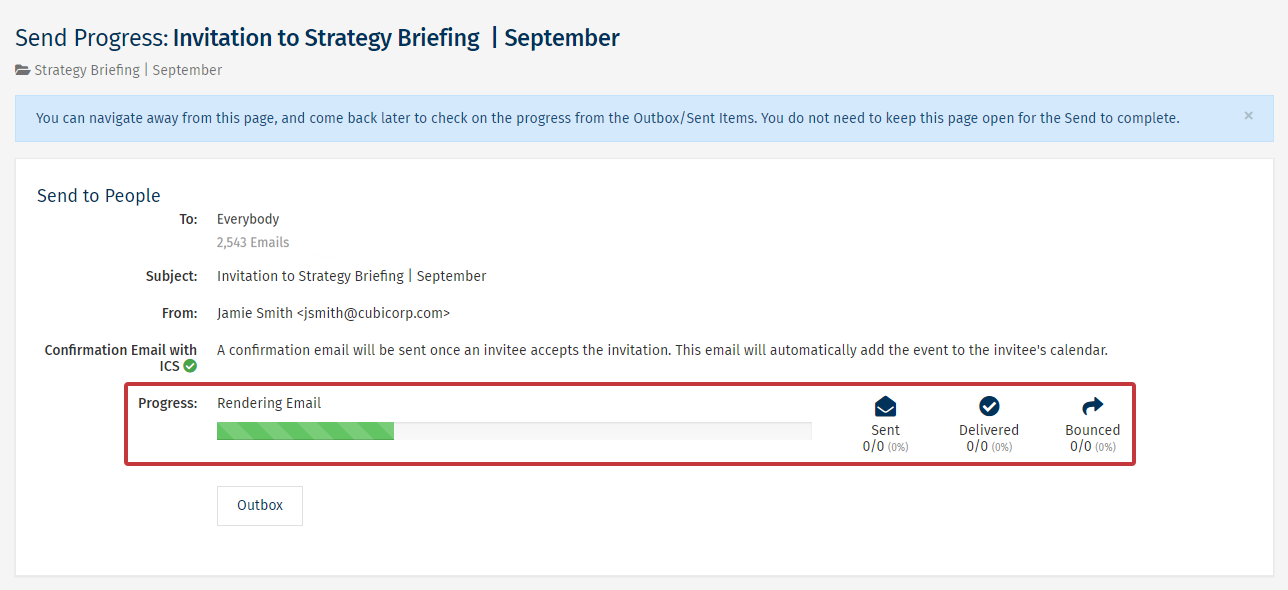
Note: You can navigate away from this page and come back later to check on the progress from the Outbox / Sent Items. You don't need to keep this page open for the send to complete.
