Tables are a great way to present data and/or statistics within your articles. Similar to most word processors, Poppulo Harmony allows you to create and edit tables to present your data effectively. If you've created a table outside of Poppulo Harmony, taking a screenshot of the table and Adding it as an Image may save you time. Follow the instructions below to add a table to your article in Poppulo Harmony.
Top Tip: Tables can also be useful if you're having trouble aligning text and images within a publication or article that doesn't have image placeholders (e.g. a blank Flyer).
To Add a Table to Your Article:
-
Open the article or Editable Content Area where you would like to add your table, and place your mouse cursor where you would like to insert it.

-
From the editing toolbar, click the Table icon.


-
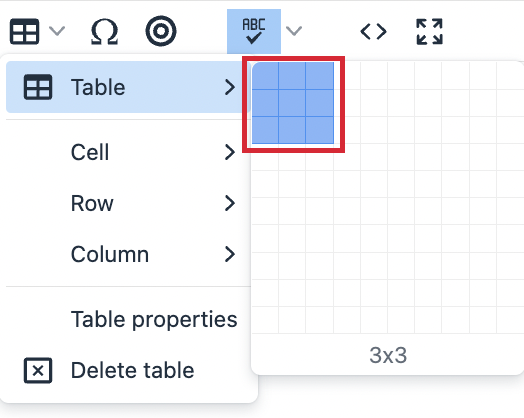
Under Table, choose the rows and columns for your table (a table of 3 rows by 3 columns is selected in this example).

-
The table will appear in your text. Use the quick edit menu to add or delete rows and columns.

Note: Click the Table properties icon to Edit and Style your Table.
-
Click and drag the corners of your table to resize, then add your content.

Note: Using the Content Editor, you can style your content by adding Boldface, Italic or Underline to your text for emphasis (the above example shows the headings in Bold) or adjust the Font size, Family and Colours of your table content. You can also add hyperlinks, images and videos to your tables. See Edit and Style a Table for more advanced options.

